| □ | Subscriber Panel(s) - This section of the Central Station Data Form allows you to define each Panel CSID that has been installed and could be transmitted by the currently selected Subscriber. |

Subscriber Panel(s) on the Central Station Data Form
| • | Subscribers - for various reasons - may have more than one CSID assigned to their Account at the same premises. |
| • | This may be based on specific security requirements, the need for system segmentation (which may be called Partitions or Areas) to allow separate Opening & Closing Events supervision, or any other business related requirements. |
| • | Typically, these individual sections of the segmented systems are referred to as Partitions or Areas contained within the whole security system, but there may actually be completely separate Control Panels installed on the premises (e.g., Fire & Sprinkler Alarm System, a Burglar Alarm System, a dedicated Safe Alarm). |
| • | Regardless of the reason, any number of CSIDs may be assigned to (installed at) a Subscriber's premises, as required. |
| ◆ | Understanding the difference between an Account, a Subscriber, and a CSID: |
| • | The Terms "Account" and "Subscriber" may be used interchangeably - both represent the Premises in which one or more Security Systems have been installed. |
| • | The term "CSID" refers specifically to the Number/Letter combination assigned by the Central Station that represents the Identification Code programmed into a Communicator within a Security System - with that Identification Code representing the whole Security System, a Segment of it, or a different Security System installed at the same Premises. |
| • | Therefore, an Account (i.e., Subscriber) may have multiple of CSIDs. but a CSID may be assigned to only one Subscriber (i.e., Account). |
| □ | Entering a new Subscriber Panel CSID: |
| ► | Note: Except for the first three Column Headers (i.e., CSID, Master CSID, and Primary CSID), all of the other Column Headers (and their related data) on the Subscriber Panel(s) section may be relocated, based on the Users personal preference, by using the standard Windows® Drag & Drop method to move them to their desired/preferred location. |

Subscriber Panel(s) on the Central Station Data Form
| • | The CSID may be manually entered. |
| ▪ | A CSID Generator is used to initialize the starting point, and subsequently maintain an Account Numbering Sequence of new CSIDs for a particular purpose (e.g., your Company, a specific Receiver, a Chain Account, an Alarm Dealer) |

Sample Drop-Down Selection List of available CSID Generators
| ▪ | Using the Drop-Down Selection List provided, Choose a CSID Generator Name which will automatically insert the next available CSID that was established for the selected CSID Generator. |
| • | Master CSID - If the CSID currently being entered is a secondary CSID (by definition, any CSID that is not identified as the Primary CSID for this Subscriber is considered a secondary CSID), a Master CSID may be identified for this Subscriber Panel record. |
| • | The Master CSID chosen must contain the CSID Zones, People To Call and Events information that should be used for any Alarm Signals received from this secondary CSID. |
| • | Assigning a Master CSID means that the CSID Zones, People To Call and Events information entered for the Master CSID assigned here, are to be "adopted" by this secondary CSID. |
| • | The Master CSID may (or may not) be the CSID designated as the Primary CSID, but it must be (one of) the CSIDs that have been defined for the currently selected Subscriber. |
| • | So, to use this Master CSID feature: |
| ▪ | Assign that CSID as the Master CSID to any other CSID entered for this Subscriber, as appropriate. |
| • | Primary CSID - Check this box if this CSID is the Primary CSID for this Subscriber - the one that is to be shown initially on the Subscribers Form. |
| • | One, and only one, of the Subscriber Panel(s) CSIDs must be designated as the Primary CSID. |
| • | Panel Description - Enter a brief description of the significance of this CSID. |
| • | The Panel Description that is entered here will be displayed as the Panel Description on the Alarm Stack Form and is displayed next to the Subscriber's CSID on the Signal Processing Form. |
| ▪ | Enter up to twenty (20) characters - Upper and lower case letters, spaces, numbers and basic punctuation marks are accepted. |
| ▪ | Examples: "Fire Alarm System", "Burglar Alarm System", "Front Office", "Warehouse", or a similar descriptive phrase that "tells" the Operator - when Processing an Alarm received from the CSID - what type of location or system (s)he is dealing with. |
| • | Part - Use the Drop-Down Selection List provided to Choose the Installed Equipment Code representing the Control Panel programmed with this CSID. |
| • | You may Right-Click this field and Select the desired Search by... method as either the Part Code or its Description. |
| • | The Instructions associated with this Control Panel - which were entered in the Installed Equipment Code Form (e.g., How to Disarm the Control Panel, Bypass a Zone) - are available within MKMSCS by Clicking the Panel Icon on the Sub Info (F2) Form. |
| • | Key Pad Code - Enter the master Key Pad Code for this Control Panel. |
| • | Communicator Format - Use the Drop-Down Selection List provided to Choose the Communicator Format being transmitted by the system's Control Panel. |

| • | Panel Options - If required, Click this field to display its Ellipse, then Click that Ellipse to open the Panel Options dialog. |
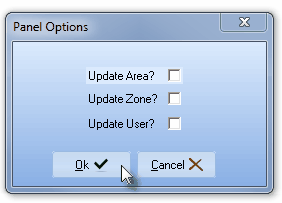
Panel Options dialog
| • | Update Area? - Check this box to have SPA update the Area information based on information in specific packet information received with a Signal. |
| • | Update Zone? - Check this box to have SPA update the CSID Zone information based on information in specific packet information received with a Signal. |
| • | Update User? - Check this box to have SPA update the User ID information based on information in specific packet information received with a Signal. |
| ► | Note: Currently, this information is only required when a DMP Receiver is being used. |
| □ | Understanding Partitions (i.e., Areas): |
| • | In some cases, a Subscriber's premises may have an Alarm System installed in such a way as to be able to sub-divide sections of that premises into separate Areas (often referred to as Partitions) for the purpose of having each section identified as a separate, unique, supervised area, with each of these individual Areas being monitored as a separate "system" within that Alarm System. |
| • | If you decide to use Partitions: |
| • | Check Lookup partition in the SPA Setup System tab. |
| • | Check Add period to partitions in the SPA Setup System tab. |
| • | If the CSIDs assigned by your Central Station have varying lengths, Partition definitions should follow this - the preferred - format: CSID.PARTITION. |
| ▪ | Because these Areas do not represent the Subscriber's premises as a whole, but instead represent a specifically sub-divided section of that Subscriber's premises, each Area may be monitored individually, Armed and Disarmed individually, and have Opening, Closing, and other types of Test Events Supervised individually. |

Partition entered as a decimal addition to Primary CSID
| ▪ | Therefore the actual CSID may also have one or more CSID.Partition (or use the CSIDPartition Lookup Format) combinations defined in the Subscriber Panels section of the Central Station Data Form. |
| • | Each Partition may have Open and Close Events scheduled at different Times/Days/Holidays (and have their own set of People To Call, CSID Zones, etc.). |
| o | For those Central Stations using Partitions, and also receiving various lengths of CSIDs, implementing the Formatting of the CSID+Partition data with a Period inserted between the CSID and Partition ensures that SPA can properly interpret the Areas when they are transmitted - regardless of the length of the CSID. |
| ▪ | Any Areas defined here, using either the CSID.Partition or the CSIDPartition Lookup Format (as selected in the Setup Form within SPA), must also be defined in the Areas Form (identifying only the Partition number that will be appended to the "root" CSID). |
| • | When defining the specific People To Call, Events, Tests, CSID Zones, etc., information for a system's Partition (and any other monitoring related data) you must First select that CSID.PARTITION line item in the Subscriber Panels section. |
| ► | Note: Although Partitions can be accommodated by entering multiple Signal IDs and Physical Zone combinations within the CSID Zones Form., using the Partitions setup feature described above that's available within SPA would be a better alternative. |
| □ | Additional Fields available for Subscriber Panel(s) - Click the right arrow u on the bottom Slide Bar to see these additional fields. |

| • | Phone List - Click the Ellipse to enter the telephone number(s) that transmit Caller ID when an alarm signal is received to open the Phone List dialog. |
| • | To have SPA automatically insert Caller ID Telephone Numbers from which Alarm Signals were transmitted for this Account, Check the Update Phone On Caller ID option in the SPA Setup Instructions System tab. |
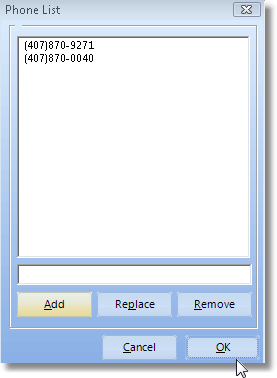
Phone List dialog
| ▪ | Click OK to insert that number into the Phone List above. |
| • | Replace - Select a number in the Phone List. |
| ▪ | It will be displayed in the box above the Replace button. |
| ▪ | Edit the Telephone Number as required. |
| ▪ | Click the Replace button. |
| ▪ | Click OK to insert that revised number into the Phone List above. |
| • | Remove - Select a number in the Phone List. |
| ▪ | It will be displayed in the box above the Remove button. |
| ▪ | Click the Remove button. |
| ▪ | Click OK to delete that number from the Phone List above. |
| • | If the system's communicator is connected through a PBX or similar system that randomly selects an outgoing line, be sure to enter as many of those numbers as can be identified into the Phones field above if they transmit Caller ID. |
| • | Phone DCU - Enter the primary telephone number used by the panel's digital communicator. |
| • | Last Signal Received At - This field is maintained by the system and represents the most recent signal received for this CSID. |
| • | Alarm Code - This field is maintained by the system and represents the most recent Alarm Code received for this CSID. |
| • | Run Away Start - This field is maintained by the system and stores when a Runaway alarm situation started. |
| □ | Special Fields used for the Subscriber Panel(s) Form - These fields are used to accommodate certain UL® requirements, and to enhance the availability of Contacts entered for Subscribers: |
| ► | Note: UL® requires that you are able to report the number of accounts that are programmed to transmit signals to each of your Receivers for the Receiver Distribution Report. |

| • | The Receiver and Line data entered in Subscriber Panels identifies the (Subscriber and CSID) members attached to each Line Card and Receiver within each Receiver Group. |
| ► | Note: As signals are received through SPA, the Receiver and Line number data is inserted automatically into these fields. |
| • | Data entry in the fields shown below in this section of Subscriber Panels establishes which Accounts belong to which Receiver Groups (by entering the correct Receiver and Line card information for each CSID). |
| • | You may manually enter the data in advance, if desired. |
| • | Receiver - Enter the Receiver ID Number to which alarm activity is reported from this Account. |
| ► | Note: The Receiver ID is the one programmed within the Receiver itself as the Receiver Identifier which is sent from the Receiver to the Signal Processing Application with the Account's Alarm and Event Signal data. |
| • | Line - Enter the Line Number of the Receiver ID entered above to which alarm activity is reported from this Account. |
| • | The Receiver Groups Form allows you to define any number of Groups, and define the Receiver ID and their related Line Card Numbers in each Receiver Group. |
| • | The Receiver and Line data entered above in this section of the Subscriber Panels table identifies the Subscriber and their CSIDs as members attached to each Line Card and Receiver within each Receiver Group. |
| • | The Receiver Distribution Report lists each Receiver Group and identifies how many Accounts are reporting to each based on data entered in the Subscriber Panels section of the Monitoring information Form. |
| ► | Note: This data is not cross validated! |
Data entry for Receiver Groups and Receiver ID and Line card information must be carefully performed to assure the accuracy of the Receiver Distribution Report.
| • | Port - Optionally, enter the Device Master (i.e., Rocket, or the TCP/IP address) Port Number to which the Receiver for this Account is connected (for future reference only). |
| • | Alt. Call List - To assign an Alternate (additional) Call List of People To Call for this CSID: |
| • | Click the Ellipse  button in the Alt.Call List field. button in the Alt.Call List field. |
| ▪ | That may be a "real" Account, or a fictitious Account established specifically to hold a set of People To Call that may be used by a group of Accounts (Restaurant Chain, affiliated Big Box Stores, Convenience Stores, etc.) all of whom are being monitored by your Central Station. |
| • | Click the OK button in the Search dialog to have the selected CSID inserted in the Alt. Call List field. |
| ▪ | Whenever an Alarm Signal is received from this Subscriber Panel's CSID, the People To Call List that will be available for the Operator to contact may include one or more of the following: |
| o | The Subscriber's own list of People To Call (these contacts are labeled as Standard). |
| o | If assigned, any Alternate Call List of contacts (these contacts are labeled as Alternate). |
| ▪ | When using the Sub Info (F2) screen to reference this Subscriber Panel's CSID, the Operator will have access to an Alternate Call List, a Dealer's designated People To Call List, as well as the Subscriber's People To Call List, if defined. |
| o | The Subscriber's People To Call list is shown on the General tab of the Call List section of the Subscriber Information Form. |
| o | Any Alternate Call List assigned in Subscriber Panels will be shown on an optional Alternate tab. |
| o | Any Dealer's designated People To Call Lists will be shown on an optional Dealer tab. |
| • | Viewing the actual Alternate Call List (and optionally the Dealer Call List) information that has been assigned: |

| ▪ | Above the Subscriber Panel(s) Column Headers are the Alt Call List and optionally, the Dlr Call List buttons: |
| o | Click the Alt Call List button to view the People To Call Form associated with the CSID entered in the Alt. Call List field. |
| o | If the Subscriber is being monitored for another Alarm Dealer, and that Dealer has been assigned a CSID which has a related People To Call list, Click the Dlr Call List to view the People To Call Form associated with the CSID entered for that Dealer. |
| ► | Note: Also read about the Global Call List feature in its chapter for additional information. |
| • | Removing the Alternate Call List: |
| ▪ | Locate specific CSID that needs to have the Alternate Call List entry removed. |

| ▪ | Press the Right Arrow at the bottom of the list to locate and move to the Alt. Call List field. |
| ▪ | Click on the Alt. Call List field (do not Click on the Ellipse) that contains the CSID which needs to be removed. |
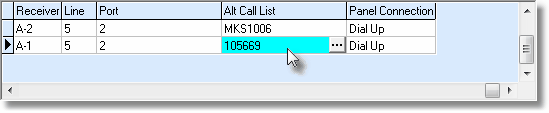
| ▪ | Right-Click on that Alt. Call List field (do not Click on the Ellipse). |
| ▪ | The Clear Call List message will be displayed. |
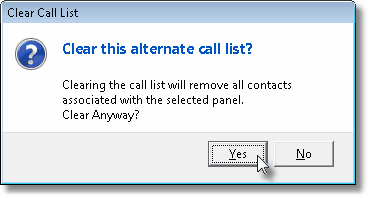
Clear this alternate call list?
| ▪ | Click Yes to remove the Alternate Call List CSID, or No to abort the process. |
| • | Panel Connection - Use the Drop-Down Selection List provided to Choose the Panel Connection Type used to send transmissions from the Subscriber's premises to your Receiver. |
| • | This field is located at the far right side of the list. |
| • | Event CSID - In a similar manner to the Alternate Call List CSID assignment (that identifies another Account whose People To Call information may be used by this Account), another Subscriber's Events information may be attached to this Account. |
| • | That may be a "real" Account, or a fictitious Account established specifically to hold the definition of a set of supervised Events that may be used by a group of Accounts (Restaurant Chain, affiliated Big Box Stores, Convenience Stores, etc.) all of whom are being monitored by your Central Station. |
| • | The EventCSID field is used to identify another Subscriber with an assigned CSID that also has Open, Close and Other Events defined. |
| ▪ | This Events information for the selected CSID will also be used by this Account. |
| • | Holiday and Multiple Events defined for the selected Event CSID Account are not available for this Subscriber's Account. |
| ▪ | Those type of Events must be specifically defined for each Account which requires them. |

Event CSID field on the Subscriber Panels section of the Central Station Data Form
| • | To assign an Event CSID to this Subscriber Panel's CSID: |
| ▪ | Click on the EventCSID field and then Click the Ellipse button in the EventCSID field. |
| ▪ | Click the OK button in the Search dialog to have the selected CSID inserted in the EventCSID field. |
| • | Click Save ("ü") to record the entry. |

Special buttons on the Subscriber Panel(s) section of the Central Station Data Form
| • | Depending on the size of your screen, whether the MKMS Application Desktop is maximized, and/or how large you've made the Central Station Data Form within MKMS, some or all of the Special Subscriber Panels Icons explained below may not be visible. |
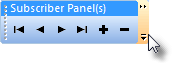
| • | To view the list of all available Special , keeping in mind that not all Icons will be available for all CSIDs, Click the tiny down arrow (see above) on the right side of the Navigation & Menu Bar to display all of the Icons that are not displayed but are available. |
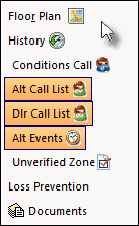
Special Icons List
| • | Floor Plan - Click this button to attach a Floor Plan image file to the Selected Subscriber Panel's CSID: |
| o | The Floor Plan Available  will be displayed. will be displayed. |
| o | The Operator may Click the Floor Plan button to display the Floor Plan that was entered for the CSID that would transmit the Alarm Signal. |
| o | This will display only the Floor Plan added for this specific CSID. |
| o | The Floor Plan tab will be displayed when an Alarm Signal is received for this specific CSID. |
| • | History - Click this button to Open the Alarm Signal History for the Selected Subscriber Panel's CSID. |
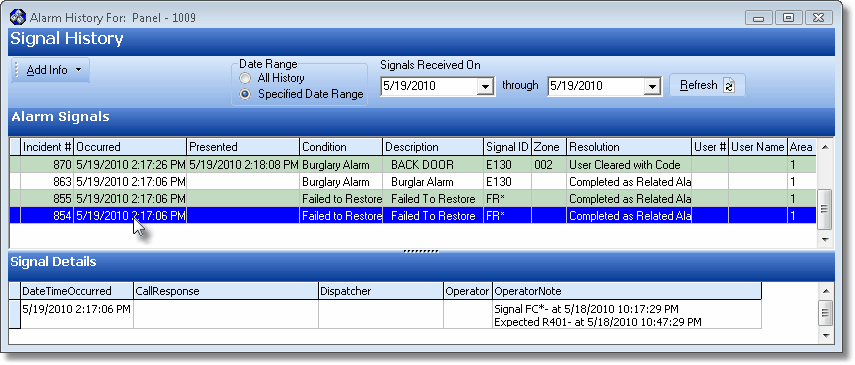
Alarm History dialog
| • | Conditions Call - Click this Conditions Call button to identify any Condition Codes which, when sent by the Selected Subscriber Panel(s) CSID, will utilize a special Call List that was previously defined as such in the CSID Zones Form. |
| • | Alt Call List - If an Alternate Call List has been assigned to this CSID (See Alt.Call List in the "Special Fields on the Subscriber Panel(s) Form" section above), Click this button to Open the People To Call Form associated with the CSID entered in the Alt. Call List field. |
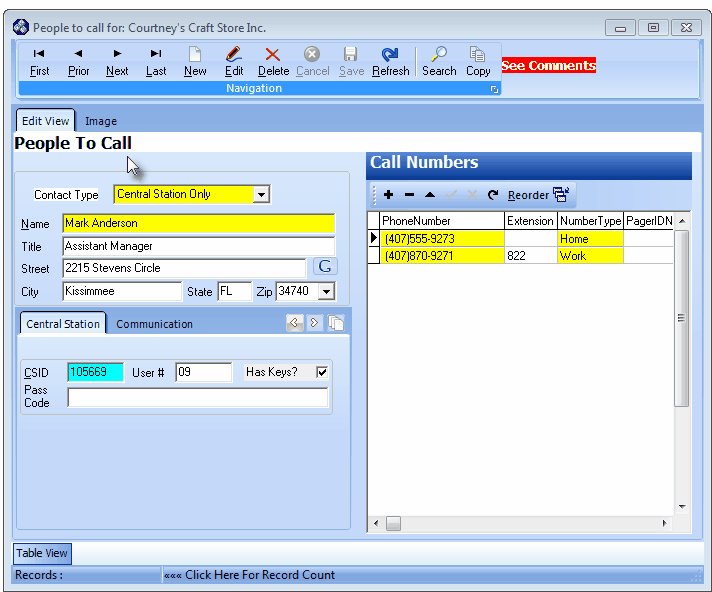
People To Call Form accessed with the Alternate Call List button
| • | If the AlternateCallList field for this CSID has no other CSID assigned, this button will not appear. |
| • | Dlr Call List - If this Subscriber is being monitored by your Company for another Alarm Dealer, and that Dealer has been assigned a CSID which has a People To Call list defined, Click this button to Open the Dealer Call List People To Call Form associated with the CSID entered for that Dealer. |
| • | Alt Events - Click this Alternate Events button to Open the Events Form associated with the CSID selected in the EventCSID field (See Events CSID in the "Special Fields on the Subscriber Panel(s) Form" section above). |
| • | Holiday and Multiple Events defined for the selected Event CSID Account are not available for this Subscriber's Account. |
| • | Those type of Events must be specifically defined for each Account that requires them. |
| • | This button will not appear unless an Events CSID has been assigned. |
| • | Unverified Zone - Click this button to Open the Unverified Zones dialog to view the Test Status of one or more CSID Zones for the selected CSID that have been Placed on Test (and for which the system is currently Waiting for those Test Signals). |
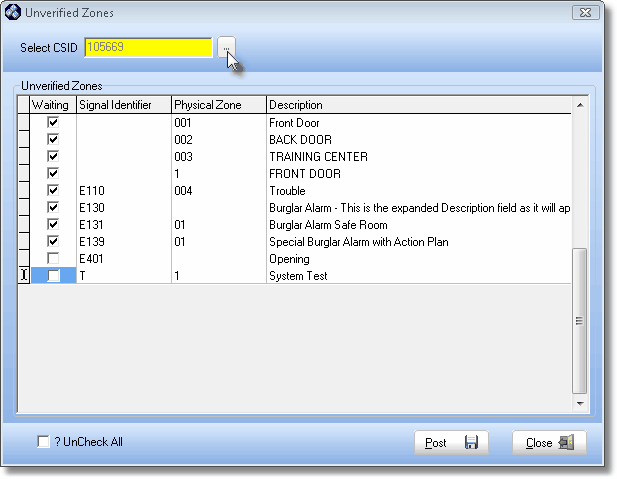
Unverified Zones dialog
| • | See the Loss Prevention application chapter and its related chapters for complete information about this feature. |
| • | Documents - Click this button to Open a sub-menu from which to Choose one of the following: |

Available Documents
| 1. | Instructions - This option displays the Arm/Disarm instructions for the Control Panel identified in the Part field (see the "Entering a new Subscriber Panel CSID" section above) by selecting the appropriate Installed Equipment Code for that Panel. |

