|
Documents This Help File Page was last Modified on 03/08/2013 |

|

|
|
|
Documents This Help File Page was last Modified on 03/08/2013 |
|
|
Documents
This Help File Page was last Modified on 03/08/2013
|
Documents This Help File Page was last Modified on 03/08/2013 |
|
|
|
|
Documents This Help File Page was last Modified on 03/08/2013 |
|
|
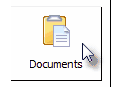
| □ | The Documents Icon appears as a Menu Option and also on many Data Entry Forms. |
| • | Subscribers, Vendors, Job Costing, Prospects, Employees, and Installed Equipment Codes among others, often have additional Documents that relate to the information normally collected on those Forms (such as contracts, letters of commendation, Proposal acceptances, W-9's and copies of Sales Tax exemption certificates, Control Panel Instructions, etc.) which should be kept on file, but be readily accessible for viewing. |
| • | If the Document to be saved is a Printed Document: |
| • | If you only have a printed copy (if you do not already have an electronic copy such as a Word® document), |
| ▪ | Scan the printed Document into either the ".jpg" or ".pdf" file format. |
| ▪ | Save it to your local Hard Drive (or, if running on a Network to the File Server - see below). |
| • | If you are operating on a Network, Save the scanned image to a Hard Drive on your File Server to which - anyone needing it - will have access to it. |
| • | If you operate on a single computer, Save the scanned image to your local Hard Drive. |
| □ | To import a Document into MKMS, Click either the Documents Quick Access Menu item, or the Documents Icon on the Form itself (the Form that needs to provide access to the Document in the future). |
| • | When the Down-Arrow (€) attached to the Documents Icon on the Form is used (see the Icon illustration below), you have two options: |
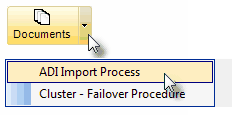
| 1. | Click the Documents Icon's Down-Arrow (€) to view a Drop-Down Selection List of the previously attached Documents - from which you may Select one of those Document Titles which will open that specific Document immediately. |
| 2. | Click the Documents button itself to open the Documents Form (see instructions and instructions below) |
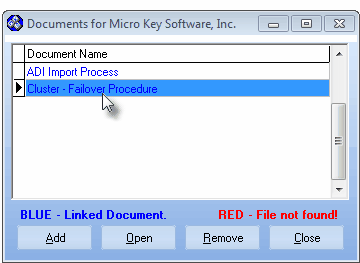
| • | When selected using the Documents Quick Access Menu item, the Documents Form is opened and provides four Action buttons: |
| 1. | Add - allows you to add a new Document and attach it to the currently displayed record. |
| 2. | Open - opens an existing Document in the Documents list |
| 3. | Remove - deletes an existing Document in the Documents list |
| 4. | Close - exits from the Documents Form |
| • | To Add a new Document: |
| • | Click Add |
Documents dialog
| • | Select a Document to add to the Form using the standard Windows © Explorer dialogue. |
| • | Documents may be: |
| ▪ | Graphics (please save scanned images as .jpgs), |
| ▪ | PDF files, |
| ▪ | Native formats like Web Site Links and Windows compatible Help Files, plus |
| ▪ | Text Files such as the text files (.txt) format saved by Windows © Word Pad. |
| • | Keeping this in mind, locate and Double-Click on the desired Document |
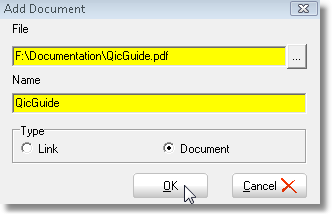
| • | The Add Document Form will be displayed (see above). |
| • | The Full Windows Path and File Name will be inserted into the File box. |
| • | The individual Name of the File will be inserted in the Name box which you can modify, if needed. |
| • | Click either the Link or Document radio button, depending on how you will need to access this file in the future. |
| ▪ | Link - This Choice tells MKMS exactly where this Document will be located when it is needed. |
| o | It must remain there. |
| o | If you have multiple users who may need to access this file, be sure it is stored on your File Server where other users will also have access to it. |
| o | Because only the Link is stored in the database, it does not make the database larger. |
| ▪ | Document - This Choice tells MKMS to actually store the Document within the database. |
| o | It does not have to remain in its current location. |
| o | Because it is stored internally, it does cause the database to get larger - sometimes, based on the size of the documents, much larger. |
| o | If many documents are to be stored and used later, you may want to use the Link method to re-locate them. |
| • | Click OK to save the file and close the Add Document Form. |
| • | Click Close to exit the Documents Form. |