| □ | The Job Costing Form contains buttons, tabs and fields that, used together properly, will provide all the functionality needed to effectively perform the Job Costing process. |
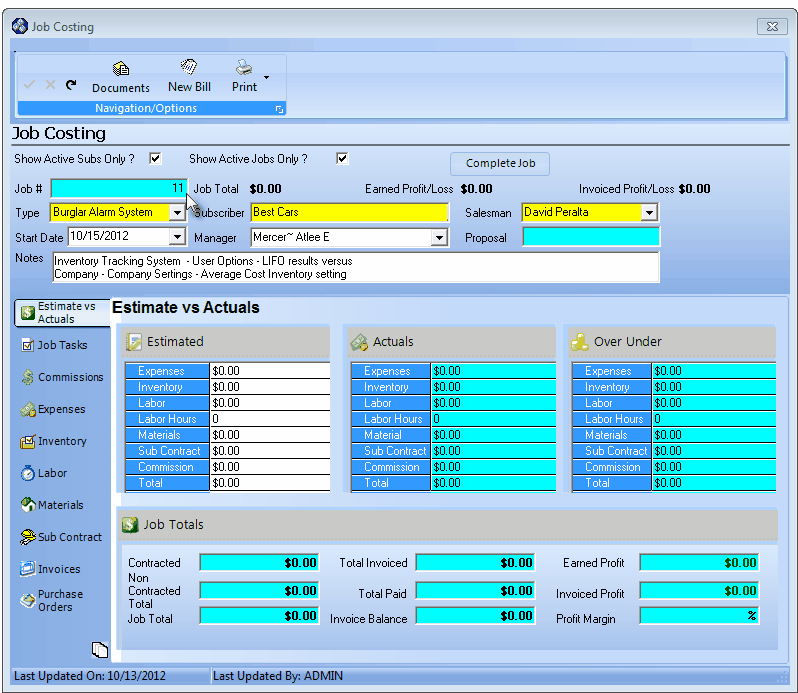
Job Costing Form - Estimate vs Actual tab
| • | Most of these Job Costing features link directly to the: |
| • | Accounts Payable System (you have to buy materials and equipment, and sometimes pay Sub Contractors to get the Systems installed) |
| • | General Ledger module where all of those (financial) transactions are reported. |
| • | Employees who will serve the Manager of a Job (and Service Requests should be identified with an Employee Type of Job Manager. |
| • | To do so, on the Employee Form's Personal tab, identify any Employee who will be assigned as a Job Manager by assigning the Type of All or Administration and placing a Check in the Job Manager box. |
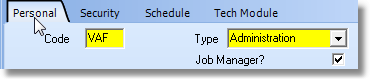
Job Manager box on the Personal tab of the Employee Form
| • | Employees who will serve as the Lead Technician on a Service Requests (created as Tasks required for the completion of a Job) are identified as such by being the first person assigned to the Work Order and so must be identified with an Employee Type of either All or a Technician. |
| • | The Employee entering Job Costing Labor related information must be permitted to Manage Time Sheets (assigned on the Employee Form's Security tab) and perhaps to also be able to view the Pay Rates (Check Display Rates? on the Employee Form's Security tab). |

Time Sheet Options area on Security tab of Employee Form
| • | A full understanding of the Job Costing system will only come after reading this chapter, and the related sub-sections, on Job Costing. |
| □ | Display and Status Choices available on the Job Costing Form: |
| • | Display Choices appear below the Navigator Controls located at the top of the Job Costing Form: |

| • | Show Active Subs Only? - Check this box to exclude Inactive (those that have been deleted) Subscribers from appearing in the Job Costing Form. |
| • | Show Active Jobs Only? - Check this box to exclude Inactive Jobs (those that have been marked Completed (see Complete immediately below) from appearing in the Job Costing Form. |
| • | Complete - Click the Complete button when the currently displayed Job has been finished. |
| ◆ | See the "Completing a Job" section at the end of this chapter. |
| □ | Special available on the Navigation/Options bar of the Job Costing Form: |
| • | These Special appear next to the Navigator Controls located at the top of the Job Costing Form: |

Go To Icon on the Navigator controls and Special Icons bar
| • | Go To Ü - Click the Go To down arrow and Select Subscriber to open the Subscribers Form of the currently selected Job. |
| ▪ | If the Subscriber Account for the currently selected Job Costing record is inactive (Deleted), an error message will be displayed indicating that you will not be able to access that Subscribers Form. |

Documents Icon on the Navigator controls & Special Icons bar
| • | Documents - Click the Documents at the top of the Job Costing Form is used to (electronically) attach any important Documents relating specifically to this Job such as Contracts, Letters, Proposals, Change Orders, etc. |

| • | Search - Click the Search is used to open the Search Jobs dialog from which you may locate a specific Job Costing record. |
| ▪ | Use this Search Jobs dialog in the same manner as all Search dialogs: |

Search Jobs dialog accessed from the Job Costing Form to locate a specific Open Job
| o | Select the desired Search By method. |
| o | Enter the appropriate Search Value. |
| o | Click on the desired Job record. |
| o | Click the OK button to make the selection. |
| ▪ | The Job Search dialog will close and the selected Job will be displayed on the Job Costing Form. |

New Bill Icon on the Navigator controls & Special Icons bar
| • | New Bill - Click the New Bill to enter an Invoice for charges relating to one of the following: |
| • | Vendor Search - The Vendor Search dialog will open to locate the Vendor from whom you received the Bill for items to be charged to this Job Costing record. |
| ▪ | Click Add ("+") to enter an Invoice from a Vendor that should be charged to this Job. |

Print Icon on the Navigator controls & Special Icons bar
| • | Print - Click the Print down arrow and Select Job Work Sheet to open the Job Work Sheet dialog customized for this specific Job Costing record. |

Print Job Work Sheets dialog pre-set for the Specific Job
| □ | Job Costing New Start Entry: |
| • | The single page Job Costing form (shown in the screen image below) seems quite simple until you notice all of those Option tabs along the left side of the Form where the real Job Costing power resides. |
| • | To access the Job Costing Form and Start a New Job, on the Main Menu, Select the Maintenance menu and Choose Job Costing. |
| • | Show Active Subs Only? - Check this box to only list (and display) Active Subscribers (those who have not been Deleted). |
| • | Show Active Jobs Only? - Check this box to only list (and display) Active Jobs (those who have not been Completed). |
| • | Click Add ("+") to Start a New Job |
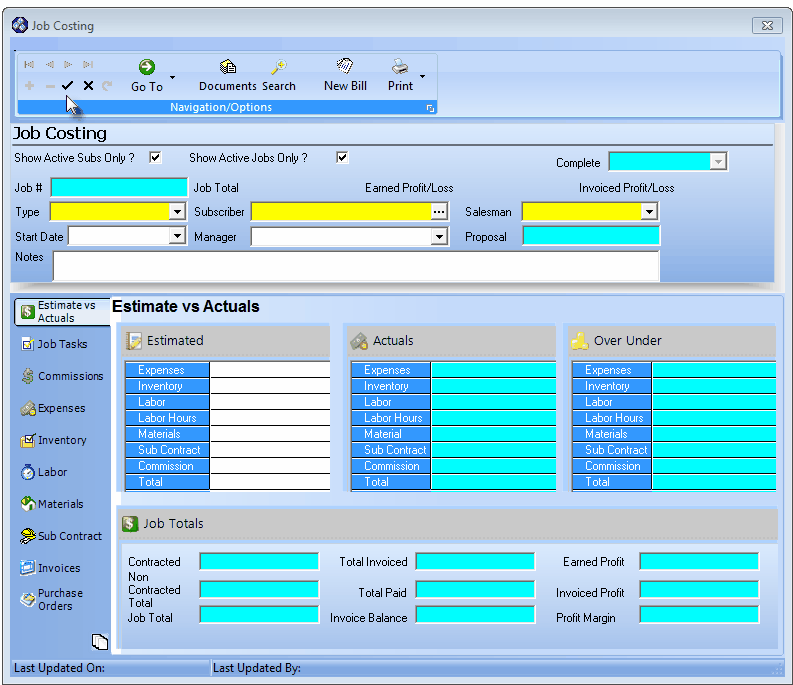
Job Costing Form shown immediately after Clicking Add (+)
| • | Type - Use the Drop-Down Selection List to Choose the appropriate Job Type. |
| • | Subscriber - Click the Subscriber field's Ellipse button (...) to open the Select Subscriber dialog. |
| • | Choose the Subscriber for whom you will be entering this Job Costing information. |

Select Subscriber dialog
| • | Search By - Use the Drop-Down Selection List to Choose the method to Search By (Subscriber, CSID, Sub ID, or Bill Payer). |
| • | Search Value - Enter the first few characters to narrow the search. As you make your entry, the records most closely matching the entry will be displayed. |
| • | Click OK - Inserts that Subscriber's Name into the Subscriber field. |
| • | Salesman - Use the Drop-Down Selection List to Choose the Salesman (Employee) who sold this Job. |
| • | Start Date - Use the Drop-Down Date Selection Box to enter the Starting Date for this Job. |
| • | Manager - The Job Manager is an individual who is assigned the duties of installation supervisor and manager for this Job. |
| • | Use the Drop-Down Selection List provided to Choose the Technician who will be the Manager of this Job. |
| ▪ | The Job Manager qualification is established by Checking the Job Manager box on the Personal tab of the Employee Form. |
| ▪ | Employees should be identified as a Job Manager if they will be: |
| • | Notes - You may enter whatever notes and comments you deem important. |
| • | This is a Rich Text Edit box that allows bold, italics and underlines of text, and the selection of Font type, it's size, color, and highlight. |
| • | Double-Click the Note field to see the Edit Rich Text box. |
| • | Click Save ("ü") to record your initial Job Costing entries. |
| • | See Job Costing Option Tabs (below) for links to each section that fully explains the purpose, use and operations of each tab on the Job Costing Form. |
Job Costing Option Tabs
| □ | All of the option tabs on the Job Costing form are listed below and explained in detail in it's own chapter. |
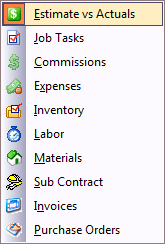
| • | Estimate vs Actual - Enter the estimated expenses - by category - for this Job Costing record |
| • | Job Tasks - Define tasks, Invoice for those tasks, and create Work Orders for those tasks required to complete the Job. |
| • | Commissions - Record the commissions paid for this Job's sale. |
| • | Expenses - Record the general expenses paid for this Job's installation. |
| • | Inventory - Record the Inventory used for this Job's installation. |
| • | Labor - Record the Labor expense required for this Job's installation. |
| • | Materials - Record the Material costs required for this Job's installation. |
| • | Sub Contract - Record any Sub Contractor's charges for this Job's installation. |
| • | Invoices - Lists Subscriber Invoices that have been billed for this installation. |
| • | Purchase Orders - Lists Purchase Orders that were created for ordering the Inventory needed for this Job's installation. |
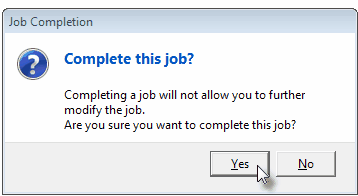
Complete this Job?
| • | Click the Yes button to mark the Job as Completed. |
| • | If certain Job Costing related items have not been properly completed (note the list above), an Open Items Found message will be displayed. |
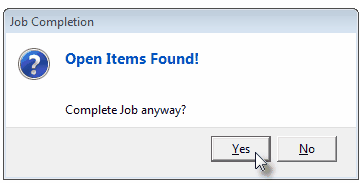
Open Items Found?
| • | Click the Yes button to proceed with the closing process. |
| • | The Current Date (Today) will be inserted into the Complete Date field next to the Complete button. |
| ▪ | Use the Drop-Down Date Selection Box to change this Date, if appropriate. |
| • | Click Save ("ü") on the Navigation/Options bar at the top of the Job Costing Form to Complete the Job. |

| ▪ | The Complete button will be removed and the selected Completion Date will be locked. |

