| □ | The Generate Invoices for Job Tasks feature is used to progressively Invoice your Subscribers for one or more Job Tasks relating to a Job. |
| • | Incremental Invoicing - As an example, if the Pre-Wire portion of an installation that you are Job Costing has been completed, you may want to Invoice the Subscriber for that portion of the Job that's been completed to date. |
| • | Invoicing the Job Tasks - This Generate Invoices button will allow you to create an Invoice for some, or all, of the Job Tasks you've entered for this Subscriber's Job. |
| • | Click the Generate Invoices icon. |
| • | The Job Task Invoicing Form will be opened. |
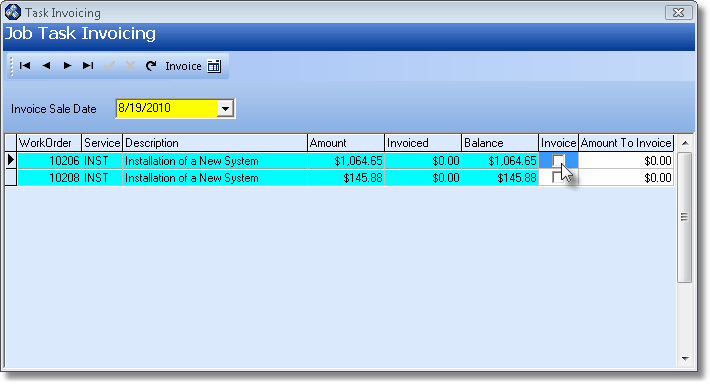
Generate Invoices - Job Task Invoicing Form
| • | A list of the Job Tasks, for which the Subscriber has not been Invoiced, is displayed. |
| • | Invoice Sale Date - By default, it will be set for Today. |
| ▪ | Use the Drop-Down Date Selection Box to Choose a different date, if required. |
| • | Amount To Invoice - Enter the Amount to Invoice for the first Job Task Item. |
| ▪ | Repeat for each additional item you want to be Invoiced. |
| • | Invoice - Once you've entered the Amount To Invoice, for those you want combined on the same Sales Invoice, Check each Job Task's Invoice box. |
| • | Click Save ("ü") to record these Amount to Invoice values and Checked Invoice entries. |
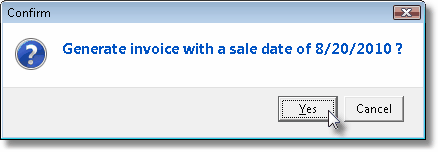
| • | Invoice - To create the actual Invoice, Click the Invoice icon on the Job Task Invoicing Form. |
| • | Confirm - Then Confirm that you want to Generate the Invoice with the Invoice Sale Date you entered. |
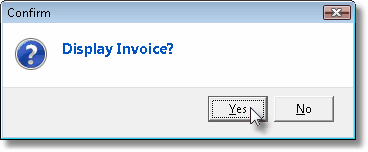
| • | Display - Answer Yes to display the Invoice and make any additions or corrections that may be needed. |
| • | The Invoice Form will be displayed and be available for any additions and/or corrections. |
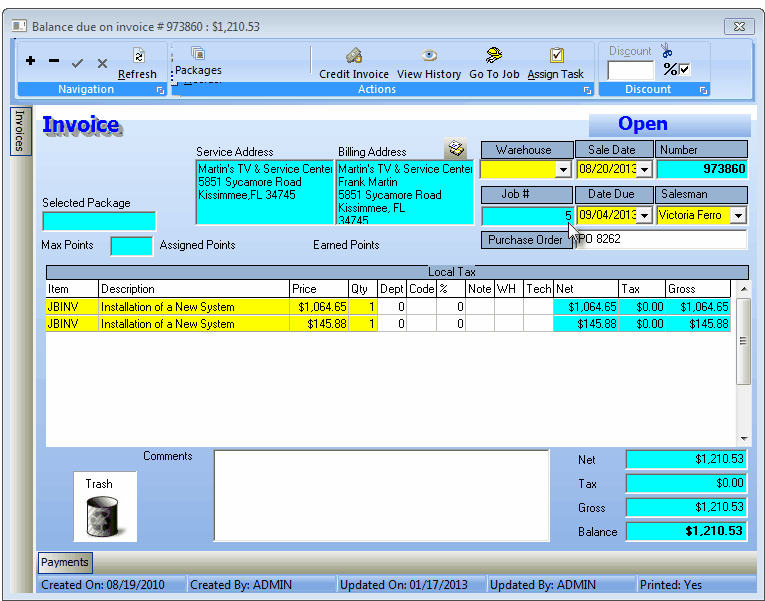
Sample of Job Costing Form's Job Tasks created Invoice
| ▪ | You may want to modify the Description, add Sales Tax if appropriate (see Sales Tax Note below), |
| ▪ | Use the Note field to enter any specific comment about a Detail line item. |
| ▪ | You may even add additional Detail line items, if necessary. |
| • | Sales Tax: Based on the rules and requirements of your Sales Tax Authorities, you may have to charged Sales Tax for certain items. |
| ▪ | The original billing Amount entered for this Job Task should not include the Sales Tax Amount as part of what you enter for the Amount to be Invoiced. |
| ▪ | For any item that must be taxed: |
| o | Click that Drop-Down Selection List in the (Sale Tax) Code field. |
| o | Choose the % (Tax Rate Code) for that item (Y/N/1/2/3), as appropriate (in most cases it will be populated automatically when the Sales Tax Code is selected above). |
| o | Repeat this process, as required, for each item for which Sales Tax must be assessed. |
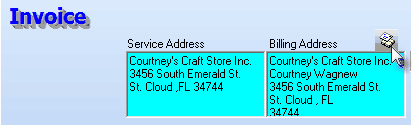
Select Billing Address Icon on the Invoice Form
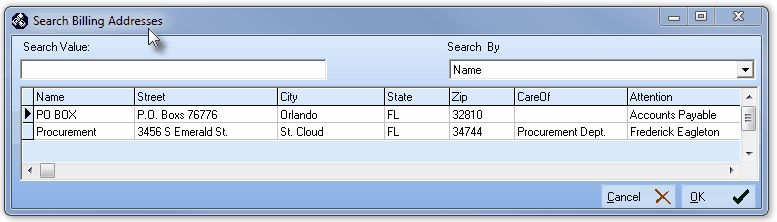
Search Billing Address dialog
| ▪ | Search Billing Address - The Search Billing Address dialog will be displayed which allows the User to Select one of the previously defined Addresses as the Billing Address for this specific Invoice. |
| • | Save - Click Save ("ü") to complete this Invoice. |
| • | Close - Click the Close T box. |
| • | Once you Save and Close the Invoice Form, you will be returned to the Job Tasks tab on the Job Costing Form. |
| • | Click the Refresh icon to update this information. |
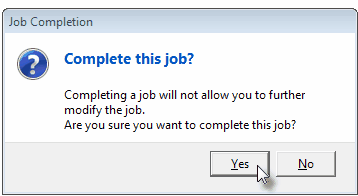
Complete this Job?
| • | Click the Yes button to mark the Job as Completed. |
| • | If certain Job Costing related items have not been properly completed (note the list above), an Open Items Found message will be displayed. |
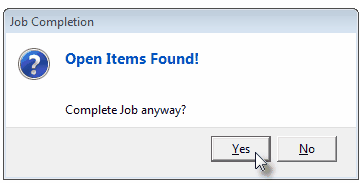
Open Items Found?
| • | Click the Yes button to proceed with the closing process. |
| • | The Current Date (Today) will be inserted into the Complete Date field next to the Complete button. |
| ▪ | Use the Drop-Down Date Selection Box to change this Date, if appropriate. |
| • | Click Save ("ü") on the Navigation/Options bar at the top of the Job Costing Form to Complete the Job. |

| ▪ | The Complete button will be removed and the selected Completion Date will be locked. |

