| • | Invoices for recurring services (e.g., Monitoring, Extended Warranty, Leasing contracts) are created automatically when you bill your Recurring Revenue. But Invoices for initial installations, and other sales for routine service calls, parts sales, or any other non-recurring charges to Subscribers must be individually created here. |
| • | The only exception to this is when a Prospect has a Proposal that, when accepted, may be converted automatically to an Invoice. |
| • | Sometimes a Sale must later be canceled, or a portion credited back to the Subscriber. |
| □ | Understanding the Sales Form: |
| • | Click the Sales on the Subscribers Form's Receivable Short Cut Menu. |
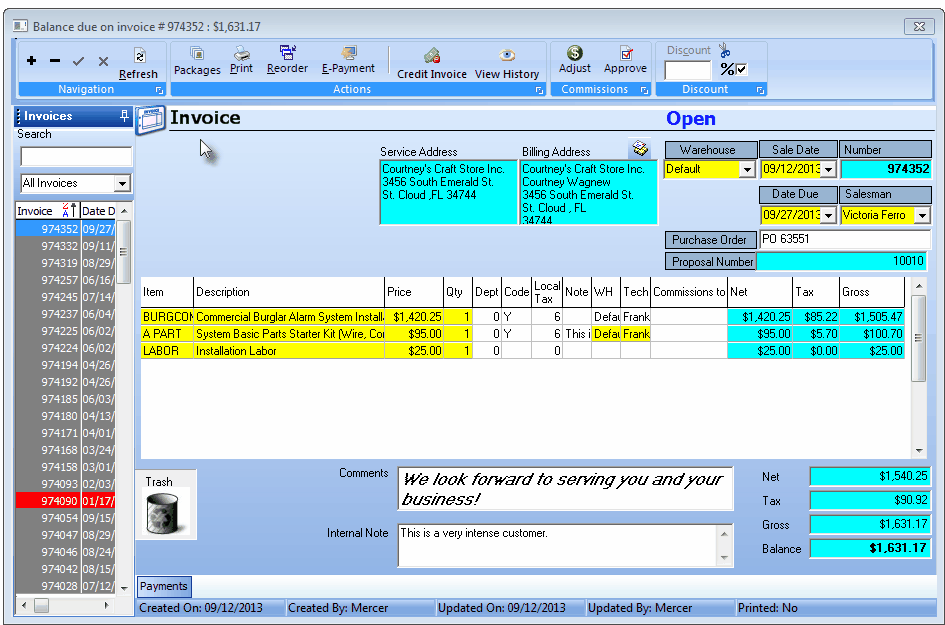
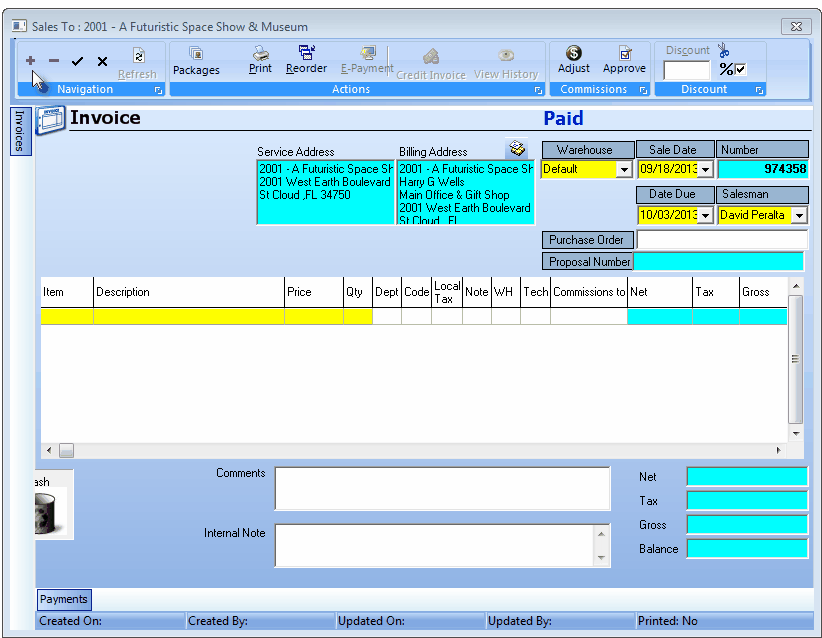
An Invoice with three Detail Line Items also showing the Prior Invoices tab on the left
| • | The Invoice Form (an example is shown above) is a "many sections within one" Form. |
| • | Menus - The Invoice Navigation, Actions, Commissions & Discount Menu Bar - at the very top of the Invoice Form - displays various Icons, but exactly which Icons will be displayed is based on the content and/or status of the Invoice. |

Invoice Form - Navigation, Actions, Commissions & Discount options
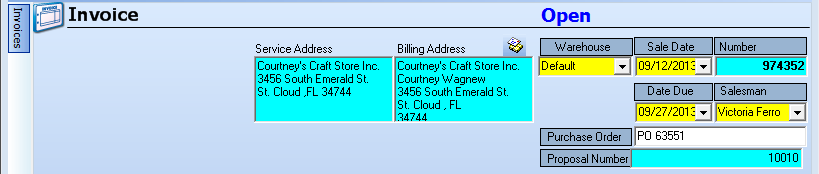
| • | Header - The section just below the Invoice Menu Bar at the top of the Invoice Form will contain some, or all of these fields and is referred to as the Invoice Header: |
| ▪ | The Warehouse, Sale Date, the Invoice Number, the Job # , Due Date, Salesman, Purchase Order Number and Proposal Number fields. |
| ▪ | The Service Address and Billing Address information. |
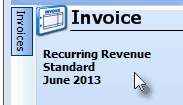
| ▪ | If the Invoice was created as an automatically billed Recurring Revenue Sale, a special message will be displayed below the "Invoice" label identifying the Invoice as a Recurring Revenue Invoice, and will show the Recurring Billing Cycle in which this Invoice was created, as well as the starting Month and Year for which this Recurring Service was billed will also be shown in the Invoice Header. |
| ▪ | If using the Commission Tracking System and all, or some items on the Invoice are Commission Eligible, these fields will also be populated in the Invoice Header: |
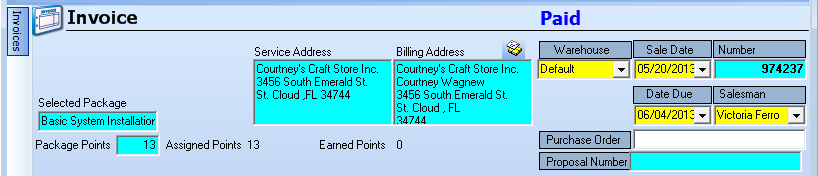
| o | Assigned Points - Based on what was added to this Fixed Price Proposal Package (which would cause a loss of Earned Points), or removed from this Fixed Price Proposal Package (which would earn addition of Earned Points), this is the Points actually Assigned to what was ultimately Sold (Invoiced). |
| o | Earned Points - If changes were made to the Fixed Price Proposal Package which altered the Earned Points, that positive or negative number is displayed here (0 = no changes were made). |
| • | Body - The center of the Invoice Form may have from one, to as many Lines as needed (a sample of which is shown below) to itemize exactly what was sold (such as Parts, Labor, a Trip Charge, etc.) and these are referred to as the Invoice's Detail Line Items. |

Detail Line Items on an Invoice
| • | Footer - The bottom of the Invoice Form - referred to as the Invoice Footer - shows various Totals information, provides a Comments and Internal Note field, and the Trash button (each are explained within the Invoice Footer section of the Creating an Invoice chapter). |

| • | Regardless of what section you are viewing within the Invoice Form: |
| • | Items displayed in Teal are inserted and/or calculated automatically by the system and cannot be changed by the user. |
| • | Items displayed in Yellow must be entered before the Invoice and/or Detail Line Items can be accepted. |
| □ | Special Bar-Tabs on the Invoice Form - There are two special bar-tabs on the Invoice Form: Invoices and Payments. |

| • | Invoices - Click the Prior Invoices Tab to display the list of the Invoices that were previously created for this Subscriber - Invoices will initially be listed in Invoice Number order, but later, the sequence in which the Prior Invoices are listed may be specified by the User. |
| • | This Prior Invoices List - located on the left of the Sales Form - is used to select and display an existing Invoice for the currently selected Subscriber. |
| ▪ | The Prior Invoices List will always be displayed when the Sales Form is opened (unless you Check the Auto Hide Invoice Listings? box in the Personal Options tab on the User Options Form). |
| ▪ | By Checking the Auto Hide Invoice Listings? box in the Personal Options tab on the User Options Form, this Prior Invoices list will normally be hidden. |
| ▪ | Even so, it is still easily accessible by Clicking on the Prior Invoices Tab (see the mouse pointer on the illustration above) on the Sales Form. |
| • | Also, if the Prior Invoices List is hidden automatically, once it is displayed by Clicking on the Invoices tab, you may Click the Pin Pointer (see mouse pointer in illustration below) to keep it displayed until you close the Form. |
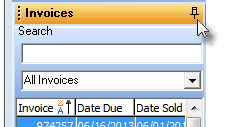
| ▪ | Once you have pinned the list open, the Prior Invoices List for all Subscribers stays pinned opened until you specifically unpin it. |
| • | Search and Filter options: |
| ▪ | Search - The Prior Invoices List contains a Search box into which an Invoice Number may be entered and the associated Invoice record will be displayed. |
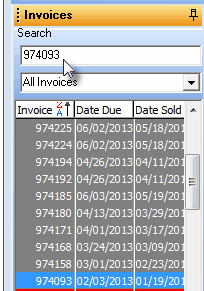
Invoices - Search field
| o | Click the word Invoice at the top of the Invoice Number column. |
| o | Enter the Invoice Number in the Search field for the Invoice record you want to view. |
| o | That Invoice - as long as it belongs to the currently selected Subscriber and has not been deleted - will be instantly displayed on the Invoices Form. |
| ▪ | Filter - The Prior Invoices List contains a Drop-Down Selection List with three Filter options: |
| 1. | All Invoices - By default, No Filter will be applied and so all existing Invoices will be listed. |
| 2. | Open Invoices Only - The list will be Filtered so that only those Invoices with a Balance Due will be listed. |
| 3. | Paid Invoices Only - The list will be Filtered so that only those Invoices which have been Paid In Full will be listed. |
| ► | Note: Once the Sales Form is closed, the default All Invoices (No Filter) option is restored. |
| • | Sorting the Prior Invoices List - The list of Prior Invoices way be displayed in any order needed, based on the information in one of the columns. |
| ▪ | The full set of Column Headers may be displayed by positioning your Mouse to the right of the vertical Slide-Bar and Dragging the vertical line to the right (or left). |
| o | Click the word Invoice at the top of the Invoice Number column to sort the records in Invoice Number Order (newest to oldest). |
| o | Click the word Invoice again to reverse the order (oldest to newest). |


| ▪ | You may sort the Prior Invoices List based on the information in any column simply by Clicking on that column's Name. |

| ▪ | This sorted order remains in effect whenever the Prior Invoices List is displayed, until you choose a different sorting order. |
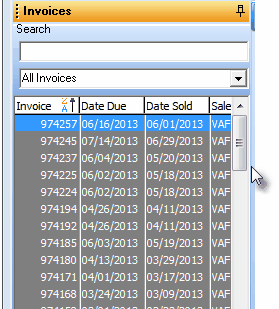
Prior Invoices List
| ▪ | You may display additional columns of Invoice information by Dragging the right edge of the Vertical Slide Bar to the right - and fewer columns by Dragging it to the left - (see mouse pointer in the illustration above). |
| ▪ | The columns displayed as a result of this action will be the default columns that are displayed in the future, unless reset again |
| • | Generally, it is best to keep the list in Invoice Number Order unless you have a specific need for a different order which may be set when needed, then reset to Invoice Number Order before closing the Sales Form. |

| • | Payments - Click the Payments Tab at the bottom of the Sales Form to view a tabular (spreadsheet style) list of all Receipts and Credits which have been Applied (see the Allocating Receipts chapter) to the currently selected Invoice. |
| • | The "Payments" list may actually include Allocated Receipts (displayed in green text), Credit Memos (displayed in red text), or any combination of both of these. |

Payments tab with Receipt listed

Payments tab with Credit listed

Payments tab with Receipt and Credit listed
| • | Double-Click any Payment item to open the associated Receipts and/or Credits Form |
Invoice Form-New Entry defaults
| □ | Special Icons on the Actions Menu Bar: |
| ◆ | Not all Action Menu Bar Icons appear on all Invoice Forms. The Icons only appear when appropriate based on the content and/or status of the Invoice. |

Invoice Form - Special Icons on the Actions Menu Bar Discount Bar
| • | Packages - Click the Packages Icon to add the components of a predefined Proposal Package to this Invoice. |
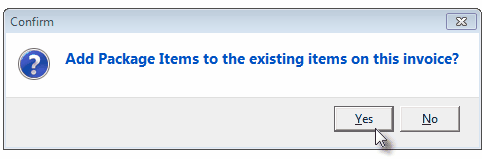
| • | Click the Yes button to Confirm this request. |
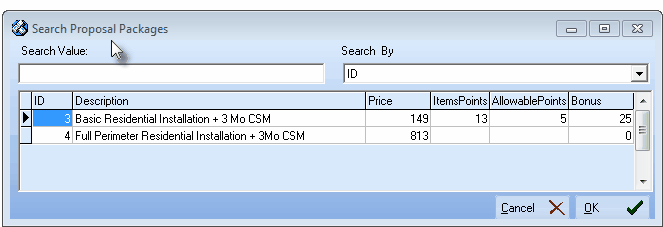
| • | Select the required Proposal Package from the list presented in the Search Proposal Packages dialog. |
| • | Add Proposal Package - Identify the Warehouse from which these Inventory Items will be taken and the Technician who Installed them: |
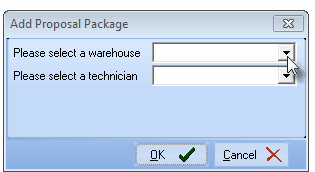
Add Proposal Package dialog
| ▪ | Please select a warehouse - Using the Drop-Down Selection List provided, Choose the Warehouse from which this Inventory was withdrawn. |
| ▪ | Please select a technician - Using the Drop-Down Selection List provided, Choose the Technician who Installed these Inventory Items. |
| • | Print - Click the Print button to immediately print the current Invoice. |
| • | The Invoice Print Options dialog will be displayed. |
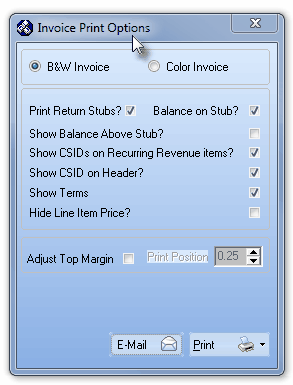
Invoice Print Options
| • | Reorder - If the sequence of the items listed on the Invoice might cause confusion, Click Reorder to display the Reorder Items dialog. |
| • | This Reorder Items Form is used to rearrange the sequence of the Detail Line Items. |
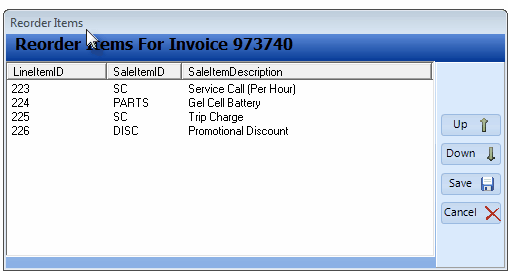
Reorder Items dialog
| • | Click on the Detail Line Item that's to be moved. |
| • | Click the Up or Down Icon as appropriate to relocate the selected Detail Line Item. |
Reorder Items?
| • | Click the Yes button to Confirm the new Order. |
| • | The Reorder Items Form will be Closed. |
| • | E-Payment - This Icon is used to open the E-Payments Form where the User may Validate a Credit Card Payment (Under Development - or Authorize an E Check) for the currently selected Subscriber. |
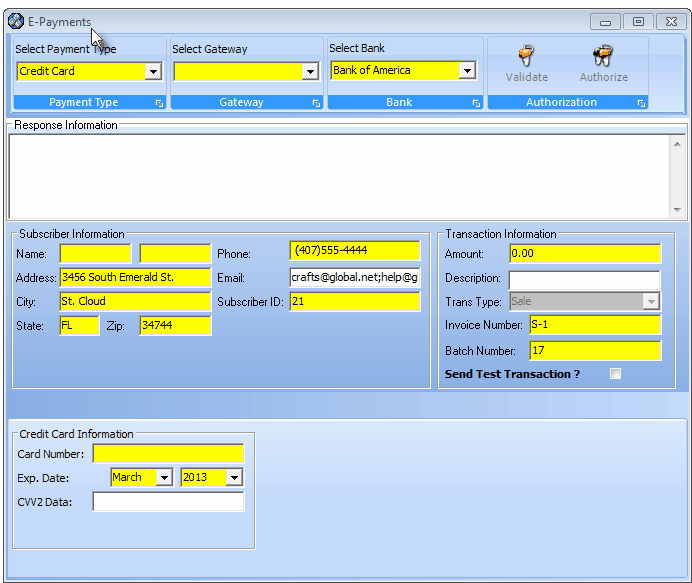
E-Payments Form
| • | Credit Invoice - Click the Credit Invoice Icon to create a Credit Memo for the currently selected Invoice: |
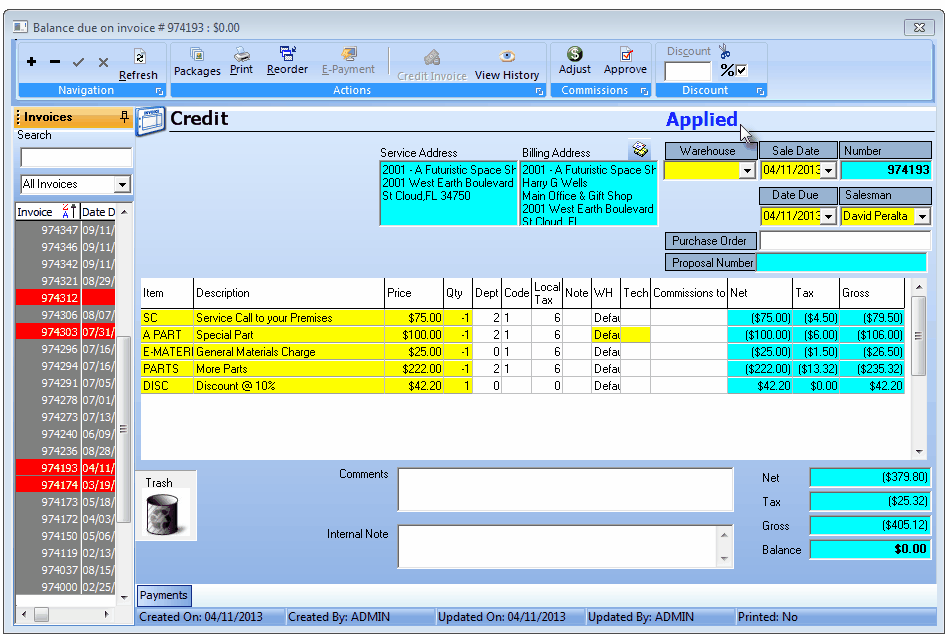
Automatically Generated Credit Memo
| • | Locate the correct Invoice. |
| • | Click the Credit Invoice at the top of the Invoice Form on the specific Invoice for which a Credit is to be issued. |
| • | Choose whether you want to have the Invoice Form Auto Generate the Credit Memo, or to Select the specific Items to be credited. |
| • | View History - Click the View History Icon to see a list of any authorized changes, the User who made them, and when they were made to the current Invoice. |
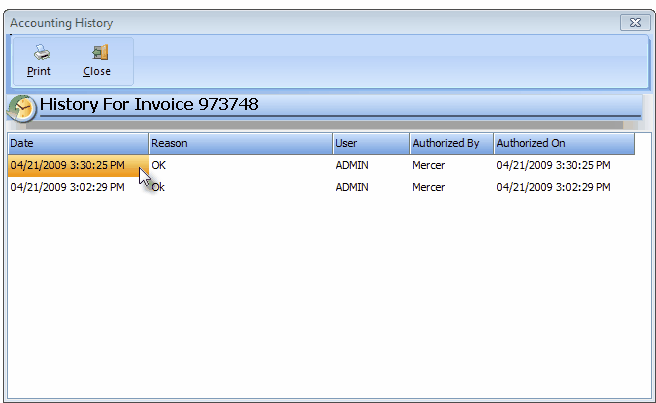
Accounting History Form - Column Headers and Modified Transaction
| • | You may Print this log whenever necessary. |
| ▪ | This option immediately send the information to your default Printer, with no Preview option offered. |
| • | Click Close to exit the Accounting History dialog. |
| • | Go To Job - See the "Job Costing related Icons on the Invoice Form" section below. |
| • | Assign Task - See the "Job Costing related Icons on the Invoice Form" section below. |
| • | Commissions - If a Proposal Package and/or any Detail Line Items have Commissions information assigned, use these Icons to Adjust and/or Approve the associated Commissions. |
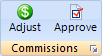
Commissions Icons
| • | Adjust - Click the Adjust Icon to open the Commission Adjustment Form within which an addition or reduction of the standard Commission may be entered. |
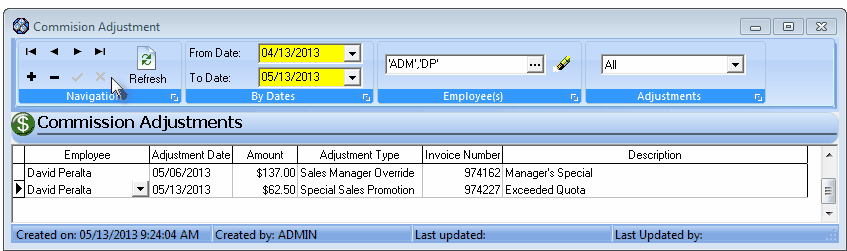
Commission Adjustment Form
| • | Approve - Click the Approve Icon to open the Approve Commissions dialog specifically for the currently selected Invoice. |
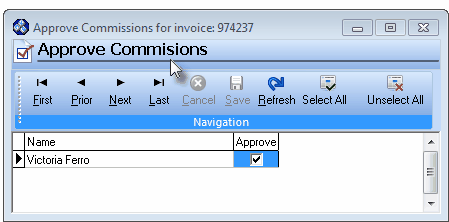
Approve Commissions dialog
| ▪ | The Invoice must be Paid and (Item) Allocated before it will be included on the list. |
| ▪ | Click the Approve box to Approve the Commission for this Invoice. |
| ▪ | Click the Save < Icon to record this approval. |
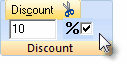
| • | Discounts - Discounting the Gross Amount of this Invoice from its total original price (whether for a Sales Promotion or some other customer compensation situation): |
| • | To provide a Discount, after the Invoice has already been completed and saved: |
| ► | Note: The Discount function - which will require the appropriate Authorization - allows you to apply either a specific "percentage off" Value (the default), or a specific "dollar off" Amount, both of which will be calculated by the Invoice Form and inserted as a separate Detail Line item. |
| ▪ | Enter the desired Discount Percentage, or a Dollar Amount. |
| o | If this Discount is to be a specific Dollar Amount, Uncheck the % box. |
| ▪ | Click the Discount (Scissors) Icon. |
| o | The Detail Line item created for this Discount (which will have a negative quantity value) will be calculated based on the Discount Method chosen and Value/Amount entered and inserted as a new Detail Line item. |

| ▪ | Click the Save ü Icon to record this Discount entry. |
| ▪ | This will automatically adjust all of the Invoice Totals. |
| ► | Note: In some States and/or Countries, Sales Tax may not be credited as part of the Discount, but in others it is allowed. |
| a. | If the Sales Tax cannot be credited as part of the Discount, and Sales Tax has been charged on other items, Click the Local Tax - Code column and, using the Drop-Down Selection List provided, Select "N" (No). |
| b. | If the Sales Tax may be credited as part of the Discount, and Sales Tax has been charged on other items, Click the Local Tax - Code column and, using the Drop-Down Selection List provided, Select the appropriate Sales Tax code and rate. |
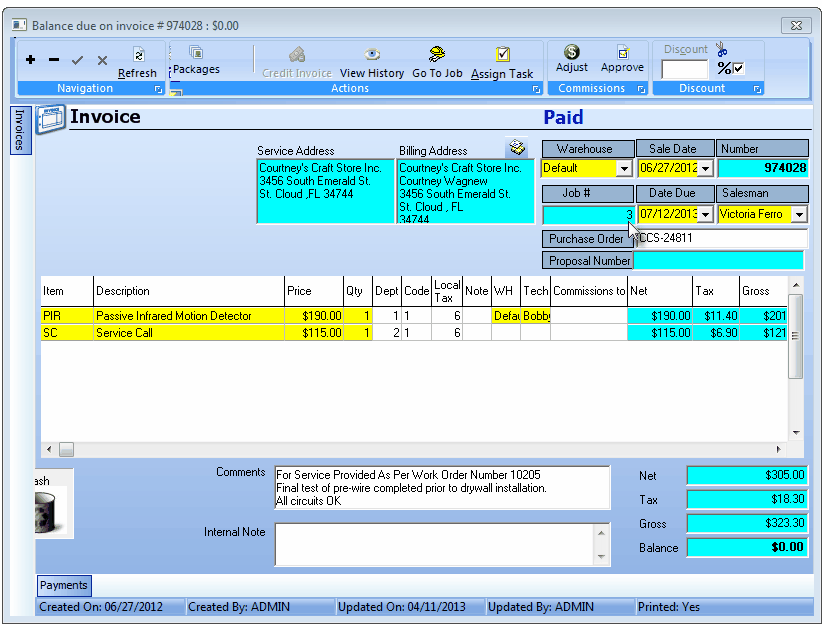
Sales Form - Invoice created form Job Costing module
| • | Job # - Invoices created through Job Costing for a completed Job Task will include a Job # field with the related Job Number inserted. |
| • | When a Job Number is shown, two additional Icons are added to the Invoice's Actions Menu Bar. |

Invoice Form - Actions Menu options: Go To Job & Assign Task
| 1. | Go To Job - Click this Icon to open the Job Costing Form for the designated Job #. |
| 2. | Assign Task - Click this Icon to (re-)assign this Invoice to a (different) Service Type from among the Job Task(s) assigned in the Job Costing Form's Job Task tab. |
| ▪ | Use the Drop-Down Selection List provided to Choose the appropriate Service Type. |
| ▪ | If another Invoice Detail Line Item is added to the Invoice (after it was created Generated from within the Job Costing Form), the User will be prompted to enter a Job Task for the new item. |
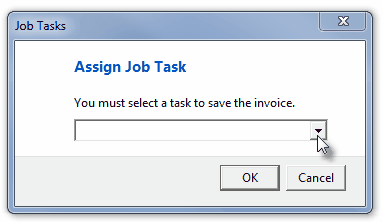
Assign Job task dialog
| □ | Refresh - Because many Users operate on a Network, and often several Users may be accessing this Sales Form at the same time, and because Sales may be modified and/or deleted by an Accounting Administrator, to see the most current version of the Sales Invoice currently being viewed, Click the Refresh button at the top of the Form. |

