Applying Receipts to Specific Invoices
| □ | The Receipts Allocation Form is accessible two ways: |
| • | Use the Search Icon on the Navigation Menu to Locate the Receipt you want to Allocate to one or more Outstanding Invoices. |
| □ | Using the Receipt Allocations Form: |
| ► | Note: Receipts for Invoices which are Commission eligible must be Allocated on a Line Item by Line Item basis (see the "Itemized Receipt Allocation" section below for more information). |
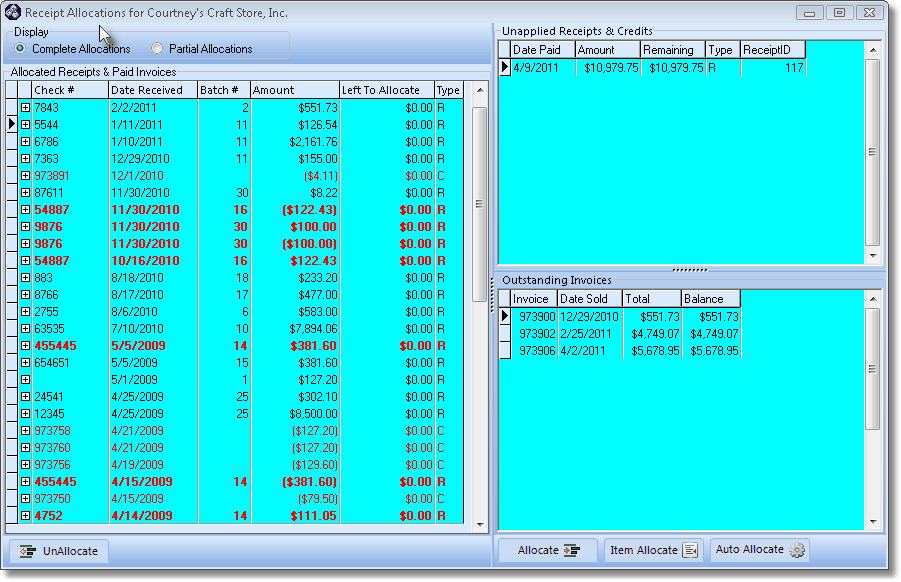
Receipts Allocation Form
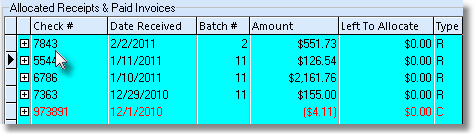
| • | On the top left side of the Receipt Allocations Form is a list of all Allocated Receipts & Paid Invoices. |
| • | This list is provided in the event that you want to Un-Allocate a Receipt, perhaps because their Check Bounced, or the Credit Card was declined (see 4. UnAllocate - Reversing an Allocation below). |
| • | Choose the Allocated Receipts data that is to be listed by Clicking either the Completed Allocations or Partial Allocations button. |
| ▪ | Complete Allocations - Only the Receipts that have been fully applied to Invoices are listed. |
| ▪ | Partial Allocations - Receipts that were partially allocated, but still have a portion of the original Receipt Amount that is unapplied, (not Allocated to an Invoice) are listed. |
| • | To view the details (i.e., the list of the Invoices to which this receipt were Allocated) of the Allocation of a Selected Receipt: |
 Click the Plus Box to the left of a Check # (or last 4 digits of the Credit Card Number) to view a list of the Invoices to which the selected Receipt was Allocated.

Allocated Receipts & Paid Invoice sections on the Receipt Allocations Form
 Click the Minus Box to close this view.
| • | On the right side of the Receipt Allocations Form are two information areas: |
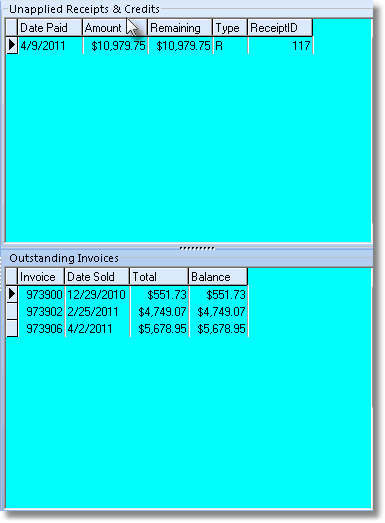
| 1. | Unapplied Receipts & Credits - a list of each Receipt and/or Credit Memo that has an Unapplied Balance remaining to be Allocated. |
| 2. | Outstanding Invoices - a list of all Invoices (for this Subscriber) that have an unpaid Balance. |
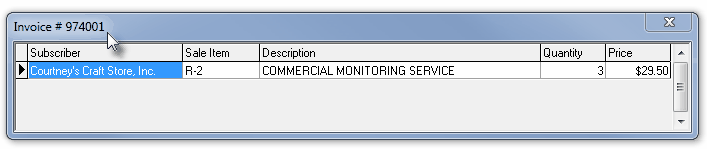
| ▪ | Double-Click on an Invoice Number to open the Invoice # Form. containing all of the Detail Line Items (excluding Sales Tax) in the Selected Invoice. |
| • | On the bottom of the Receipt Allocations Form are four buttons. |
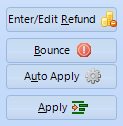
| 1. | Allocate - 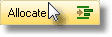 - This allows you to Choose the specific Invoice(s) to be paid with the Receipt you Selected. - This allows you to Choose the specific Invoice(s) to be paid with the Receipt you Selected. |
| ▪ | Click on the Receipt or Credit Memo in the Unapplied Receipts & Credits box that you wish to Allocate. |
| o | Being able to control what Receipt pays off what Invoice is quite useful when the paying Subscriber has specifically identified which Invoice(s) should be satisfied with their payment (the Receipt). |
| o | More that one Receipt and/or Credit Memo may be selected. To do so, Hold down the Ctrl key and Click on each item to be included. |
| o | The Selected Receipt will be highlighted in Blue. |
| ▪ | Click the Invoice in the Outstanding Invoices to which you want to Allocate the value of the selected Receipt. |
| o | If you want to Allocate the value of the Receipt(s) and/or Credit Memo(s) to more than one item, Hold down the Ctrl key and Click on the additional Outstanding Invoices item(s). |
| o | The Selected Outstanding Invoices will be highlighted in Blue. |
| o | Allocate Receipt? - If, and only if the ChangeAllocationDate option in the Company Setting Form is set to True ("T"), the Allocate Receipt? dialog will be displayed and you may accept (by default it is set to Today), or change the Date of Allocation by using the Drop-Down Date Selection Box provided - if required, then Click OK to continue the Allocation procedure. |
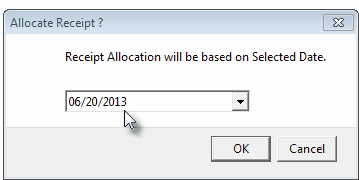
Allocate Receipt? dialog
| o | If the ChangeAllocationDate Company Setting is set to False ("F"), this dialog will not appear at all. |
| o | The Receipt will be removed from the Unapplied Receipts & Credits box. |
| o | The Balance(s) or Outstanding Invoices will be adjusted based on the amount of allocation that was applied. |
| o | If there is not enough value in the Receipt to satisfy all of the selected Outstanding Invoices, they will be paid off from the oldest to the newest |
| o | This may leave a partially paid Invoice at the end of the allocation process. |
| o | This may also leave a Receipt that still has some balance - resulting in a partially allocated Receipt. |
| 2. | Auto Allocate - 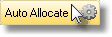 - This allows you to automatically apply Receipts to Outstanding Invoices. - This allows you to automatically apply Receipts to Outstanding Invoices. |
| ▪ | Click Auto Allocate (also see "Allocate Receipt?" above). |
| o | If the ChangeAllocationDate Company Setting is set to True ("T"), the Allocate Receipt? dialog will be displayed and you may accept or change the Date of Allocation (by default it is set to Today) by using the Drop-Down Date Selection Box provided - if required, then Click OK to continue the Allocation procedure. |
| o | All available Receipts from the Unapplied Receipts & Credits box will be applied to Outstanding Invoices until either the Receipts have exhausted their value or no more Invoices are unpaid. |
| o | The Balance(s) of Outstanding Invoices will be adjusted based on the amount of allocation that was applied. |
| o | If there is not enough value in the Receipt(s) to satisfy all of the Outstanding Invoices, they will be paid off from the oldest to the newest. |
| o | This may leave a partially paid Invoice at the end of the allocation process. |
| o | If there were more Receipts (payments) than Outstanding Invoices (those with unpaid balances), there may be Receipt(s) that still have some or all of their payment balance - also resulting sometimes in a partially allocated Receipt. |
| 3. | Item Allocate - 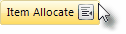 - Performing an Item by Item Allocation - All or Portions of a Receipt may be allocated to specifically Selected Detail Line Items of an Invoice. - Performing an Item by Item Allocation - All or Portions of a Receipt may be allocated to specifically Selected Detail Line Items of an Invoice. |
| ▪ | This allows the funds to be applied to an Invoice on a line item by line item basis. |
| ▪ | Often allocation by line item is required when Central Stations are paid for many different Subscriber's Monitoring Services with the same Receipt (such as Medicare reimbursements for Elderly Medical & Emergency Monitoring Services. |
| ▪ | To allocated by specifically selected line items: |
| o | Select the specific Receipt to be Item Allocated. |
| o | Select the specific Invoice to be Item Allocated. |
| o | Click the Item Allocate button on the Receipt Allocations Form. |
| ▪ | If you have not chosen the Receipt and/or the Invoice to be Item Allocated, an Invalid Criteria error message will be displayed |
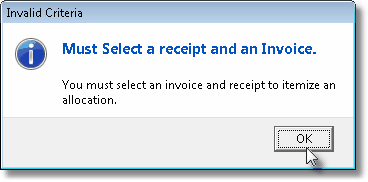
Choose a Receipt and an Invoice before using Item Allocate
| o | Click the OK button to close the Invalid Criteria message. |
| o | Select the specific Receipt and Invoice combination to be Item Allocated. |
| o | Click the Item Allocate button on the Receipt Allocations Form. |
| ▪ | Continue with the directions below. |
| • | Itemized Receipt Allocations - When the Itemized Receipt Allocation Form opens: |
| ► | Important Note: For those using the Commission Tracking System, all Receipts for the payment of any Invoices that are Commission Eligible must be Allocated on a Line Item by Line Item basis using the Itemized Receipt Allocation process described below! |
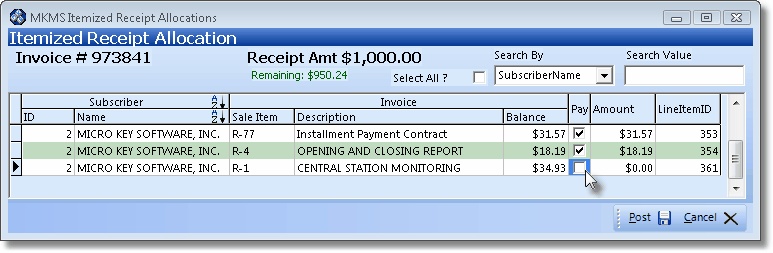
MKMS Itemized Receipt Allocation dialog
| • | Choose the Detail Line Item(s) to be paid with a portion of the Receipt: |
| ▪ | Check the Pay box of each Detail Line Item that you want paid, as required. |
| ▪ | Press the down arrow key i to move focus to the next item. |
| ▪ | The Amount of the Remaining Receipt balance that is still available is updated automatically. |
| ▪ | When the Invoice, to which you are applying some or all of a Receipt, has a very large number of Detail Line Items, and so all items cannot be seen in the list: |
| o | Select All - You may Check the Select All box to have all items Chosen, then Uncheck items to which you do not want to Allocate an Amount. |
| o | Search By - Use the Search By Drop-Down Selection List to Choose the method you want to use to locate that Item. |
| ► | Title Bar - Alternately, you may Click the column's Title Bar to insert that field name into the Search By field. |
| ► | Sort Order - Click the column's Title Bar to set the Order in which the Detail Line Items are listed, and Click the column's Title Bar to reverse that selected Order. |
| o | Search Value - Enter the characters or numbers that will identify the Detail Line Item in the Search Value field. |
| ▪ | Post - Click the Post button to record these Itemized Receipt Allocations. |
| 4. | UnAllocate - 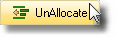 - For Reversing an Allocation: - For Reversing an Allocation: |

