| □ | Recurring Revenue Billing Cycles provide the ability to divide Subscribers into separate Automatic Billing Groups. |
| • | A Subscriber becomes a Member of an Automatic Billing Group simply by having a Recurring Revenue Billing Cycle Code assigned to one (some, or all) of their Auto Billing records and the same Subscriber may be a Member of more than one Automatic Billing Group (have multiple Recurring Revenue billing requirements which fall within - are assigned to - different Billing Cycles). |
| • | This allows each Automatic Billing Group: |
| • | To be Invoiced for their Recurring Revenue at different times of the month. |
| • | To be Invoiced for their Recurring Revenue for different purposes such as: |
| ▪ | Subscribers who are billed earlier in the month versus later in the month |
| • | Automatic Billing Groups provides the ability to establish Multiple Billing Cycles within the same Month (enabling automatic invoicing of different sets of Subscribers at different times throughout the Month - which is particularly helpful for those companies having a large number of Accounts), and for Semi-Monthly Billing, Monthly Billing, billing Subscribers who pay by Credit Card separately from those that want their Invoice sent via e-mail and most importantly - for any combination of all of the above! |
| • | Automatic Billing Groups do not restrict any other Recurring Revenue Billing capabilities such as automatically billing Subscribers with multiple locations and billing on a Monthly, Bi-Monthly, Quarterly, Semi-Annual, Annual and Bi-Annual basis for both Recurring Revenue that continues indefinitely and for fixed period billings (for time-payments of installations charges and/or Fixed Term leases). |
| □ | If you plan on billing Recurring Revenue using this Recurring Billing Cycles feature (where different groups of Subscribers may be billed at different times throughout the Month): |
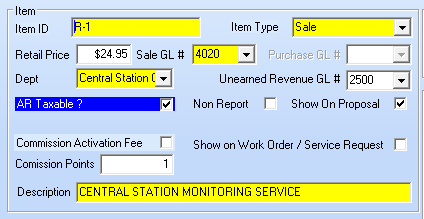
| • | Sale-Purchase Items must be created for the types of Recurring Revenue related services that you provide. |
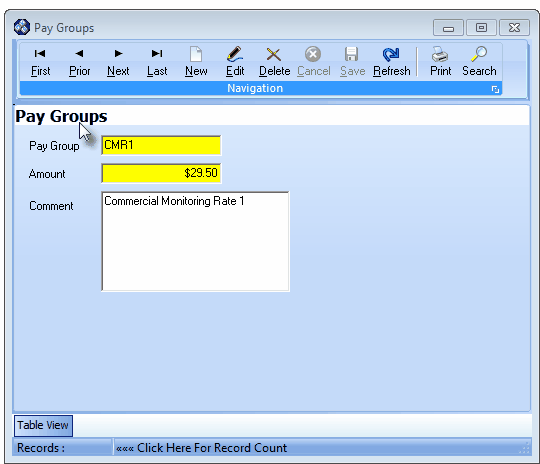
| • | Pay Groups must be defined to establish the normal Price for the Recurring Revenue related services you provide. |
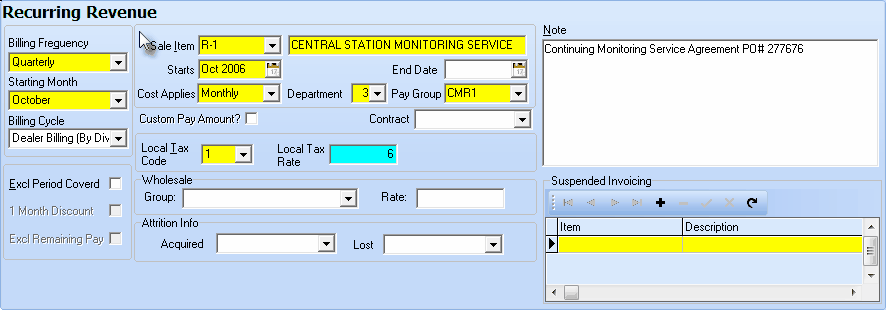
| • | The required Recurring Billing Cycles must be defined (as described within this chapter). |
| □ | Creating Recurring Revenue Billing Cycles |
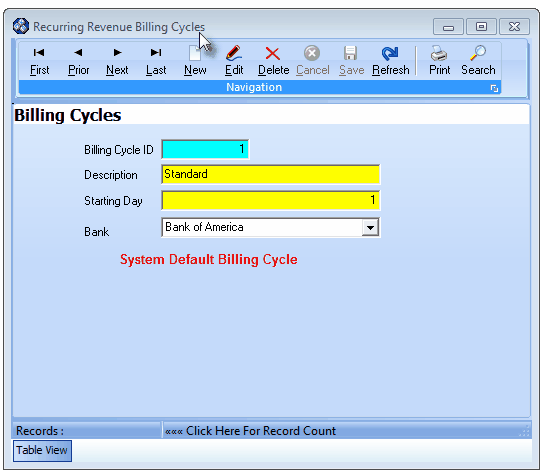
| • | From the Main Menu Select Maintenance then Choose the Accounts Receivable sub-menu and Click Billing Cycles. |
Recurring Revenue Billing Cycles Form
| ► | Note: There are four predefined System Default Billing Cycles which should not be deleted. |

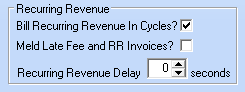
Bill Recurring Revenue In Cycles
| 2. | Week 2 - If the Bill Recurring Revenue in Cycles option is Checked in the Company Options - Invoice/Proposal sub-tab this is the first of the three additional predefined Billing Cycles. |
| 3. | Week 3 - If the Bill Recurring Revenue in Cycles option is Checked in the Company Options - Invoice/Proposal sub-tab this is second of the three additional predefined Billing Cycles. |
| 4. | Day 15 - If the Bill Recurring Revenue in Cycles option is Checked in the Company Options - Invoice/Proposal sub-tab this is third of the three additional predefined Billing Cycles. |
| • | This Recurring Revenue Billing Cycles Form may be Re-sized by Dragging the Top and/or Bottom up or down, and/or the Right side in or out. |
| • | Navigation Menu - The Navigation Menu is located at the top of the Recurring Revenue Billing Cycles Form. |

| • | This Navigation Menu provides the normal Record Movement, New, Edit, Delete, Cancel, Save, and Refresh options; as well as a Print and Search function. |
| • | Record Editing section - The details of the currently selected record are displayed below the Navigation Menu at the center (Main Body) of the Recurring Revenue Billing Cycles Form. |
| • | Table View tab - A tabular (spreadsheet style) Table View of the currently defined Billing Cycles is accessible by Clicking the Table View tab at the bottom of the Recurring Revenue Billing Cycles Form. |

| • | This Table View information may be Pinned in Place by Clicking the Pin Icon on the right. |
| • | To display a specific Recurring Revenue Billing Cycle record in the Record Editing section, Click on that record within the Table View section, or use the Search Icon (see the "Using the Special Functions" section later in this chapter). |
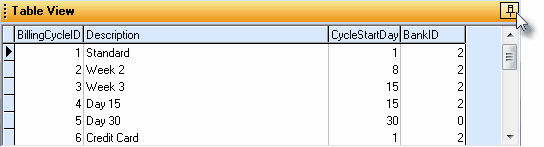
Recurring Revenue Billing Cycles Form - with Table View tab Pinned Open
| ▪ | You may Un-Pin this Table View by Clicking the Pin Icon again. |
| ▪ | Click on any listed record to display that information in the center (Main Body) of the Form. |
| • | There are four columns of data in this Recurring Revenue Billing Cycles Record Listing: |
| 1) | Billing Cycle ID - The record ID assigned by the system when the entry is originally saved. |
| 2) | Description - The description of the purpose, timing, or members of this Billing Cycle Code. |
| 3) | Cycle Start Day - The Day of the Month on which the Invoice created using this Billing Cycle Code will be Dated. |
| 4) | Bank ID - The record ID of the Bank Account assigned for this Billing Cycle Code. |
| • | Each column's Header Name describes the data contained in that column. |
| ▪ | Clicking on a Header Name will set the order in which the Recurring Revenue Billing Cycles will be listed. |
| ▪ | Clicking on the same Header Name will set the order in the opposite direction (ascending vs. descending). |
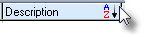
| ▪ | The Header Name that is determining the Order of the list will have an Icon indicating the Order displayed next to that Header Name. |
| • | To define the Recurring Revenue Billing Cycles which will be used to identify the intra-monthly Billing Cycle for each Auto Billing record. |
| • | Click the  Icon to start the Recurring Revenue Billing Cycle entry in the Record Editing section. Icon to start the Recurring Revenue Billing Cycle entry in the Record Editing section. |
| ▪ | Billing Cycle ID - Once the record is initially saved, the system will assign an ID. |
| ▪ | Description - Enter a brief Description for this Billing Cycle Code entry. |
| o | The Description may up to 40 characters in length and include upper and/or lower case letters, numbers, spaces and normally used punctuation marks. |
| ▪ | Starting Day - Enter the starting Day Number for this Billing Cycle within the Month. |
| o | This should be the Day number within a month when the service period starts for this Billing Cycle. |
| o | It is recommended that no Day number over 28 be entered. |
| o | The result is that the Period Covered explanation on the Invoice will start on the day of the month entered here, and end on the day number preceding it in the month this billed service period ends. |

The Period Covered explanation on Recurring Revenue Invoice
| ▪ | Bank - Optionally, using the Drop-Down Selection List provided, Choose the preferred Bank Account to which the proceeds will be deposited. |
| o | If this Billing Cycles group pays via Electronic Funds Transfer (EFT), the selected Bank will be where those Receipts will be processed.. |
| o | By assigning the appropriate Bank, the EFT transactions will automatically debit the Total Amount Invoiced to each Subscriber in this Billing Cycle using the EFT rules established for the selected Bank. |
| • | Click the  Icon to to record this Recurring Billing Cycle. Icon to to record this Recurring Billing Cycle. |
| • | Any number of additional Recurring Billing Cycles may be created. |
| • | If the Company has chosen to Charge Interest on Past Due Invoices and will be billing Recurring Revenue using this Recurring Billing Cycles feature: |
| a) | Create Late Fee Groups for each Recurring Billing Cycle that will be used. |
| b) | On the Subscribers Accounting Info tab, Select the Late Fee Group with the rules to be applied to the Late Fees that may be assessed and Check the Charge Interest? box. |
| □ | Using the Special Functions on the Navigation Menu at the top of the Billing Cycles Dialog Form: |
| • | Print - Click the Print Icon to open the Recurring Revenue Billing Cycles. |
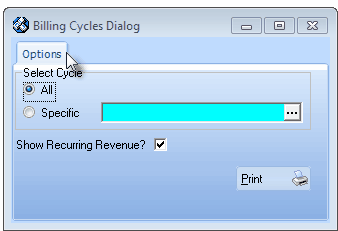
Billing Cycles Dialog - Options tab
| • | Print - Click the Print button to View a copy of the report. |
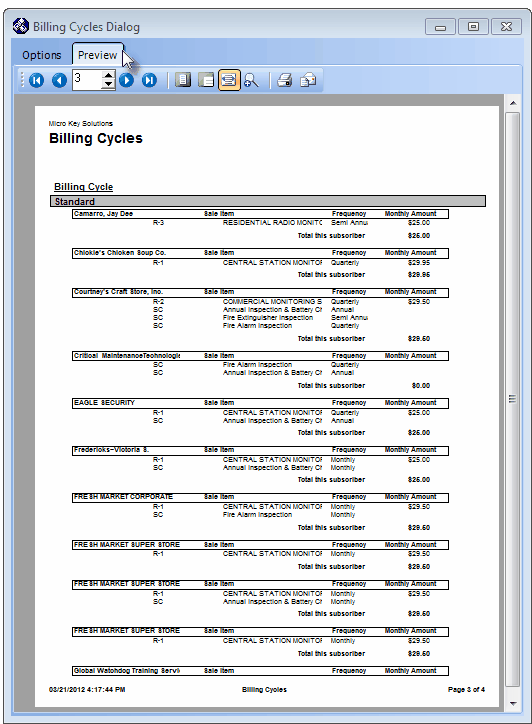
Billing Cycles Report - Preview tab
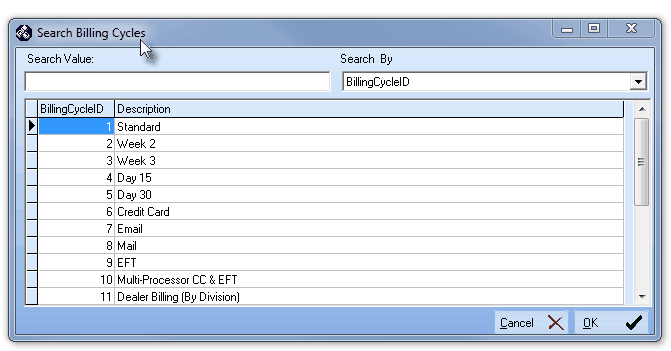
| • | Search - Click the Search Icon to open the Search Billing Cycles dialog. |
Search dialog
| • | See the "Using the Generic Search dialog" section in the Advanced Search Dialog chapter for more information about this Search dialog. |

