| □ | Open Term Billing (for automatically creating Invoices which bill for continuing services (e.g., Monitoring Service, |
Service Contracts, Opening & Closing Service):
| • | The Auto Bill form is divided into sections (sometimes surrounded by boxes). |
| • | Complete each section of this Form - as needed. |
| • | Start be Clicking the Open Term radio button. |

| • | The first section - the box on the upper left - deals with When and How frequently this service will be billed: |
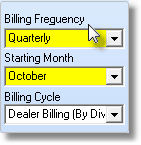
| • | Billing Frequency - Using the Drop-Down Selection List provided, Choose how often this item is to be billed: |
| ▪ | Annually - They are to be billed once each year for 12 months of service. Note that, just because you select Annually, the Invoice will reflect a Monthly Rate Amount, show that the bill is for 12 Months and calculate the Total Amount. You may override this behavior: Check Excl Period Covered (see below) and the Monthly Rate and Number of Months being billed will not be printed - only the total Amount and Description and any information that was entered in the Note box (see below) of the service. This "exclude" feature is available for any item being billed for a period greater than one month. |
| ▪ | Bi-Annually - They are to be billed once every other year for two years of service. All other capabilities are the same as they are for Annual billing. |
| ▪ | Bi-Monthly - They are to be billed once every two months for two months of service. All other capabilities are the same as they are for Annual billing. |
| ▪ | Monthly - They are to be billed once every month for one month of service.. |
| ▪ | Quarterly - They are to be billed once every three months for three months of service. All other capabilities are the same as they are for Annual billing. |
| ▪ | Semi-Annually - They are to be billed once every six months for six months of service. All other capabilities are the same as they are for Annual billing. |
| • | Starting Month - Using the Drop-Down Selection List provided, Choose the Month in which this billing should be started. |
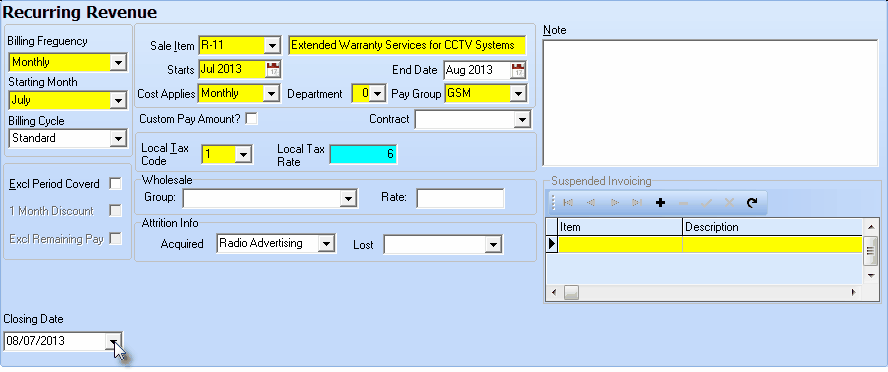
| ▪ | In the example below, this Subscriber is being Monitored for a Dealer and has agreed to have their Monitoring Service Payment billed Quarterly so this Recurring Billing entry will be included in that batch of Recurring Revenue bills for that Dealer. |
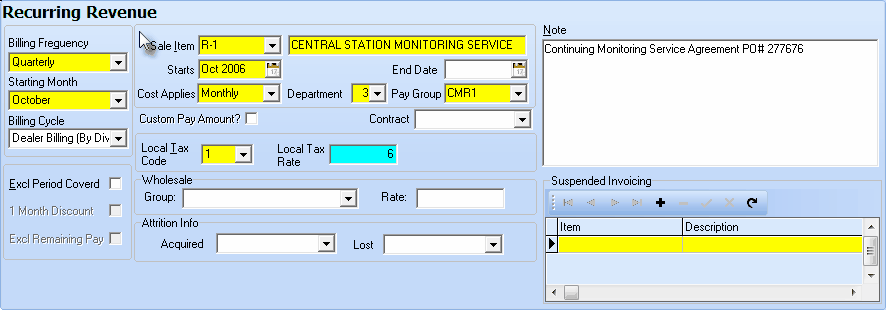
Recurring Revenue Form for Open Term Payment entry
| • | The second section - to the right - deals with Sales information: the What they are going to be billed for, and how much it will Cost. |
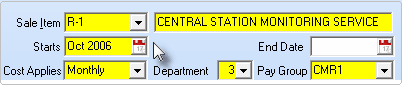
| • | Sale Item - Using the Drop-Down Selection List provided, Choose the Recurring Revenue Service to be billed from among those that you previously defined in the Sale-Purchase Items Form. |
| ▪ | If you want to assign a special Recurring Billing Price for this specific Subscriber, use the Custom Pay Amount feature (see below). |
| ▪ | Note: However, the default Price for this service set when you entered this Recurring Revenue Sale-Purchase Item is the default Price that is shown when manually entering this item on an Invoice. |
| • | Description - Enter a Description for this Service - by default the system will enter what you defined in the Sale-Purchase Items Form. |
| • | Starts - By identifying when the billing will start, you can set up billing to start months or even years later, automatically. This is useful when you provide some months of free service(s) prior to commencement of billing. By setting it up in advance, you will not forget (nor will you have) to do so later. |
| ▪ | Using the Select Month and Select Year dialogue box - with Drop-Down Selection Listes for each - enter the Month and Year this Service is (was) to be started. |
| ▪ | Click OK to save your selections. |
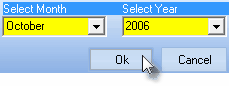
Month and Year Selector
| • | Cost Applies - There are two ways the predefined cost for this service may be applied. Use the Drop-Down Selection List to make your choice. |
| 1. | Monthly - The charge will be the pre-set Pay Group Amount multiplied by the number of months of service being billed - unless you override the default price with a Custom Pay Amount (see below). |
| 2. | Per Billing Frequency - The charge will be the pre-set Pay Group Amount regardless of the number of months of service being billed - unless you override the default price with a Custom Pay Amount (see below). |
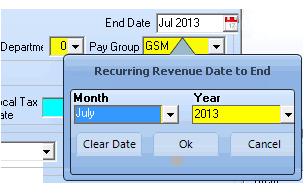
| • | End Date - Optionally, enter the Date when the Automatic Billing for this Open Term item should End (i.e., if the contract is not renewed, or because of some other arrangement with that Subscriber). |
| ▪ | So, if either you, or the Subscriber cancels this service, you should insert the End Date at that time. |
| ▪ | Click the Calendar Icon in the End Date field. |
| ▪ | The Recurring Revenue Date to End dialog is displayed. |
| ▪ | Enter the Month and Year using the Drop-Down Selection Listes provided. |
| ▪ | If there has been a Recurring Revenue Invoice created which covers a portion of the service ("an Unearned Period") that includes any period of time after the End Date that was entered here, the User will be given the opportunity to request that a Credit Memo be issued for this unused service period. |
| o | When there is an Unearned Period which has already been billed for this Recurring Revenue item, a temporary Closing Date field will be displayed at the bottom of the Form - which may be modified using the Drop-Down Date Selection Box provided. |
| o | The Create Credit dialog will be displayed. |
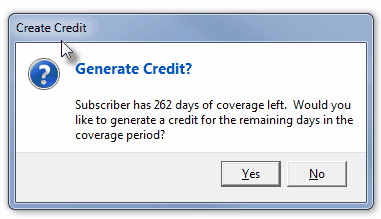
Create Credit message
| o | Click the Yes button to automatically create that Credit Memo, or No to ignore this suggestion. |
| o | This Closing Date information is also used in the Attrition Report to identify terminating services. |
| • | Cancelling Multiple Recurring Revenue Items - If the Subscriber has more than one Recurring Revenue Item defined, and an End Date was newly assigned to one of them: |
| ▪ | The Multiple Recurring Revenue dialog will be displayed asking if there are other Recurring Revenues Items that should also be Ended. |
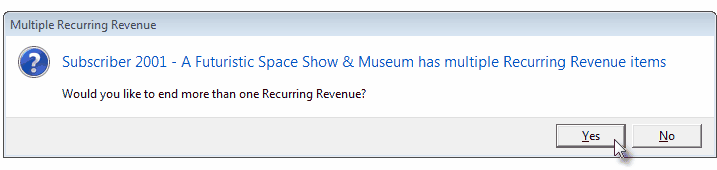
| ▪ | Answer Yes to do so and the Select Recurring Revenues to End dialog will be displayed. |
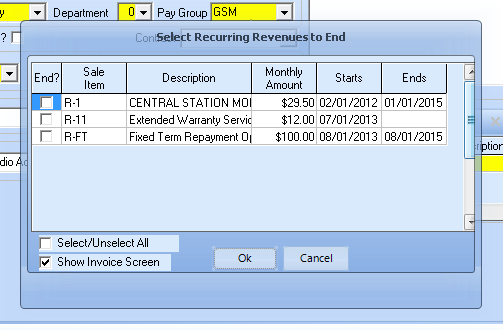
Select Recurring Revenues to End dialog
| o | End? - Check this box for each Recurring Revenue Item that should also be Ended. |
| o | Ok - Click the Ok button. |
Create Credit message
| o | You will be offered the opportunity to Generate a Credit Memo for any of these Cancellations. |
| ◆ | In those cases where you have arranged an escalating Billing Rate for a Recurring Revenue related service |
| o | Enter multiple Auto Bill records, each with a different starting date (one year after another), and each with a End Date indicating when that Billing Rate will should end (and the next one begins). |
| o | In this way, at the time of the original system's sale, you could define multiple future rate increases (and not forget to do them later) that would then occur, automatically. |
| ► | Note: The Status button at the bottom of the Recurring Revenue Form is Green (Active) when this Open Term item is currently being billed, and Red (InActive) when that assigned End Date has passed. |
| • | Department - If you using the General Ledger System and have defined multiple Departments for tracking Sales by Department, use the Drop-Down Selection List to Choose the appropriate Department number - the default is zero ("0"). |
| • | Pay Group - Use the Drop-Down Selection List to Select the appropriate Pay Group for setting the Price for this service. |
| ▪ | Assigning a Pay Group to establish the Price for this Service allows you to globally re-set the Price for this Service by simply changing the Price in the Pay Groups Form. |
| ▪ | Remember the Price set is still subject to how you assess that Price (Monthly or on a Per Billing Cycle basis) based on your Cost Applies selection (see above). |
| • | The third section - below the Sales information area - allows you set Sales Tax Codes & Rates, to override the default billing amount with a Custom Pay Amount for this item, to identify the Contract associated with this Recurring Revenue Item, and to establish Wholesale Billing: |
| • | Contract - If recorded for this Subscriber in the Contracts Form, using the Drop-Down Selection List provided, Choose the associated Contract for this Recurring Revenue Item. |
| • | Custom Pay Amount? - Overriding any Price pre-set in the Pay Groups Form. |

Custom Pay Amount Check box, Amount field, & Contract drop-down box
| ▪ | However, you may override this normal pricing behavior by entering a Custom Pay Amount, because there are times when you will want to make an exception and fix the price for a service: |
| ▪ | That Custom Pay Amount entered in the Rate Box becomes the permanent price and will not be re-set by the Pay Group Change process |
| ▪ | If the record was previously assigned a Pay Group Code, once a Custom Pay Amount has been set, the previous Pay Group assignment is canceled automatically. |
| ► | Note: Keep in mind the following information when manually creating Recurring Revenue Invoices: |
| ii. | That Description and Price will be inserted when manually creating an Invoice for that service. |
| iii. | Both the Description and Price can be changed on an Invoice by Invoice basis. |
| ▪ | To manually set the Price, Check the Custom Pay Amount? box and then enter the special rate in the Rate Box that will be provided (see above). |
| ▪ | When you Check the Custom Pay Amount box, the Rate Increase information box will appear at the bottom of the Form. |

Rate Increase information box for Custom Pay Amount
| ▪ | Next Increase - By default, it will be 12 months from Today. If needed, use the Drop-Down Date Selection Box to enter a different date for the Next Increase. |
| ▪ | Last Increase - By default, when initially entered, it will be set as Today. This is a system maintained field. |
| ▪ | Locked For - By default, it is set at 12 months. If needed, enter a different number of months that this rate is to be Locked For. |
| ▪ | Note - Enter any comment or additional information for the service being billed. |
| o | The additional information will be included on the Invoice when created. |
| o | This additional information may include Purchase Order Numbers, a more detailed Explanation of the Service being provided, or other Reference Information that will help the Subscriber better understand this recurring charge. |
| ► | Important Note: See the Custom Pay Increase information which provides a simple way to selectively increase, when appropriate, these Custom Pay Amounts. |
| • | Contract - If appropriate, use the Drop-Down Selection List to Choose the associated (Monitoring) Contract for which this Open Term Recurring Billing record is being created. |
| • | Sales Tax Rate Codes - based on the Sales Tax Class - there are two possible Sales Tax Rate & Code field sets that may be displayed: |
| 1. |  |
Sales Tax Codes & Rates for Users with only a Local Sales Tax
| 2. |  |
Sales Tax Codes & Rates for Users with both Local & National Sales Tax Rates
| ▪ | The following is a list of all of the possible Sales Tax Rate Codes: |
| o | Y = Yes the item is Taxable and there is only one Sales Tax Rate defined for this Subscriber's Sales Tax Class. |
| o | E = The Subscriber is Tax Exempt. |
| o | N = No this Subscriber is not Taxable for this item. |
| o | 1 = (2 or 3) The item is Taxable and among the multiple Sales Tax Rates defined for this Subscriber's Sales Tax Class, this is the appropriate Tax Rate |
| ▪ | Local Tax Code - Use the Drop-Down Selection List to Choose the appropriate Sales Tax Class Sales Tax Rate Code (Y,N,1,2 or 3) representing the Sales Tax Rate that must be charged. |
| ▪ | Local Tax Rate - The Sales Tax Rate will be inserted automatically based on the assigned Sales Tax Class rate code. |
| ▪ | National Tax Code - This field is only displayed if you must charge a National Sales Tax. |
| o | Use the Drop-Down Selection List to Choose the correct National Sales Tax Rate Code . |
| ► | Note: Once this (Local and/or National) Tax Code and Tax Rate information is saved, and if this information is subsequently modified on the Accounting Infomation tab of the Subscribers Form, a Rate Change Detected message will be displayed with the option to Update the affected Auto Bill records with the correct (Local and/or National) Tax Code and Tax Rate information. |
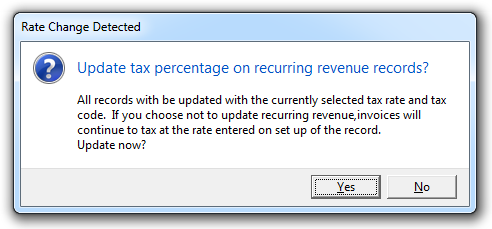
Rate Change Detected
| • | Wholesale Billing - Group & Rate Information - For those who are, and for those that use a Contract Monitoring Provider: |

| ▪ | This area accommodates Dealer Billing when you are their Contract Monitoring Provider, and the tracking of what is owed when you use a Contract Monitoring Provider. |
| o | For the Subscribers for whom you outsource their Monitoring Service, to a Contract Monitoring Provider, enter that Company's Wholesale Group information using the Drop-Down Selection List provided, and enter the Wholesale Rate that you are being billed by that Contract Monitoring Provider. (see Wholesale Groups, and the Wholesale Groups Report chapters for more information). |
| ▪ | Dealer Billing in MKMS allows you, as the Contract Monitoring Provider, to Invoice the Recurring Billing for the Dealer's Accounts, collect the Receipts and so be assured of accurate and reliable payment for the contracted monitoring services you are providing. |
| o | The Wholesale Rate field allows you to define the internal billing rate to that Dealer for the Monitoring/Services you are providing for their Accounts. |
| o | Thereafter, detailed Wholesale Collections Report will list what was Invoiced and Collected and so will allow you to easily identify, manage, and collect what's owed from, these Accounts. |
| • | The other sections - on the lower left part of the Form - deal with special Invoice Formatting, detailed Descriptions, and Attrition Tracking information: |
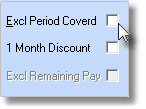
| • | Exclude Period Covered - Labeled Excl Period Covered - If you do not want the Monthly Rate and Number of Months being billed to be printed on the Invoice, Check Excl Period Covered. |
| • | One Month Discount for Annual Payment - Check 1 Month Discount to provide the Subscriber One Month Free for Annual Payment of this service. |
| ▪ | Only available for Annually billed services (see Billing Frequency above), |
| o | If selected, a One Month Free for Annual Payment message will be printed on their Invoice. |
| o | A separate line item, subtracting one monthly amount will be included on the Invoice. |
| • | Attrition Info - Indicate how you attained this Account, and if necessary, how you lost the Account by entering the appropriate Attrition Type. |

| ▪ | Acquired - Use the Drop-Down Selection List provided to Choose the appropriate Revenue Acquired Attrition Type code that best explains how you got this Account. |
| ▪ | Lost - Use the Drop-Down Selection List provided to identify the appropriate Revenue Lost Attrition Type code that best explains the reason why this Account was Lost. |
| • | Note - This information will be printed on the Invoice. This information might include: |
| ▪ | An additional explanation for, or a comment about, the service being billed. |
| ▪ | The Subscriber's Purchase Order Number |
| ▪ | A more detailed explanation of the service(s) being provided |
| ▪ | Other reference information that will help the Subscriber better understand this charge. |
| • | Click the  Icon to to record this Open Term Recurring Revenue record. Icon to to record this Open Term Recurring Revenue record. |
| • | You will then be asked if you want to Create a Pro-Rated Invoice? |
| • | Create Now? - Choose this option to create a Pro-Rated Invoice Invoice for the appropriate amount (see "Prorated Invoices" below) |
| • | Suspend? - Choose this option to create a Pro-Rated Invoice entry in the Suspended Invoicing section (see the "Suspended Invoicing" section below). |
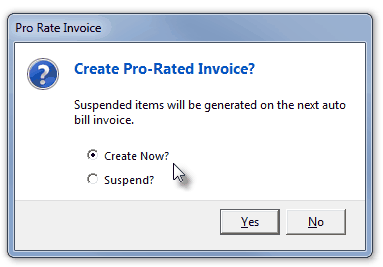
Pro Rate Invoice dialog
| • | Click Yes to do so, or No to finish the process without implementing either prorated billing procedure. |
| • | Suspended Invoicing - If the Suspend? option is selected, an entry is made in the Suspended Invoicing section. |
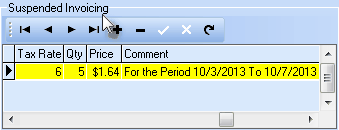
Recurring Revenue Form - Suspended Invoicing section
| • | Each Suspended Invoice entry will be inserted as a Detail Line Item when the initial (next) Automatic Billing process is executed for this Subscriber. |
| • | After the Automatic Billing process is executed, the Suspended Invoice entry will be deleted automatically. |
| • | Prorated Invoices - If you have chosen to Create a Pro-Rated Invoice, that Invoice will be calculated as follows: |
| 1. | An Average Month is assumed as 30 days. |
| 2. | The number of Days Remaining from today's date to the end of the Average Month is calculated and inserted as the Detail Line Item's Qty. |
| 3. | The Payment entered above is divided by 30 to establish a Daily Rate which is inserted as the Detail Line Item's Price. |
| 4. | That Daily Rate is multiplied by the number of Days Remaining to establish the Detail Line Item's Net. |
| • | The Invoice is displayed (as in the example below). |
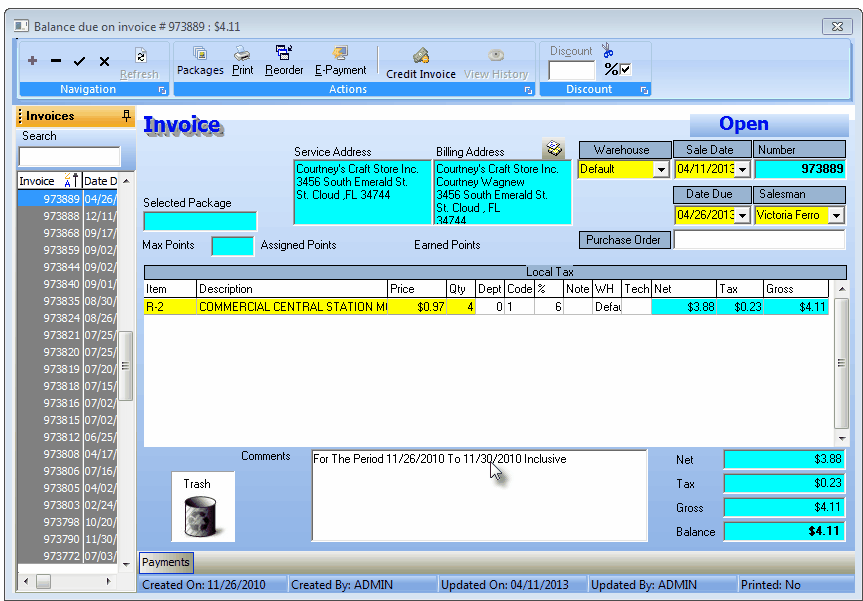
Pro-Rated Invoice showing Qty as the 4 days billed at pro-rated daily rate - the Price - with the Comment itemizing the period billed
| ▪ | To accept the Invoice as presented, Click Save ("ü"). |
| ▪ | You may also modify any part of the Invoice (except what is displayed in Teal, and then save it. |
| • | Once all but the Last Payment is billed, the final payment will automatically be calculated based on the final, unpaid, balance remaining. |
| □ | Manual Changes for Open Term Recurring Revenue Billing |
| • | Sometimes is is necessary to manually set the Payment Amount such as when using the Fixed Term billing feature (which allows you to Invoice for such things as Leased System Payments and Installment Sale Payment Plans) or for special customers (like the Boss's daughter): |
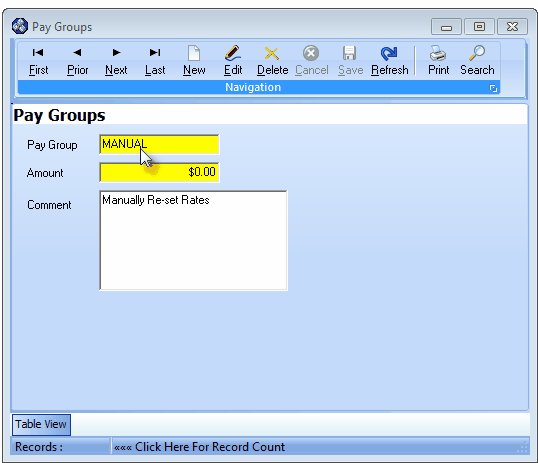
| • | Create a Pay Group that will be used for manual changes (such as those that would be done to an installment payment) and assign that code to these type of Payments. |
| • | It is also a good practice to define a Pay Group code that will allow you to manually increase rates for special customers, too. |