| • | You really should know why! |
| □ | Why did they come to you? |
| • | Was it from a regular Sale, a purchased Account, a take-over of another Company's service, results of referral, or a new home pre-wire that moved in and ordered monitoring? |
| • | Was it a poor service experience, unacceptable monitoring response time, they simply moved away or were foreclosed on, there was a take-over by another Company, or a pre-wire that went with some other Company? |
| □ | To actually know Why, enter the appropriate Attrition Type code, as Accounts come on-line (Acquired) and go off-line (Lost), in each (Subscribers) Account's Auto Bill Form. |
| • | Keep in mind that Sales are not what makes an Alarm Company successful over the long term. |
| • | This Attrition Report provides that all important Recurring Revenue related information. |
| • | It is a better way to address your on-going business's success. |
| □ | If you do enter Acquisition and Attrition information in a timely and consistent manner, this Attrition Report will provide you with clear, valuable and up to the minute information about your Recurring Revenue and account base stability. |
| • | From the Main Menu: Select Reports. Select the Accounts Receivable Reports sub-menu. Then Click Attrition Reports. |
| • | Use this Attrition Report to research the information needed to better understand a Company's Acquisition and Attrition results. |
| □ | Attrition Report tabs - There are three tabs on the Attrition Report dialog. |
| • | Options - Initially only the Options tab is shown (until you make your Options selections and Select Print). |

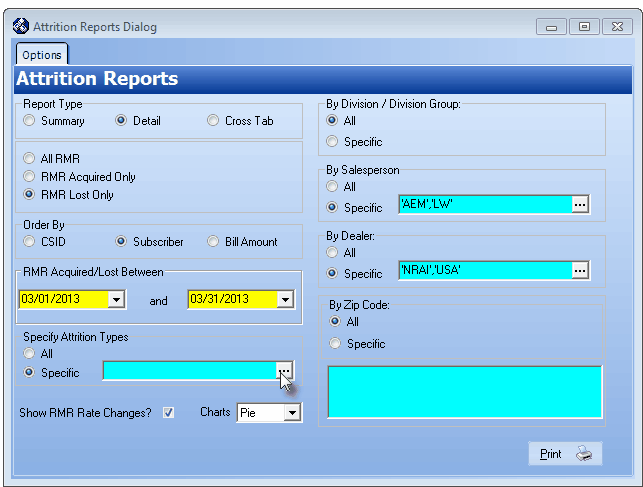
Attrition Reports - Options tab
| • | Report Type - Choose how much detail should be included in this report. |

Attrition Report - Report Type options
| • | Summary - Summarize the requested RMR Selection for Attrition and/or Acquisitions, the number that occurred and total dollar value gained and/or lost. |
| • | Detail - Lists each requested RMR Selection for Attrition and/or Acquisitions, the Subscribers, CSID, Contact, Telephone, Date Acquired/Lost and the dollar Value gained and/or lost on each. |
| • | Cross Tab - Provides a tabular, spreadsheet style report for one year based on a defined Starting Date. |
| • | RMR Selections - Note: RMR ("Recurring Monitoring Revenue") actually refers to any Recurring Revenues defined in the Subscribers Auto Bill Form |
Attrition Report - RMR Acquired Only option
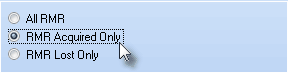
| • | All RMR - Report on all Recurring Revenue status changes (Acquisitions and Attrition). |
| • | RMR Acquired Only - Report on all Acquired Recurring Revenue. |
| • | RMR Lost Only - Report on all Lost Recurring Revenue |
| • | Order By - Choose the sequencing of this report. |
| • | Subscriber - List alphabetically by the Subscribers names. |
| • | RMR Acquired/Lost Between - Specify the Date Range of the data to be included in this report. |
| • | Enter the Starting and Ending Dates of the period to be reported. |
| • | Based on certain selected Options, the Date Range is automatically inserted, or the End Date is calculated based on the Starting Date that was selected. |
| • | Specify Attrition Types - Choose whether to include all Attrition Types, or to limit the report to a specific Attrition Type: |
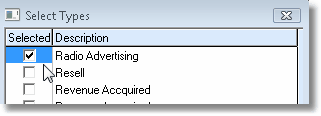
Select the Specific Acquisition/Attrition Type
| ▪ | Use the Select Types look-up box (Click the Ellipse "..." button) to identify each desired Attrition Type. |
| ▪ | Check the desired Attrition Type(s). |
| ▪ | Click the OK ü button to insert the selection(s) in the Specific field. |
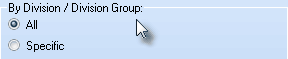
| • | By Division/Division Group: - Include all, or limit the reporting to Accounts within a specific Division or a Division Group: |
All or a Specific Division or Division Group
| • | All - All Subscribers will be included, regardless of what or if they have a Division code assigned. |
| ▪ | If a Division is selected using the Drop-Down Selection List provided, the report will be limited to Subscribers assigned that Division code. |
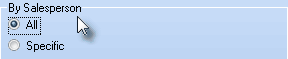
| • | By Salesperson: - Include all, or limit the reporting to Accounts assigned to a specific set of one or more Salespersons (Employees): |
All or a Specific Salesperson
| • | All - All Subscribers will be included, regardless of who they have assigned as a Salesperson. |
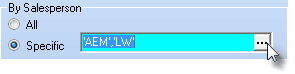
| • | Specific - To include only those Subscribers who are assigned to a specific set of one or more Salespersons, Click Specific. |
| ▪ | When one or more Salespersons are selected using the Select Salesperson dialog, the report will be limited to those Subscribers that have been assigned to the selected Salespersons (Employees). |
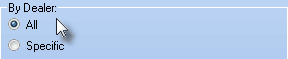
| • | By Dealer: - Include all, or limit the reporting to Accounts being monitored for a specific Dealer. |
All or a Specific Dealer
| • | All - All Subscribers will be included, regardless of whether they are being monitored for a Dealer. |
| • | Specific - To include only those Subscribers who are assigned to a specific set of one or more Dealers, Click Specific. |
| ▪ | When one or more Dealers are selected using the Select Dealers dialog, the report will be limited to those Subscribers that have been assigned to the selected Dealer(s). |
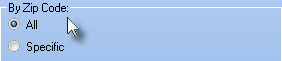
| • | By Zip Code: - Include all, or limit the reporting to Accounts located within a specific Zip Code. |
All or Specified Zip Code(s)
| • | All - All Zip Codes will be included, regardless the Subscriber's Zip Code location. |
| • | Specific - To include only those Zip Codes specifically identified to be included in this report, Click Specific. |
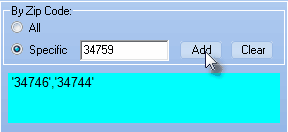
Specific field, Add button, Selected Zip Codes field
| ▪ | Enter a Zip Code in the Specific field. |
| ▪ | Click the Add button to insert a Zip Code into the Selected Zip Codes field. |
| ▪ | Repeat this two-step action, as needed, to identify all of the required Zip Codes. |
| ▪ | If one or more Zip Codes are Added, the report will be limited to Subscribers that are located within any of those Zip Codes. |
| • | Show RMR Rate Change? - Check this box to have the Recurring Revenues Rate Change information included. |
Attrition Reports - Options tab - various options selected
| • | Charts - Using the Drop-Down Selection List provided, you may request that a Pie or Bar Chart be included as part of this report's output. |
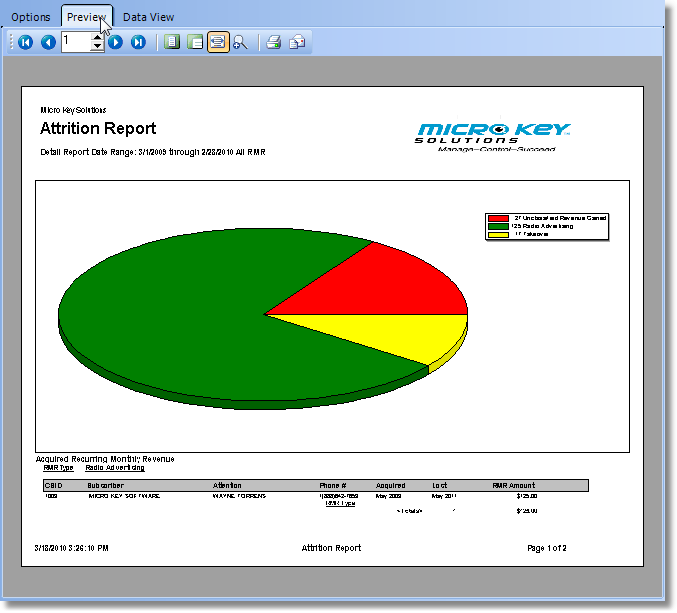
Attrition Report - Preview tab with Pie Chart
| • | Print - Click the Print button  to Preview and optionally Print (to a File or a Printer) this Attrition Report. to Preview and optionally Print (to a File or a Printer) this Attrition Report. |
| □ | Preview - The Preview tab presents the report which resulted from the Options you've selected. |
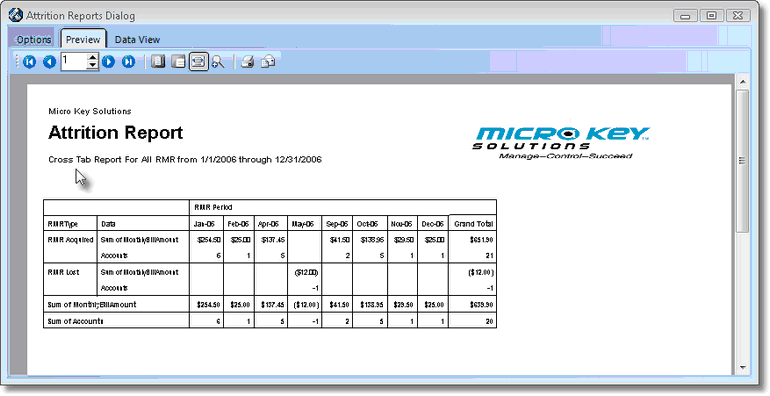
Attrition Report - Cross Tab Report format
| • | Up Arrow/Down Arrow - hi - Moves the report one line up, or one line line down, respectively. |
| • | Page Up/Page Down - Moves the report to the previous or next page, respectively. |
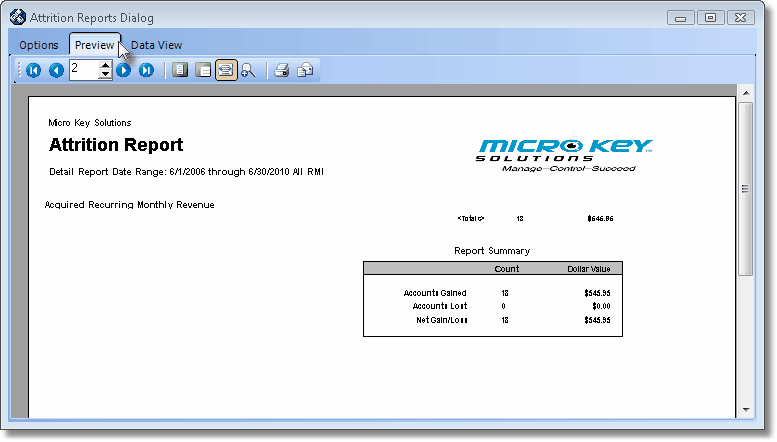
Attrition Report - Preview tab
| • | Home -  - Using either the screen or your Keyboard's Home key, moves the report to the top of the first page. - Using either the screen or your Keyboard's Home key, moves the report to the top of the first page. |
| • | End -  - Using either the screen or your Keyboard's End key, moves the report to the bottom of the last page.Arrows - The arrows allow you to move back and forth, from page to page. - Using either the screen or your Keyboard's End key, moves the report to the bottom of the last page.Arrows - The arrows allow you to move back and forth, from page to page. |
| • | Number - Indicates the page number you are viewing. |
| • | You may also type in a specific page number, Press 8 Enter and that page will be displayed immediately. |
| • | If you enter an invalid page number, it will be ignored. |
| • | Fit To Page - Click the first button after the arrows to size a full page of the report to fit the screen. |
| • | Zoom To 100% - Click the second button after the arrows to display the page at 100% (of the printed view). |
| • | Fit To Page Width - Click the third button after the arrows to size the page of the report to fit the full width of the screen. |
| • | Zoom To Percentage - Click the fourth button after the arrows to re-size the page of the report by percentage. |

| • | When you Click the Zoom To Percentage button, the Percentage selector will be displayed. |
| • | You may then Click the Up or Down ‚ arrows to set the exact amount of Zoom you want. |
| • | Print - Click the Print button to Print (to a File or a Printer)  the displayed Attrition Report. the displayed Attrition Report. |
| • | Email - Click the Email button  to send the Report to an Email Address of your choosing. to send the Report to an Email Address of your choosing. |
| • | To Exit the Preview tab and Close this Report dialog Form, Click the Close button x on the right at the top of the Preview tab. |
| □ | Data View - This view provides a tabular (spreadsheet style) presentation of the selected data. |

Attrition Report - Data View tab
| • | Arrows - Click the arrows to move through the record. |
| • | Export - Exporting the data from this Data View tab (note the "fly-over" help available on these buttons): |
| • | Export to CSV - Click the first button after the arrows to export the data to a Comma Separated Values (CSV) file format. |
| • | Export To Excel - Click the second button after the arrows to export the data to an Excel (.xls) file format. |
| • | Export To Html - Click the third button after the arrows to export the data to an HTML formatted file. |
| • | To Exit the Data View tab and Close this Report dialog Form, Click the Close button x on the right at the top of the Data View tab. |

