| □ | There are two types of Contracts tracked by MKMS: |
| a. | In order to assign your Subscriber's Monitoring Related Contract information, you must first create the Codes and Descriptions representing these Monitoring Related Contract Types being offered by your Company. |
| b. | Monitoring Contract Types are defined by Choosing Maintenance from the Main Menu and Selecting the Central Station sub-menu then Clicking Contract Types. |

Contract Type Form
| c. | These User-Defined Monitoring Contract types are used to identify the type of Monitoring Related Services that are being provided to each Subscriber. |
| d. | The Monitoring Contract is assigned to a Subscriber using the Contracts Form (documented in "Entering a Subscriber's Monitoring Related Contract information" below). |
| a. | In order to assign your Subscriber's Service Related Contract information, you must first create the Codes and Descriptions representing the Service Contracts being offered by your Company. |
| b. | Service Contracts are defined by Choosing Maintenance from the Main Menu and Selecting Service Tracking Items and Choosing Service Contracts. |
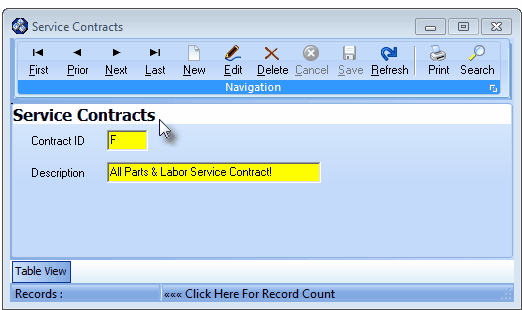
Service Contracts Form
| c. | These User-Defined Service Contract types are used for identifying a Subscriber's Extended Warranty and/or Service Agreement |
| ► | Note: Before assigning your Subscriber's Monitoring Related Contract information, you must first create the Codes and Descriptions representing the Monitoring Related Contract Types being offered by your Company. |
| □ | Entering a Subscriber's Monitoring Related Contract information: |
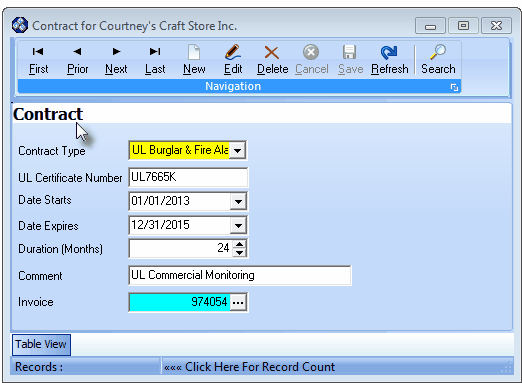
Contract (information) Form
| • | This Contract Form may be Re-sized by Dragging the Top and/or Bottom up or down, and/or the Right side in or out. |
| • | Navigation Menu - The Navigation Menu is located at the top of the Contract Form. |

| • | This Navigation Menu provides the normal Record Movement, New, Edit, Delete, Cancel, Save, and Refresh options; as well as a Search function. |
| • | Record Editing section - The details of the currently selected record are displayed below the Navigation Menu at the center (Main Body) of the Contract Form. |
| • | Table View tab - A tabular (spreadsheet style) Table View of the currently defined Contracts is accessible by Clicking the Table View tab at the bottom of the Contract Form. |

| • | To display a specific Contract record in the Record Editing section, Click on that record within the Table View section, or use the Search Icon (see the "Using the Search Icon" section later in this chapter). |
| • | This Table View information may be Pinned in Place by Clicking the Pin Icon on the right. |

Contract Form - with Table View tab Pinned Open
| ▪ | You may Un-Pin this Table View by Clicking the Pin Icon again. |
| ▪ | Click on any listed record to display that information in the center (Main Body) of the Form. |
| • | There are nine columns of data in this Contract Record Listing: |
| • | Each column's Header Name describes the data contained in that column. |
| ▪ | Clicking on a Header Name will set the order in which the Contracts will be listed. |
| ▪ | Clicking on the same Header Name will set the order in the opposite direction (ascending vs. descending). |

| ▪ | The Header Name that is determining the Order of the list will have an Icon indicating the Order displayed next to that Header Name. |
| • | Click the  Icon to start the Contract entry in the Record Editing section. Icon to start the Contract entry in the Record Editing section. |
| ▪ | Contract Type - Using the Drop-Down Selection List provided, Choose one of the predefined Monitoring Contract Types. |
| ▪ | UL Certificate Number - If this is a UL® installation, enter their certificate number (up to 10 alpha-numeric characters). |
| ▪ | Date Starts - Using the Drop-Down Date Selection Box provided, Choose the Starting Date of this Contract. |
| ▪ | Date Expires - Using the Drop-Down Date Selection Box, enter the expiration date for this Contract. |
| ▪ | Duration (Months) - This number is calculated automatically and inserted in this field but may be modified, if required. |
| ▪ | Comment - Provide information/note/comment that could better clarify this Contract entry, if appropriate. |
| ▪ | Invoice - Click the Ellipse to display the Select Invoice dialog. |
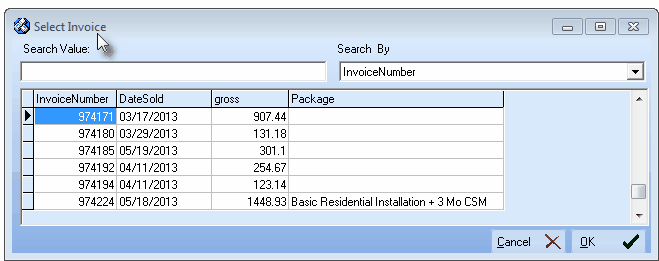
Contracts From - Invoice field - Select Invoice dialog
| o | Select the appropriate Invoice Number (representing the initial billing for this Contract). |
| o | Click the OK übutton to Close the Select Invoice dialog. |
| o | The elected Invoice Number will be inserted into the Invoice field. |
| • | Click the  Icon to record this entry. Icon to record this entry. |
| • | Any number of additional Contracts may be identified. |
| □ | Using the Search on Navigation Menu of the Contract Form. |
| • | Search - Click the Search to retrieve an existing Contract record to review or modify it, as needed. |

