Subscribers Form - General Menu > Monitoring Icon on General Menu
| • | On the Main Menu of MKMS Select the Outlook Bar Menu and Choose Accounts Receivable, then Click F3 Subscriber. Alternately, just Press the F3 function key. |
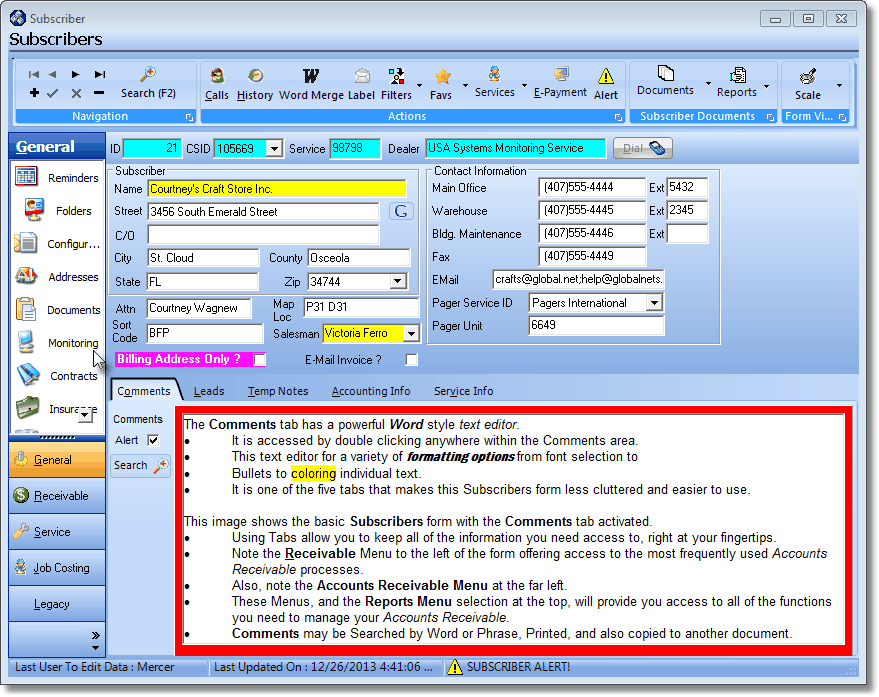
| • | The Subscribers Form will be opened, generally with the Comments tab selected. |
| □ | Entering a new Subscriber: |
| • | System managed information: |

| ► | The Subscriber's ID is system generated once the record is initially saved. |
| ► | Once entered, data entered in these fields are automatically inserted into the appropriate fields as shown above. |
| • | Click Add ("+") to start a new Subscriber record. |
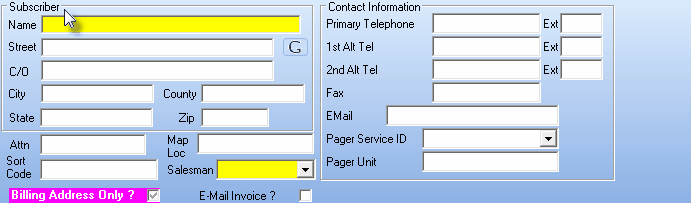
Default Subscribers Data Entry Form
| • | Name - Enter the Subscriber's name. |
| • | Entering a Business Name |
| ▪ | Enter the Name as it would be listed in the Telephone Directory |
| ▪ | If a prefix is part of the name but that name is not normally alphabetized by that prefix (such as the word "the"), enter the name followed by a tilde ("~") and the prefix. |
| ▪ | Example: "ABC Company~The" |
| • | Entering an individual Person's Name |
| ▪ | Last Name is entered first |
| o | (The tilde tells the system that everything after it is the Employee's first name and middle initial.) |
| ▪ | Enter the First Name and Middle Initial |
| ▪ | For Prefixes (Mr., Mrs., Ms., etc.), enter them after the Tilde, and before the first name |
| ▪ | For Suffixes (MD., Jr., III, etc.), enter them after the last name and before the tilde. |
| o | Example: "Smith, MD~Dr. James T." |
| • | Street - Enter the Street address and name. |
| • | C/O - The Care Of field also provides a place to expand the Subscriber's address information, and will appear below the Attention line, if entered. |
| • | City, County, State, Zip - Enter the City, County, State (or Province) code and Zip (or Postal) code. |
| • | Attn - The Attention line will be printed below the Subscriber's Name as part of their Mailing Address (on reports and Invoices sent to the Subscriber). |
| • | This may be used for a building name, a person, suite number, additional address information. |
| • | It may be skipped entirely - depending on what you need. |
| • | Map Loc(ation) - This field is used to record the page number and map coordinates, of GPS information, for this location. |
| • | Sort Code - This may be entered to help you classify this Subscriber. |
| • | Up to 20 characters including upper and lower case letters, numbers, spaces and normal punctuation marks may be entered. |
| • | The Subscriber Listing report allows you to Filter based on - among many other fields - the Sort Code. |
| • | Salesman - Using the Drop-Down Selection List , Choose the Salesman of record for this Subscriber. Your Sales staff must be predefined as Employees. |
| • | Billing Address Only? - Check the box only if this record is being entered as a billing address (no service is provided at this address) for one or more other Subscriber locations (see Bill Payer). |
| □ | Continue the Subscriber entry by completing the Contact Information box. |
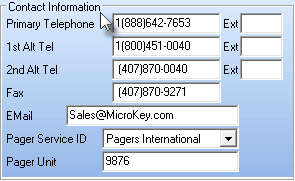
Contact Information on Subscribers Form
| • | Primary Telephone - Enter the Primary Telephone Number following the rules below. |
| ◆ | If you have not Checked Remove Phone Formatting in User Options Form's Company Options tab, Formatting - parentheses and dashes - are applied automatically by the system - you do not have to type them. |
| • | If no Area Code is required, enter the telephone number (it cannot start with a 1) |
| • | If 10 digit dialing is in effect - no "1"prefix is needed, but you do need to dial an Area Code as part of the telephone number: |
| ▪ | Press the <Space Bar> first. |
| ▪ | Then enter the three digit Area Code. |
| ▪ | Finally, enter the seven digit Telephone Number. |
| ▪ | Correct formatting will occur automatically. |
| • | Long distance Telephone Numbers (with a "1" prefix) are entered as such with the formatting parentheses and dash applied automatically. |
| • | Ext - Enter any Extension number that is required. |
| • | 1st Alt Tel - Continue with the Alternate Numbers as needed following the Telephone Number entry rules above. |
| • | Ext - Enter any Extension number that is required. |
| • | 2nd Alt Tel - Continue with the Alternate Numbers as needed following the Telephone Number entry rules above. |
| • | Ext - Enter any Extension number that is required. |
| ► | Important Note: The field Labels (i.e., "Primary Telephone", "1st Alt Tel", and "2nd Alt Tel") for the first three Telephone Number fields may be User Defined for each Subscriber individually: |
| i. | Double-Click the field Label to be changed. |
| ii. | This will open the Modify Label? dialog. |
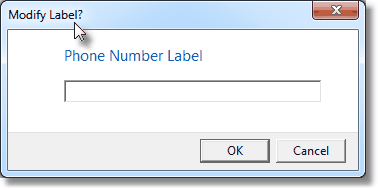
Modify Label? dialog
| iii. | Enter the desired Telephone Number field Label and Click OK. |
| iv. | That Label will replace the existing field's Label. |

Contact Information - New Telephone Number Labels
| ▪ | To cancel any User Defined Label: |
| i. | Double-Click on the changed field's Label to be canceled. |
| ii. | This will open the Modify Label? dialog. |
Modify Label? dialog
| iii. | Press Enter and Click OK. |
| iv. | That User Defined Label will revert to the field's original Label. |
| • | Fax - Enter their Fax number. |
| • | E-Mail - Enter their E-mail address for secure messages. |
| • | If you are using the Communications Module and have elected to use the Notification feature associated with Monitoring these fields will be activated, otherwise they will be unavailable: |
| • | Pager Service ID - Enter the Page Service ID using the Drop-Down Selection List , if applicable, for this Subscriber |
| • | Pager Unit - Enter the Pager Unit name. |
| • | Click the Save ("ü") icon to record the Subscriber entry. |
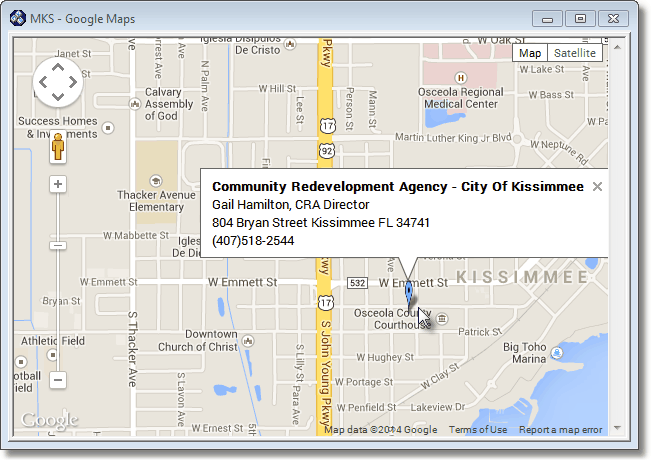
| □ | Google Maps® - Once the record is saved, thereafter you may Click the  Icon to the right of the Subscriber's address to open a Digital Map Display showing the exact location of this Subscriber. Icon to the right of the Subscriber's address to open a Digital Map Display showing the exact location of this Subscriber. |
| • | Click the Locator Icon and the Subscriber location and contact information will be displayed. |
| • | When the Subscriber Form is initially opened, the Comments tab is displayed, by default. |
| • | However, once another tab is selected and is active when the Subscribers Form is closed, that tab will become the new default. |
| • | Enter Comments as needed. |
| • | Click on the Comments tab. |
| ▪ | Simply type in your comments as needed. |
| ▪ | For entries made without opening the Edit Comments box (see below), Click Save ("ü") after finishing a Comment entry. |
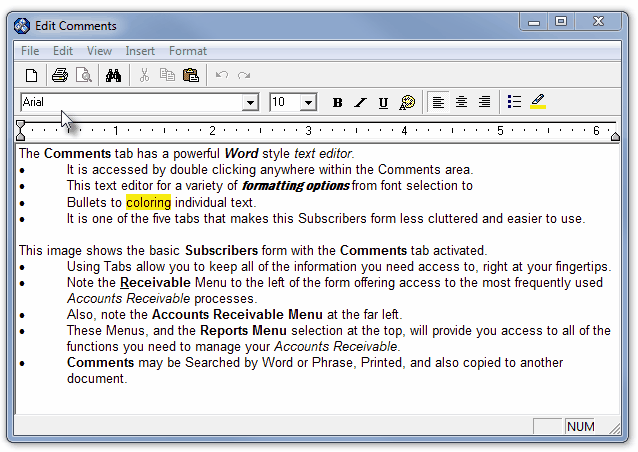
| • | Edit Comments box - However, there is a built in Rich Text Editor available - accessed by Double-Clicking within the Comments field - which referred to as the Edit Comments box |
| ▪ | This Edit Comments box provides word processing level features - most of which - you will find familiar like bold, underline, italics, highlighting and font and font color selections. |
| ▪ | If you have opened the Edit Comments box to make your entry, to save your entry, select File and Choose Save & Exit (or Press Ctrl + S). |
| • | If you've made changes to the Comments - whether by using the Rich Text Editor or by just typing them directly into the Comments field - be sure to Click the Save ("ü") Icon on the Navigation box at the top of the Form to update the Subscriber entry. |
| • | In addition to the Comments field itself, there are two other features that will assist you in getting the most benefit from the Comments that are entered here. |
| • | Alert - Check the Alert box if you want the Comments framed in Red whenever this record is viewed. This is particularly useful if the Account is Past Due, needs follow up, is receiving special care or a special resolution process is underway, or in other ways - needs to be recognized as needing the Comments information viewed by you (or whomever might also view this record) before communicating with the Subscriber. |
| • | Search - Click the Comments Form's Search Icon to locate a particular word or phrase anywhere within the Comments. |
| ▪ | Click the Comments Form's Search Icon to locate a particular word or phrase anywhere within the Comments. |
| ▪ | Enter the word or phrase you are searching for in the Find What field. |
| ▪ | Check the Match whole word only box if you want the search result limited to the exact word or phrase you entered (versus a portion of it). |
| ▪ | Check the Match case box if you want your search results to exactly match the upper and lower case of your Find what entry |

Find dialog
| ▪ | Once you've located the required text, Click the Cancel button to close the Find dialog. |
| ▪ | View or change what you've located, as needed. |
| ◆ | If you've made changes to the Comments - whether by using the Rich Text Editor or by just typing them directly into the Comments field - be sure to Click the Save ("ü") Icon on the Navigation box at the top of the Form to update the Subscriber entry. |
| □ | Temp Notes tab - Temporary Notes may be entered as a result of a Subscriber call-in, an alarm event, a verification response, and/or some other Subscriber related situation that occurred within a Central Station, |
| • | The availability of these Temporary Notes can help eliminate a double dispatch, contacting the wrong (unavailable) person, or knowing important information like a family being on vacation, or business closed because of an unusual schedule change. |
| • | So, it is often useful to attach a Temporary Note to the Subscriber's record - with a starting and ending date and time within which it will be shown. |
| • | In the event of another signal being transmitted from that Subscriber, the next Operator will be informed of the "issue" through the (automatic) display of any active Temp Notes message(s). |
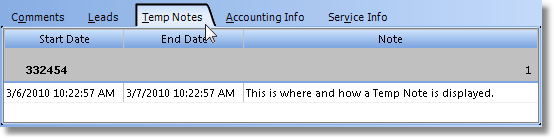
Temp Notes tab on Subscribers Form
| • | Also, if a Temp Note is active (within the date and time range set for when it is to be displayed), the Temp Notes tab will be displayed whenever the Subscribers Form is opened, but the Temp Notes tab is for Viewing Only - the actual Temporary Notes are entered using any one of these methods: |
| 1. | In MKMS following these instructions: |
| ▪ | Select the General Quick Access Menu and Choose the Monitoring to open the Central Station Data Form. |
| ▪ | Locate the appropriate Subscriber using the Search option. |
| ▪ | Click on the Notes Information Access Button. |
| 3. | In MKMSCS following these instructions: |
| ▪ | On its Subscriber Information Menu bar, Click the Temp Notes .. |
| ◆ | See the Temp Notes chapter for complete information or entering, updating and deleting them. |
| • | The Reports selection contains several Central Station related Reports. |

Special Icon selections of the Subscribers Form
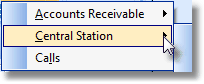
| • | Click the down arrow to the right of the Reports Icon to open the the Reports menu. |

| • | Select the Central Station option. |
| • | Select the desired Central Station related Report. |
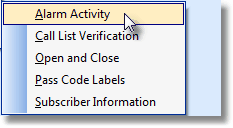
| ▪ | Alarm Activity - The Alarm Activity report's dialog will open with this Subscriber's CSID set as the selection to be reported. |
| ▪ | Call List Verification - The Call List Verification report's dialog will open with this Subscriber's CSID set as the selection to be reported. |
| ▪ | Open and Close - The Open and Close report's dialog will open for this One Subscriber set as the selection to be reported. |
| ▪ | Pass Code Labels - The Pass Code Labels dialog will open for this One Subscriber set as the selection to be reported. |
| ▪ | Subscriber Information - The Subscriber Information Report's dialog will open with this One Subscriber's Name set as the selection to be reported. |
| • | Print or View the selected Central Station related Report, as needed. |

