| □ | Subscribers who contract for the Supervision of their Opening and Closing Events, will usually want an Opening and Closing Report provided periodically. |
| • | The Open/Close Report lists each Opening and Closing event record that matches the parameters selected below. |
| • | To view the Opening and Closing Report, on the Main Menu Select Reports and Choose the Central Station sub-menu then Click Open/Close. |
| □ | Open/Close Report tabs - There are two tabs on the Open/Close Report dialog. |
| • | Options - Initially only the Options tab is shown (until you make your Options selections and Select Print). |
| ► | Note: Once a set of Options are Chosen for the Open/Close Report, they become the new default Options. |
These default Options may be reset at any time by simply making a different set of Choices.
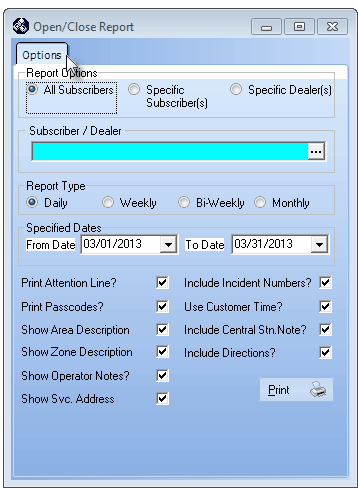
Open/Close Report - Options tab
| • | Report Options - Indicate what records are to be included. |
| ▪ | All Subscribers - By default All Subscribers with Opening and Closing records, and matching the selection criteria you make below, will be listed. |
| ▪ | Specific Subscriber(s) - To report the Opening and Closing records for a specific set of (one or more) Subscribers, |

Open Close Report - Specific Subscriber(s)
| o | Click this Specific Subscriber(s) button |
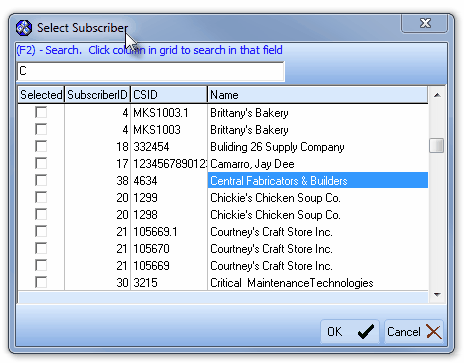
Select Subscriber dialog
| o | Click the Ellipse in the Subscriber/Dealer field to Choose those Subscribers using the Select Subscriber dialog. |
| o | Check the Selected box for those Subscribers who are to be included in this report. |
| o | Click the OK übutton to Close the Select Subscriber dialog. |

| o | The record number for each Selected Subscriber will be inserted into the Subscriber/Dealer field. |
| ▪ | Specific Dealer(s) - To report the Opening and Closing records for a specific set of (one or more) Dealers. |

Open Close Report - Specific Dealer(s)
| o | Click the Ellipse in the Subscriber/Dealer field to Choose those Dealers using the Select Dealers dialog. |
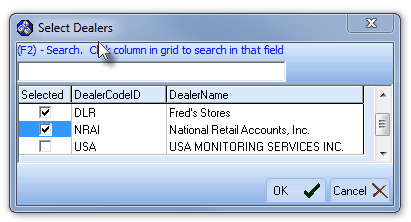
Select Dealers dialog
| o | Check the Selected box for those Dealers whose Accounts are to be included in this report. |
| o | Click the OK übutton to Close the Select Dealers dialog. |

| o | The Selected Dealer Code(s) will be inserted into the Subscriber/Dealer field. |
| • | Report Type - Indicate which Open/Close Report Frequency that should be printed. |
| ▪ | Daily - Weekly - Bi-Weekly - Monthly: Click the appropriate button for the desired Report Frequency. |
| ► | Note: If a Subscriber's Opening and Closing Events are being supervised: |
That Report Frequency (which defined how often they want to receive an Open/Close Report) is entered in the Central Station Data Form.
But even if a Subscriber currently has no Opening and Closing Events to report, if they have been assigned the selected Report Frequency, they will be listed in the Open/Close Report.
| • | Other Options - There are ten (10) additional options that allow you to further define what will be printed and how it will be formatted. |
| 1. | Print Attention Line? - To include the Attention line information, Check this box. |
| 2. | Print Passcodes? - To include the Pass Codes for each Subscriber, Check this box. |
| 3. | Show Area Description - To include any of the Area's (system partition's) Description, Check this box. |
| 5. | Show Operator Notes? - To include any Operator's Notes entered for a listed Event, Check this box. |
| 6. | Show Srv. Address -The Billing Address will always be printed in the the "Mail To:" section of the report. |
| ▪ | If this box is Checked, the actual Service Provided at: address (which may or may not be their Billing Address) will be printed in the body of the report at the beginning of the Open/Close Events list. |
| 7. | Include Incident Numbers? - To include the Incident Numbers for each Event, Check this box. |
| 8. | Use Customer Time? - To use the Customer's Time (if it is different from yours) for each Event, Check this box. |
| 9. | Include Central Stn. Note? - To include the Central Station Notes field entered in the Central Station Data Form, Check this box. |
| 10. | Include Directions? - To include the Directions field entered in the Central Station Data Form, Check this box. |
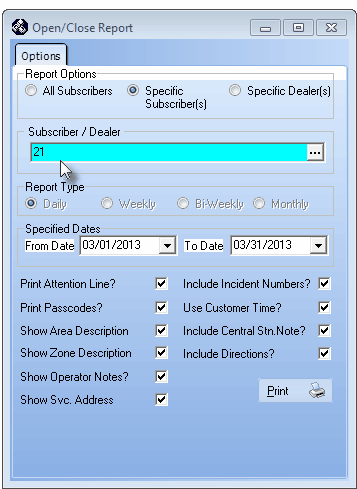
Open/Close Report dialog from Subscriber's Reports Icon menu
| a. | The related information for the currently displayed Subscriber entry will automatically populate the Options tab. |
| b. | The default Date Range will be the Current Month, but using the Drop-Down Date Selection Box provided, these Date(s) may be changed. |
| c. | All the options (see "Other Options" above for more detail about these Options) on the Open/Close Report dialog will be selected, but this may be changed, as needed. |
| • | Print - Click the Print button  to Preview and optionally Print (to a File or a Printer) this Opening and Closing Report. to Preview and optionally Print (to a File or a Printer) this Opening and Closing Report. |
| • | Preview - The Preview tab presents the report which resulted from the Options you've selected. |
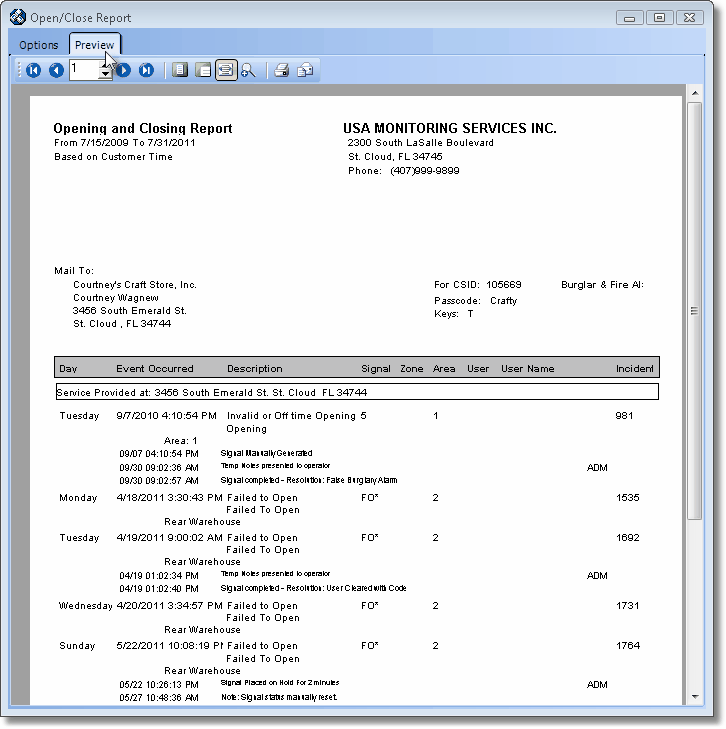
Opening and Closing Report Preview
| • | Home -  - Using either the screen or your Keyboard's Home key, moves the report to the top of the first page. - Using either the screen or your Keyboard's Home key, moves the report to the top of the first page. |
| • | End -  - Using either the screen or your Keyboard's End key, moves the report to the bottom of the last page. - Using either the screen or your Keyboard's End key, moves the report to the bottom of the last page. |
| • | Arrows - The arrows allow you to move back and forth, from page to page. |
| • | Number - Indicates the page number you are viewing. |
| ▪ | You may also type in a specific page number, Press 8 Enter and that page will be displayed immediately. |
| ▪ | If you enter an invalid page number, it will be ignored. |
| • | Fit To Page - Click the first button after the arrows to size a full page of the report to fit the screen. |
| • | Zoom To 100% - Click the second button after the arrows to display the page at 100% (of the printed view). |
| • | Fit To Page Width - Click the third button after the arrows to size the page of the report to fit the full width of the screen. |
| • | Zoom To Percentage - Click the fourth button after the arrows to re-size the page of the report by percentage. |

| ▪ | When you Click the Zoom To Percentage button, the Percentage selector will be displayed. |
| ▪ | You may then Click the Up or Down ‚ arrows to set the exact amount of Zoom you want. |
| • | Print - Click the Print button to Print (to a File or a Printer) the displayed Open/Close Report. |
| • | Email - Click the Email  button to send this report to an Email address of your choosing. button to send this report to an Email address of your choosing. |
| • | Exit the form by Clicking the Close button x on the right at the top of the form. |


![]()