| □ | The Pricing Mark Up Groups Form is used to create any number of special purpose Mark Up/Mark Down Percentages, and assign each a Description and a system ID number. |
| • | After a Pricing Mark Up Group is assigned, when an Invoice and/or Proposal is created: |
| • | Calculating the Price on the Invoice or Proposal using a Pricing Mark Up Group's Percentage: |
| a. | Multiply the Sale-Purchase Item's Retail Price value by the assigned Pricing Markup Group's Percentage. |
| b. | Add that result to the Retail Price (keeping in mind that a Minus Pricing Markup Group's Percentage value is subtracted from the Retail Price - see Important Note #1 below). |
| c. | The sum of those two calculations will be the Amount (Price) that is charged for this Invoice or Proposal line item. |
| ► | Important Note #1: The Pricing Markup Percentage may be a positive or negative value. |
| i. | When the assigned Percentage is a positive value, the calculated Price will be greater than the original Retail Price, thereby charging a "premium" for this item. |
| ii. | When the assigned Percentage is a negative value, the calculated Price will be less than the original Retail Price, thereby offering a "discount" for this item. |
| iv. | The Sale-Purchase Item Drop-Down Selection List list will display both the default retail Price and the adjusted Mark Up Price. |

Sale-Purchase Items: Sale Item ID, Description, (Retail) Price, & (adjusted) Mark Up Price
| ► | Important Note #3: The Price on the Invoice - regardless of whether it is calculated based on a Pricing Markup Group's Percentage, or the original Retail Price, may still be modified by the User at the time of the entry. |
| □ | Creating a Pricing Mark Up Group: |
| • | On the Main Menu Select Maintenance and Choose the Accounts Receivable sub-menu. |
| • | Then Select the Pricing Mark Up Groups option. |
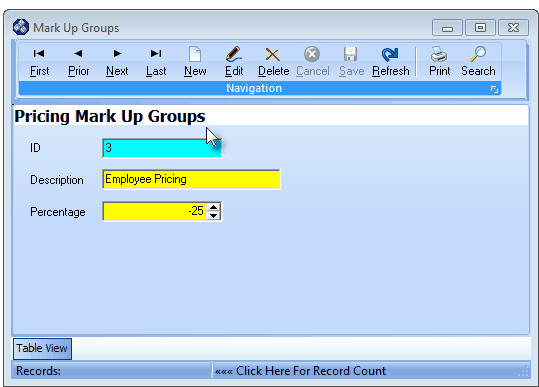
Pricing Mark Up Groups Form
| • | This Mark Up Groups Form may be Re-sized by Dragging the Top and/or Bottom up or down, and/or the Right side in or out. |
| • | Navigation Menu - The Navigation Menu is located at the top of the Pricing Mark Up Groups Form. |

| • | This Navigation Menu provides the normal Record Movement, New, Edit, Delete, Cancel, Save, and Refresh options; as well as special Print and Search functions. |
| • | Record Editing section - The details of the currently selected record are displayed below the Navigation Menu at the center (Main Body) of the Pricing Mark Up Groups Form. |
| • | Table View tab - A tabular (spreadsheet style) Table View of the currently defined Pricing Mark Up Groups is accessible by Clicking the Table View tab at the bottom of the Pricing Mark Up Groups Form. |

| • | This Table View information may be Pinned in Place by Clicking the Pin Icon on the right. |
| • | To display a specific Pricing Mark Up Group record in the Record Editing section, Click on that record within the Table View section, or use the Search Icon (see the "Using the Special Functions" section later in this chapter). |

Pricing Mark Up Groups Form - with Table View tab Pinned Open
| ▪ | You may Un-Pin this Table View by Clicking the Pin Icon again. |
| ▪ | Click on any listed record to display that information in the center (Main Body) of the Form. |
| • | There are three columns of data in this Pricing Mark Up Groups Record Listing: |
| 1) | ID - The record ID assigned by the system when the entry is originally saved. |
| 2) | Description - The description of the Pricing Mark Up Group. |
| 3) | Percentage -The Percentage of Mark Up/Mark Down as a positive or negative value. |
| • | Each column's Header Name describes the data contained in that column. |
| ▪ | Clicking on a Header Name will set the order in which the Pricing Mark Up Groups will be listed. |
| ▪ | Clicking on the same Header Name will set the order in the opposite direction (ascending vs. descending). |

| ▪ | The Header Name that is determining the Order of the list will have an Icon indicating the Order displayed next to that Header Name. |
| • | To define the Pricing Mark Up Groups which will be used to calculate a (previously identified) Subscriber's Price for each Sale-Purchase Item added to an Invoice or Proposal: |
| • | Click the  Icon to start a Pricing Mark Up Group entry in the Record Editing section. Icon to start a Pricing Mark Up Group entry in the Record Editing section. |
| ▪ | ID - This record number will be assigned after the entry is initially saved. |
| ▪ | Description - Enter a Description of this of the Pricing Mark Up Group. |
| o | The Description may up to 30 characters in length and include upper and/or lower case letters, numbers, spaces and normally used punctuation marks. |
| ▪ | Percentage - Enter the Percentage of Mark Up/Mark Down as a positive or negative value. |
| o | The regular Retail Price entered for a Sale-Purchase Item will be increased or decreased (respectively) by the sum of that Percentage rate multiplied by the Retail Price, plus the original Retail Price, when creating an Invoice or a Proposal. |
| o | See "Calculating the Price on the Invoice or Proposal using a Pricing Mark Up Group's Percentage" above. |
| • | Click the  Icon to to record this Pricing Mark Up Group. Icon to to record this Pricing Mark Up Group. |
| • | Any number of additional Pricing Mark Up Groups may be created. |
| □ | Using a Pricing Mark Up Group: |
| 1. | Define the desired Pricing Mark Up Groups to fit your Company's needs. |
| 2. | Enter a Retail Price (the "List Price" value) on the Sale-Purchase Items Form for each item to which a Mark Up Percentage calculation should be applied when the Amount (Price) for that item is inserted while creating an Invoice or a Proposal. |
| 3. | Be sure to also enter a Retail Price value on the Sale-Purchase Items Form because a Mark Up Percentage may not always be applied! |
| ▪ | This will ensure that the correct Retail Price - when not being adjusted by a Pricing Markup Group Percentage - will be used for the item's Price on an Invoice or a Proposal. |
| ▪ | The Price Override tab on the Sale-Purchase Items Form allows for the entry of a different set of Pricing Mark Up/Down Percentages for previously defined Pricing Mark Up Groups, as appropriate. |
| 4. | Inventory Items must also have both a Price In (the actual cost or wholesale) value and a Retail Price value assigned. |
| 5. | Any Sale-Purchase Item may also have a Price Override defined for any, or all predefined Pricing Mark Up Groups. |
| ▪ | When a Price Override Percentage is defined for a Sale-Purchase Item, that Percentage will prevail in the Price calculation. |
| ▪ | See "Calculating the Price on the Invoice or Proposal using a Pricing Mark Up Group's Percentage" above. |
| □ | Using the Special Functions on the Navigation Menu at the top of the Pricing Mark Up Groups Form: |
| • | Print - Click the Print Icon to View and/or Print a list of the Pricing Mark Up Groups. |
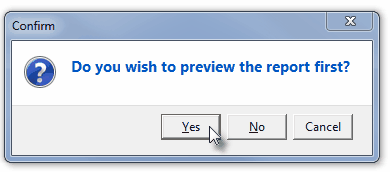
| • | Yes - Click the Yes button to View a copy of the report. |
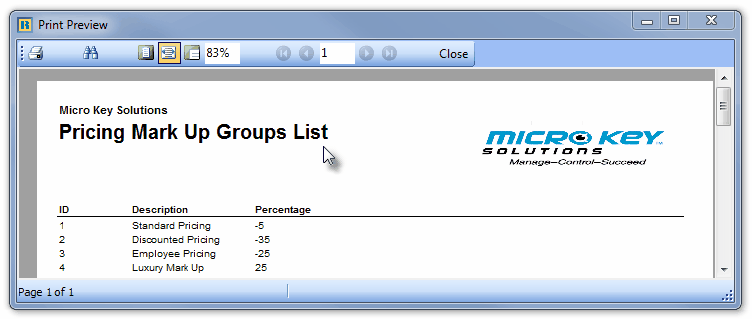
| • | No - Click the No button to open the Windows® Print dialog where a copy of the report may be sent to a selected Printer, or Printed to a File. |
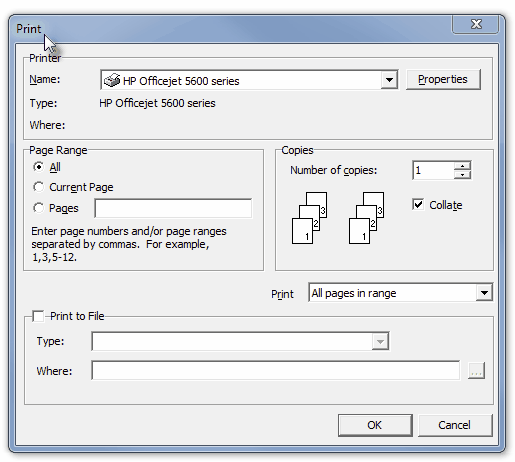
| • | Cancel - Click the Cancel button to close this Print question and return to the Form. |
| • | Search - Click the Search Icon to open the Search Attrition Types dialog. |
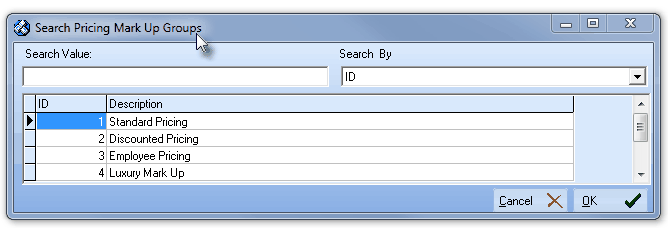
Search dialog
| • | See the "Using the Generic Search dialog" section in the Advanced Search Dialog chapter for more information about this Search dialog. |


![]()

![]()


