|
Printing to a File This Help File Page was last Modified on 09/01/2012 |

|

|
|
|
Printing to a File This Help File Page was last Modified on 09/01/2012 |
|
|
Printing to a File
This Help File Page was last Modified on 09/01/2012
|
Printing to a File This Help File Page was last Modified on 09/01/2012 |
|
|
|
|
Printing to a File This Help File Page was last Modified on 09/01/2012 |
|
|
| □ | Some Reports must be saved as they looked Today. |
| • | Generally this is because the report is a "snap shot" report listing Today's current status of transactions, situations, etc., and so would be different if printed "tomorrow". |
| • | There are certain critical "snap shot" reports, usually related to accounting transactions, that should be saved permanently (for a year and sometimes more - based on your accountant's requirements). |
| • | But hopefully, you won't want to print these reports and save them as Paper copies! These critical "snap shot" reports should be "printed" to a file instead - preferably a "pdf" file (although in some cases, other file formats may be more appropriate) - so that they can be viewed (and even printed onto paper, if needed) at any time in the future, but with the information as it existed on the exact day the report was originally created. |
| • | Most reports offer this Print to File option. |
| □ | Printing to a File - Many Reports and lists may be "printed" to a file, and while doing so, formatted for many different file types. |
| • | Click the Print Icon (button) on the Report Options tab. |
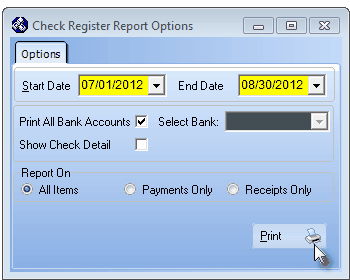
Report Options tab with Print button at the bottom
| • | The Report Preview tab will be displayed. |

Report Preview tab with Print Icon
| • | Print Dialog - Click the Print Icon on the Preview tab to display a standard Windows® style Print dialog. |
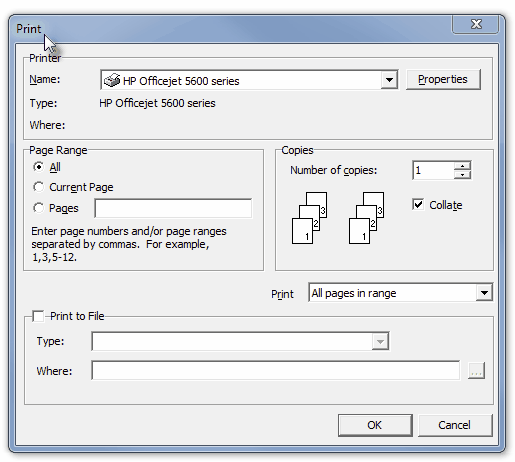
Windows® Print dialog
| • | Check the Print to File box (see mouse pointer in illustration above). |
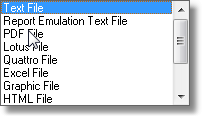
| • | Type - Use the Drop-Down Selection Box to select the PDF format (or whatever format is appropriate for this report or list). |
| • | Where - Click the Ellipse (locate) button (...), and using your OS version's standard Windows® interface. |

| • | Drill down to the appropriate folder where the report is to be stored, and then name the file (no extension needs to be entered because the extension will be assigned automatically based on the type of file format you've selected), and Click Save. |
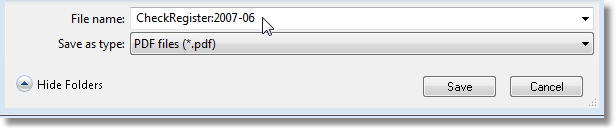
| • | You will be returned to the Print dialog with your entry inserted into the Where field. |
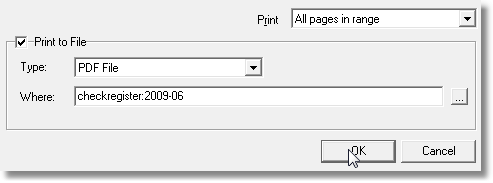
| • | Click OK to Print the report to the designated File. |