| • | Any number of Warehouse Locations may be identified. |
| • | Warehouse Locations may be buildings, sheds, someone's Home, etc. where Inventory Items are normally stored and each may be defined as either Level 1 (primary) or Level 2 (secondary) Warehouse. |
| • | Some Companies consider each of their Service and Installation Vehicles to be a Warehouse Location (because the vehicles often have a great number of Inventory Items stored in them at all times). |
| • | These Service and Installation Vehicles may also be defined as either Level 1 (primary) or Level 2 (secondary) Warehouse Locations, based on each individual Company's internal policy. |
| □ | Entering Warehouse Information: |
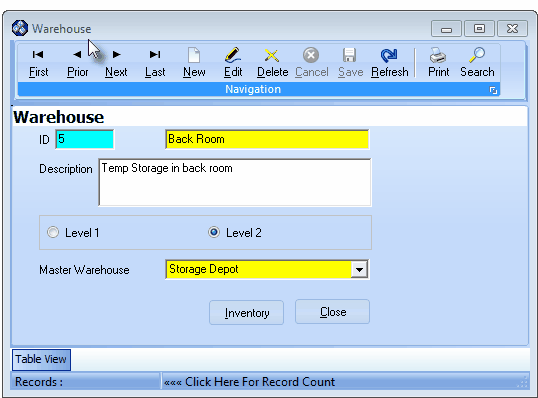
| • | To enter Warehouse Locations, on the Main Menu Select Maintenance and Choose Inventory Tracking and then Click the Warehouse option. |
Warehouse Form
| • | This Warehouse Form may be Re-sized by Dragging the Top and/or Bottom up or down, and/or the Right side in or out. |
| • | Navigation Menu - The Navigation Menu is located at the top of the Warehouse Form. |

| • | This Navigation Menu provides the normal Record Movement, New, Edit, Delete, Cancel, Save, and Refresh options; as well as special Print and Search functions. |
| • | Record Editing section - The details of the currently selected record are displayed below the Navigation Menu at the center (Main Body) of the Warehouse Form. |
| • | Table View tab - A tabular (spreadsheet style) Table View of the currently defined Warehouse records is accessible by Clicking the Table View tab at the bottom of the Warehouse Form. |

| • | To display a specific Warehouse record in the Record Editing section, Click on that record within the Table View section, or use the Search Icon (see the "Using the Special Functions" section later in this chapter). |
| • | This Table View information may be Pinned in Place by Clicking the Pin Icon on the right. |

Warehouse Form - with Table View tab Pinned Open
| ▪ | You may Un-Pin this Table View by Clicking the Pin Icon again. |
| ▪ | Click on any listed record to display that information in the center (Main Body) of the Form. |
| • | There are five columns of data in this Warehouse Record Listing: |
| 1) | Warehouse ID - This is the record number assigned by the system when the Warehouse entry was initially saved. |
| 2) | Name - The Name for this Warehouse Location |
| 3) | Description - The Description of this Warehouse Location |
| 4) | Master Warehouse - The Level 1 Warehouse ID representing the Warehouse to which this Warehouse Location is assigned |
| 5) | Level - If Level 1: this is one of the primary Inventory Warehouse Locations; if Level 2: this is not a Primary Inventory Warehouse Location and is secondary to another facility that is a Level 1. |
| • | Each column's Header Name describes the data contained in that column. |
| ▪ | Clicking on a Header Name will set the order in which the Warehouse will be listed. |
| ▪ | Clicking on the same Header Name will set the order in the opposite direction (ascending vs. descending). |

| ▪ | The Header Name that is determining the Order of the list will have an Icon indicating the Order displayed next to that Header Name. |
| • | To define a Warehouse to be used for identifying where the Inventory Items are stored: |
| • | Click the  Icon to start a Warehouse entry in the Record Editing section. Icon to start a Warehouse entry in the Record Editing section. |
| • | ID - This is the record number and it will be assigned by the system. |
| • | Name - Enter a Name for this Warehouse Location. |
| ▪ | It may be up to 40 characters in length and include upper and lower case letters, numbers, spaces, and common punctuation marks. |
| • | Description - Enter a Description of this Warehouse Location (e.g., based on its address, the direct phone number, for a specific supervisor, what is generally stored there). |
| ▪ | It may be up to 70 characters in length and include upper and lower case letters, numbers, spaces, and common punctuation marks. |
| • | Level 1 - Click this button (the default selection) to indicate that this is one of the Primary Inventory Warehouse Locations. |
| • | Level 2 - Click this button to indicate that this is not a Primary Warehouse Location and is secondary to (e.g., inside; supplied by; associated with; a special purpose room within) another facility that is designated as a Level 1. |
| • | Master Warehouse - If Level 2 was selected, use the Drop-Down Selection List provided to Choose the Level 1 Warehouse to which this Location is assigned. |

| • | Click the  Icon to to record this Warehouse. Icon to to record this Warehouse. |
| • | Any number of additional Primary and/or secondary Warehouses may be identified, as required. |
| □ | Special Buttons on the Warehouse Form: |
| • | Delete - Click the Delete Icon on the Navigation Menu to remove a Warehouse Location record. |
| • | Confirm the Delete request. |
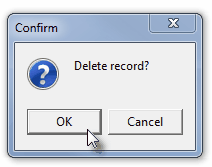
| • | Any existing Inventory (quantities) at the Warehouse Location that is being deleted will automatically be transferred and added to the quantities at the Default Warehouse. |

| • | Inventory - Click the Inventory button at the bottom of the Warehouse Form to display the Warehouse Inventory Form which lists the Inventory Items currently stored at this Warehouse Location. |
| ◆ | See the Warehouse Inventory chapter for complete information about using the Warehouse Inventory Form |

| • | The Inventory Items with no Quantities shown are are not present in the selected Warehouse Location. |
| • | The number that are stored at the currently viewed location are shown. |
| • | Close - Click the Close button at the bottom of the Form to exit the Warehouse Form. |
| • | If any data has changed and is unsaved, this button will not be available. |
| □ | Using the Special Functions on the Navigation Menu at the top of the Warehouse Form: |
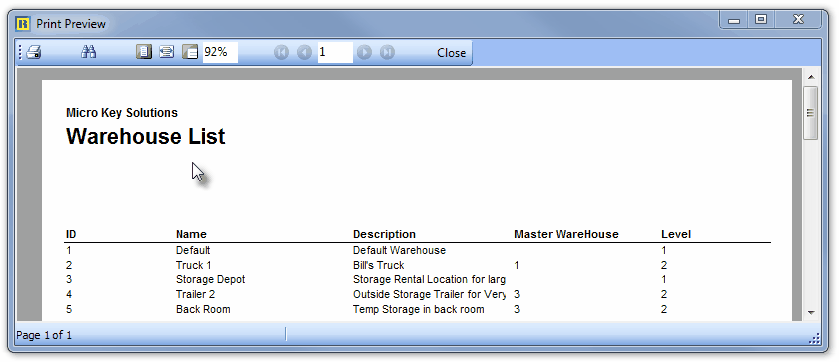
| • | Print - Click the Print Icon to View and/or Print a list of the Warehouses. |
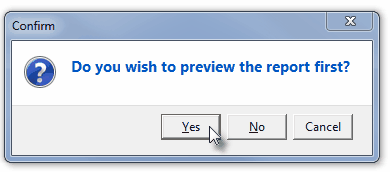
| • | Yes - Click the Yes button to View a copy of the report. |
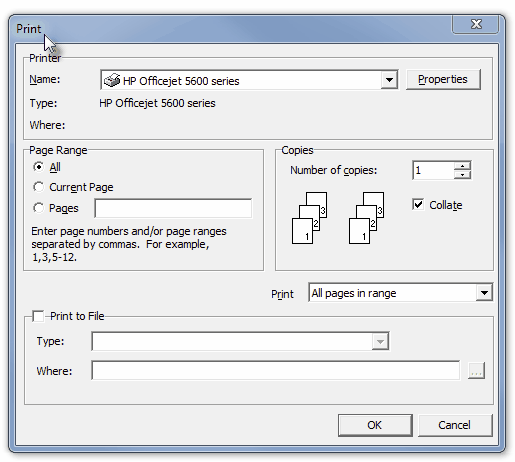
| • | No - Click the No button to open the Windows® Print dialog where a copy of the report may be sent to a selected Printer, or Printed to a File. |
| • | Cancel - Click the Cancel button to close this Print question and return to the Form. |
| • | Search - Click the Search Icon to open the Search Warehouses dialog. |
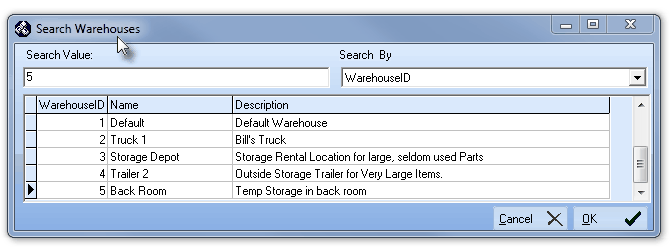
Search dialog
| • | See the "Using the Generic Search dialog" section in the Advanced Search Dialog chapter for more information about this Search dialog. |


![]()

![]()


