| □ | As an Alarm Signal is being handled by an Operator, the active Call Order - the one to be used for the Notification step - is derived from one of five sources: |
| 1. | The order in which the People To Call were entered originally. |
| 2. | The revised order for People To Call re-set in the Call Order Form. |
| 3. | The special Call Order established in a CSID Zone record. |
| ► | Note: See the Call Order chapter for a complete discussion relating the the sequence in which Notifications are made. |
| □ | The Monitoring of Alarm Systems not only requires that Police Departments, Fire Departments, Emergency Medical Services (identified in the Town Codes Form), and other specialty service responders are able to be Dispatched, it also entails Notification of a "third party" that there has been an emergency which requires that they be notified, and perhaps to also respond in some manner. |
| • | Different types of emergencies may require that different sets of people be notified. These may include: |
| ii. | Friends and Neighbors, |
| iii. | Specialty service providers, |
| iv. | designated Company Employees, |
| • | Because the types of emergencies vary, each may require those that are being notified, are contacted in a different sequence. |
| • | In some case, this "third party" call will be the only notification that occurs. |
| • | To accommodate this need, a list of People To Call must be maintained for each Subscriber and Subscriber Panel CSID, for whom the Central Station is providing monitoring services. |
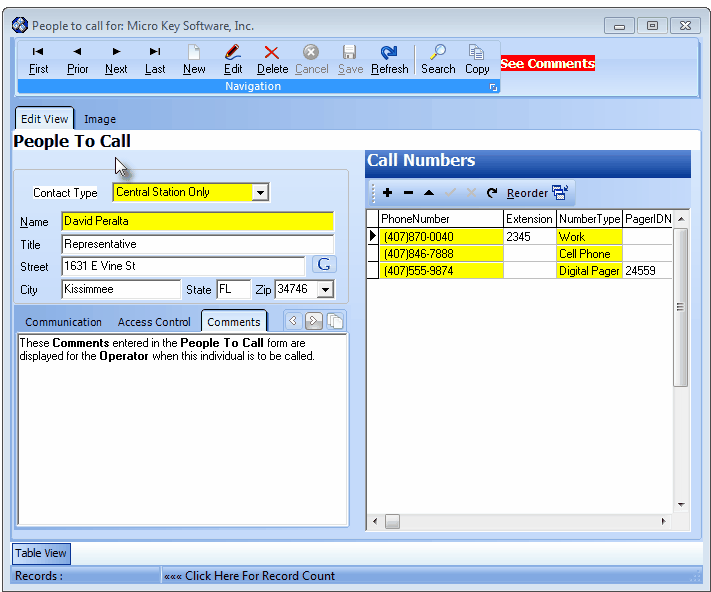
| □ | To view the names, telephone numbers, and other important information for the People To Call: |
| • | Retrieve (F2 Search) the appropriate Subscriber record. |
| • | Select the General Quick Access Menu. |
People To Call Form showing the Comments tab
| • | The People To Call Form, with the Names and Contact Information that were entered for the selected Subscriber Panel's CSID, will be displayed |
| • | This People To Call Form may be Re-sized by Dragging the Top and/or Bottom up or down, and/or the Right side in or out. |
| • | Navigation Menu - The Navigation Menu is located at the top of the People To Call Form. |

| • | This Navigation Menu provides the normal Record Movement, New, Edit, Delete, Cancel, Save, and Refresh options; as well as special Search and Copy functions. |
| • | Edit View tab - The details of the currently selected record are displayed below the Navigation Menu in the center (Main Body) of the People To Call Form within the Edit View tab. |
| • | Image tab - The Image of the currently selected People To Call record may be entered and viewed within this tab (see the "Entering an Image for a People To Call record" section below. |
| • | Table View tab - A tabular (spreadsheet style) Table View of the currently defined People To Call is accessible by Clicking the Table View tab at the bottom of the People To Call Form. |

| • | To display a specific Person To Call record in the Record Editing section, Click on that record within the Table View section, or use the Search Icon (see the "Using the Special Functions" section later in this chapter). |
| • | This Table View information may be Pinned in Place by Clicking the Pin Icon on the right. |
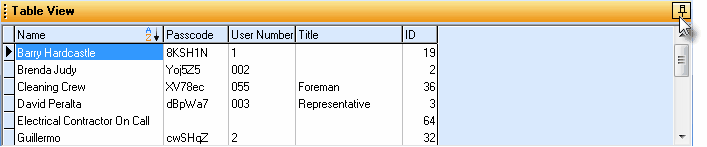
People To Call Form - with Table View tab Pinned Open
| ▪ | You may Un-Pin this Table View by Clicking the Pin Icon again. |
| ▪ | Click on any listed record to display that information in the center (Main Body) of the Form. |
| • | There are many Columns of data in this People To Call listing and each Column's Header Name describes the data contained in that Column. |
| • | The default Order in which this information will be listed is by Name. |
| ▪ | Clicking on a Header Name will re-set the Order in which the People To Call will be listed. |
| ▪ | Clicking on the same Header Name will set the Order in the opposite direction (ascending vs. descending). |

| ▪ | If the default Order has been changed, the Header Name that is determining the Order of the list will have an Icon indicating the Order displayed next to that Header Name. |
| c) | Each of the CSIDs to which that Master CSID has been assigned, will "inherit" all of the People To Call (CSID Zones and Events) entered for the Master CSID. |
| □ | Entering the People To Call: |
| • | On the People To Call Form, Click the Edit View tab, and then Click the  Icon to start the entry in that Edit View tab. Icon to start the entry in that Edit View tab. |
| • | These People To Call are only being entered for the currently selected Subscriber Panel CSID (unless this CSID is identified as the Master CSID - see above). |
| • | Contact Type - Use the Drop-Down Selection List to Choose either Central Station Only, or Access Ctr.& Cen.Station. |
| • | Central Station Only - If this contact information is only used in the course of monitoring signals, make this selection. |
| • | Access Control & Central Station - Used for both Monitoring related responses and Access Control responses through VertX. |
| • | Name - Enter the name - as the Operator should normally say it. |
| • | Title - Enter the appropriate title of this individual, if needed. |
| • | Street - Enter the person's street address. |
| • | City - Enter their city. |
| • | State - Enter the state. |
| • | Zip - Enter the zip code. |
| • | Click the Save (<) Icon to record this People To Call entry. |
| □ | Entering an Image for a People To Call record: |
| • | On the People To Call Form, Click the Image tab to insert an Image of the selected Person. |
| ► | Note: You must enter a Name before attempting to attach an image to a People To Call record. |
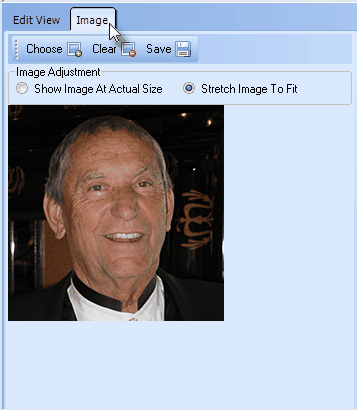
Image tab on the People To Call Form
| • | Choose - Click the Choose button and, using the standard Windows® dialogue box provided, locate the desired image file. |
| ▪ | This should be a BMP or JPG file approximately 5 x 5 inches at 72 ppi. |
| • | Image Adjustment - Once the People To Call's BMP or JPG image file is selected, Choose the Image Adjustment method that best displays your People To Call Image in the display box by alternately Clicking Show Image At Actual Size and Stretch Image To Fit. |
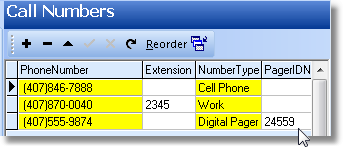
| □ | Call Numbers - Enter as many contact Telephone Numbers for this individual, as are available and appropriate. |
Call Numbers section of the People To Call Form
| • | Phone Number - Enter the telephone number following the rules below. |
(Note: If you have not Checked Remove Phone Formatting in User Options Form's Company Options tab, Formatting - parentheses and dashes - is applied automatically by the system - you do not have to type them.)
| • | If no area code is needed, enter the telephone number (it cannot start with a 1) |
| • | If you have 10 digit dialing where no "1"prefix is needed, but you do need to dial an area code as part of the telephone number: |
| ▪ | Press the <Space Bar> first. |
| ▪ | Enter the three digit area code. |
| ▪ | Then enter the seven digit telephone number. |
| ▪ | Correct telephone number formatting will occur automatically. |
| ▪ | Long distance numbers (with a "1" prefix) are entered as such with the formatting parentheses and dash supplied automatically |
| • | Extension - Enter the appropriate extension number, if needed. |
| • | Number Type - Use the Drop-Down Selection List to Choose the type of line this is. |

| • | Pager ID Note - If using a Pager for contact, enter Pager ID information, as needed. |
| • | Click the Save ("ü") to record this Call Numbers information. |
| □ | Using the Reorder button in the Call Numbers section of the People To Call Form: |
| • | Reorder - You may adjust the sequence that the Call Numbers will be listed (when displayed for the Operator). |

| • | Click the Reorder button above the Call Numbers list. |
| • | Reorder Call Numbers - The Reorder Call Numbers dialog will be displayed. |
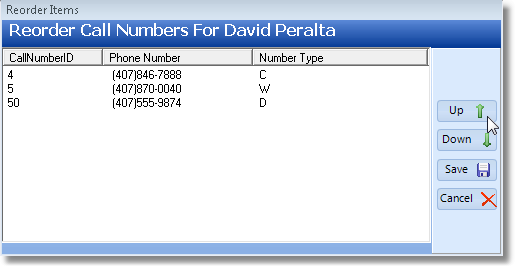
Reorder Call Numbers dialog
| • | Click to select the Phone Number to be relocated on the list. |
| • | Click the Up ñ or Down ò arrow button, as needed. |
| • | Click the Save < button to record its new position in the list. |
| □ | Using the Special Functions on the Navigation Menu at the top of the People To Call Form: |
| • | Search - To locate a specific People To Call record, Click the Search at the top of the Form. |
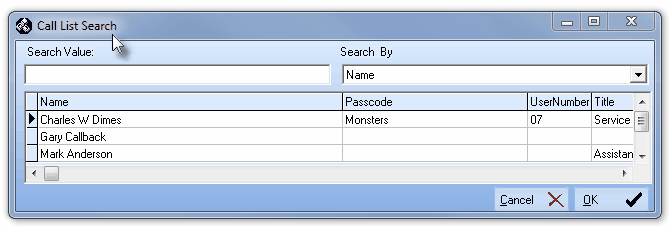
| • | The Call List Search dialog will appear. |
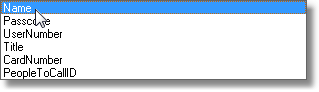
| • | Enter the Search By method using the Drop-Down Selection List . |
| • | Enter the Search Value characters until the desired record is displayed. |
| • | Click on the record when it is displayed. |
| • | Click OK to select the record and Close the Call List Search dialog. |
| • | Copy - You may copy all of the People To Call numbers for one Subscriber's CSID, to another Subscriber (either to a different CSID installed at the Same Subscriber's premises, or to a Subscriber's CSID being monitored for a completely different Subscriber). |
| • | Click the Copy  |
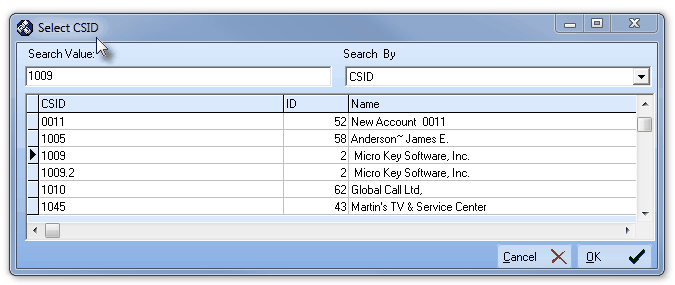
| • | It will display the Select CSID dialog. |
| • | Search By - Select the method you'll use for this search with the Drop-Down Selection List provided. |
| ▪ | CSID - Search by the CSID. |
| ▪ | ID - Search by the actual internal record number. |
| ▪ | Name - Search by the Subscribers Name. |
| • | Search Value - Enter the appropriate characters to locate the desired Subscriber to which you want to copy the currently selected People To Call. |
| • | Click on the desired Subscriber's CSID record. |
| • | Click OK to select the record to copy to, and then return to the People To Call Form. |
| • | All People To Call will be copied to the selected Subscriber's CSID. |
| • | If any names are not required at the new location, go to that Subscriber, Select Monitoring and then Choose People To Call where you will then be able to delete any unnecessary names. |
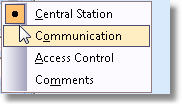
| □ | Understanding the Special Information tab's Requirements and Usage: |
| • | Selecting a Tab - There are four tabs on the People To Call Form. |
| • | These may be selected in either of two ways: |
| 1. | Use the arrow buttons to move to the desired tab.  |
| 2. | Click the List button (see mouse pointer) to select from the list of available tabs. |
| • | Central Station tab - Enter any available information relating to this individual and the Subscriber's Alarm System. |
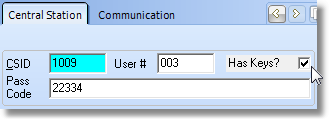
Central Station tab on the People To Call Form
| • | User # - Enter the User ID # that would be transmitted by the control panel, if this individual disarmed the Alarm System. |
| ▪ | In some cases the User # may be transmitted as a Physical Zone rather than as a discreet User #. |
| • | Has Keys? - Check this box if this individual has keys to the premises. |
| • | Pass Code - Enter the pass code, if this individual is required to provide one. |
| • | Comments tab - Enter important information that an Operator should read prior to contacting this individual. |
| • | Comment - Enter whatever may be appropriate for a User and/or the Operator to know about this person. |
| • | See the Comments tab in the illustration at the top of this page. |
| • | If a Comment has been entered, when this People To Call record is selected, a See Comments message is flashed at the top of the Form above the Call Numbers box. |
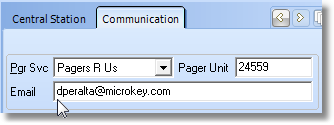
Communication tab on the People To Call Form
| • | Pgr Svc - Use the Drop-Down Selection List to Choose this individual's Pager Service that should be used for Alarm Signal notifications. |
| • | Pager Unit - Enter their Pager's ID. |
| • | Email - Enter the Email address that should be used for Signal notifications. |
| ▪ | If no Email communication to this person will be required, leave this field blank. |
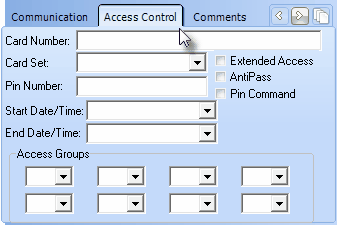
| • | Access Control - Enter any Access Control related information required for this Person. |
Access Control tab - People To Call Form

