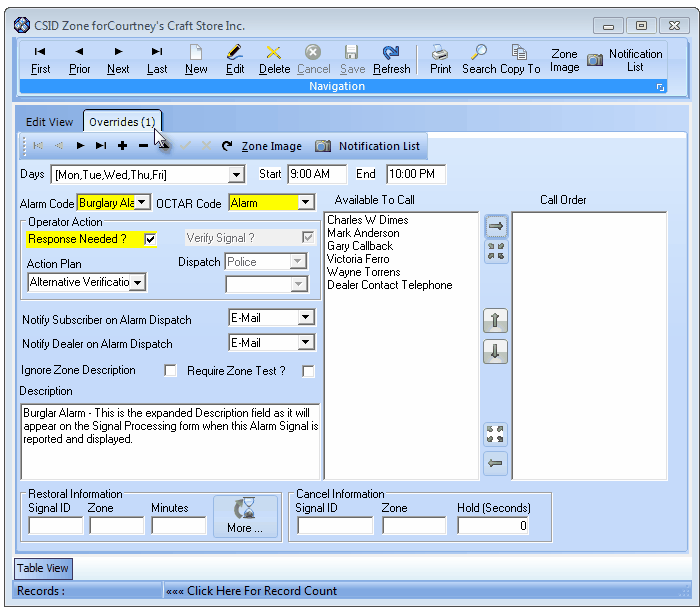
| □ | The Overrides tab the CSID Zones Form is used to modify the default procedures established for the selected CSID Zone. |
| • | The Overrides tab's screen format appears to be almost identical to the Edit View except that the Signal ID and Physical Zone fields are replaced with the Days, Start and End fields. |
Overrides tab on the CSID Zones Form
| • | The total number of Overrides defined for the currently selected CSID Zone will appear in parentheses (see the mouse pointer above). |
| • | The significance of these new Days, Start and End fields is that they allow you to set the Day(s) and a Time Range within those Day(s), when these changes (Overrides) are to be in effect. |
| • | Any other Alarm Signals received for the currently selected CSID Zone, which occur outside the Day and Time Range established within the CSID Zone Overrides tab, will be Processed based on the rules entered in the original CSID Zone. |
| □ | Making changes to Override the original CSID Zone procedures: |
| • | To enter an Override for the currently selected CSID Zone, on the CSID Zones Form, Click the Overrides tab, then Click Add ("+"). |
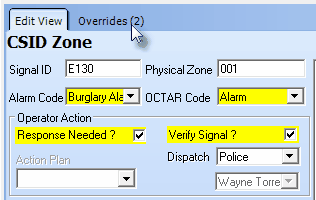
CSID Zone definition with (2) Overrides entered
| • | Days - Use the Drop-Down Day Selection List to display a list of the Days of the Week. |
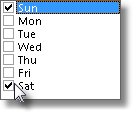
| • | Check the Day(s) in which these changes should be implemented. |
| • | Be sure to Uncheck the Day(s) when this Override should not be implemented. |
| • | The set of Day(s) that are Checked will be inserted - within [Square Brackets] separated by Commas - into the Days field. |

| • | Start - Enter the Starting Time for this Override - paying careful special attention to the AM or PM choices. |
| • | Enter the Start Time based on the Central Station's Time Zone! |
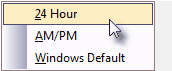
| • | You may format the Starting Time that is Displayed in any one of three styles: |
3 Time Format Display options
| ▪ | Right-Click the Start field to open the menu shown above. |
| ▪ | Select the preferred Time Display Format. |
| ▪ | The Start field will be immediately reconfigured to the chosen format. |
| • | End - Enter the Ending Time for this Override paying special attention to the AM or PM choices. |
| • | Enter the End Time based on the Central Station's Time Zone! |
| • | You may format the Ending Time that is Displayed in any one of three styles: |
3 Time Format Display options
| ▪ | Right-Click the Start field to open the menu shown above. |
| ▪ | Select the preferred Time Display Format. |
| ▪ | The End field will be immediately reconfigured to the chosen format. |
| • | Alarm Code - Use the Drop-Down Selection List provided to Choose the appropriate Alarm Condition Code. |
| • | OCTAR Code - Use the Drop-Down Selection List provided to Choose (the list is shown below) the type of signal or event that is being defined. |
| • | Operator Action - If this is an Active Signal (one that needs some type of Operator Response), indicate the Alarm Processing step(s) the Operator is to take when this Alarm Signal is received. (see "Changing Processing Procedures" below). |
| • | Response Needed? - Check this box when some type of Operator Response is required. |
| ▪ | Whether or not the Response Needed? box is Checked, the Call List section with the Available To Call and Call Order columns will be accessible. |
| ▪ | If Response Needed? is not Checked, it will be considered a Passive Signal (one that does not need any specific Operator Response) and no other Operator Action or Notification options will be available. |
| • | Verify Signal? - Check if this Signal is to be Verified by telephoning the premises in advance of any Dispatch, or other Notification process. |
| • | Dispatch - If this is an Active Signal, use the Drop-Down Selection List provided to Choose (the list is shown below) the type of response that is needed. |
| ▪ | Fire = Notify the appropriate Fire Department of the reported Fire Alarm Condition. |
| ▪ | Medical = Notify the appropriate Medical Emergency Response Service of the reported Medical Alarm Condition. |
| ▪ | Police = Notify the appropriate Police or Sheriff's Department of the reported Burglary, Silent or Hold-Up Alarm Condition. |
| ▪ | Other = Notify the appropriate Responsible Person of the reported Emergency Condition (also see Other Call below). |
| ▪ | None = No specific "Dispatch" related Response is needed (see Note below). |
| a) | The Comments entered on the Central Station Data Form should clearly reflect that a Guard Response is required for any Active Alarm Signals. |
| b) | The CSID Zone Override records defining these events should be Checked Response Needed? and have <Other> selected for the Dispatch type. |
| d) | Select the record representing that Security Company when defining who is contacted for the <Other> response (see "Other Call" below). |
| e) | Be sure that the CSID Zone Override's Description field also clearly reflects this response requirement (see "Other Call" below). |
| • | Other Call - If the type of Dispatch Response that was selected above is <Other>, use the Drop-Down Selection List (immediately below the Dispatch box) to Choose the appropriate Name, from the Subscriber's People To Call table, that represents who is to be notified. |
| • | Action Plan - If there is a Response Needed for this Alarm Signal and the normal Operator Guided Response is incapable of providing the appropriate instructions for the Operator, you may instead use a predefined Action Plan to dictate the exact Signal Processing steps that are required. |
| ▪ | Use the Drop-Down Selection List provided to Choose the appropriate Action Plan for this Alarm Signal. |
| ▪ | You may Right-Click in the Action Plan field to set the order of the Drop-Down Selection List by Choosing either ID or Description order, as desired. |
| • | Notify Subscriber on Alarm Dispatch - Use the Drop-Down Selection List provided to Choose the Subscriber's notification preference. |
| • | Notify Dealer on Alarm Dispatch - Use the Drop-Down Selection List provided to Choose the Dealer's notification preference. |
| • | Ignore Zone Description - Check this box to not use the Description field information (see below) when this CSID Zone Override is displayed for an Operator. |
| • | Check this box to not use the Description field information (see below) when this CSID Zone Override is displayed for an Operator. |
| • | The Ignore Zone Description Check box is a special setting used to properly process certain types of Supervisory Signals. |
| ▪ | When a Supervisory Signal is received, it generally consists of a Signal Identifier (which identifies the Problem or Situation) and also frequently includes a Physical Zone (which actually does not represent a "real" Zone within the Alarm System). |
| ▪ | But certain Communicator Formats may add a Zone Code to the Signal Identifier transmitted for some Supervisory Signals |
| ▪ | There is a possibility that this Signal Identifier + Zone Code (Physical Zone) combination might be misinterpreted as an Actual Zone in the Alarm System in use (e.g., LB+001). |
| ▪ | This would occur when the Signal Identifier in the Panel Zones record is matched with a Physical Zone identified in a CSID Zones record creating something like " Low Battery/Front Door" when there is no battery at the front door (it's in the Control Panel). |
| • | Therefore, Check this box to ignore the Zone Code (Physical Zone) and it's Description, and instead use the default Description field information defined in the Panel Zones record when this Supervisory Signal is displayed for an Operator. |
| • | The VerifyZones option must be set to True ("T") in the Company Settings dialog to make this Zone Test? feature operative. |
| ▪ | All Zones that are displayed may be Reset to a Waiting ("W") Test Status, if needed. |
| • | Description - Provide a clear, concise description of this CSID Zone Override. |
| ► | Note: As noted above, for Accounts using a Security Company for their Burglar Alarm Response, this Description field should also clearly reflect this response requirement. |
| • | Click the Save ("ü") to record the CSID Zone Override entry. |
| □ | Changing Processing Procedures - All of the original CSID Zone settings for Operator Actions may be altered using any of the options listed below: |
| ► | Note: Specific People To Call, and the order in which they are to be contacted based on a specified Date and Time Range, may be set by using this CSID Zone Overrides feature by simply reordering those Names in the Call Order column (see "(Re-)Setting the Call List Order" in the CSID Zones chapter. |
| c. | Reset the(OCTAR) Alarm Type of the Signal or Event, |
| d. | Provide a special Zone Image, |
| e. | Define different Restoral Information and/or Cancel Information (see below), as needed. |
| • | Restoral Information - If the Signal has a corresponding Restoral Code, enter that information here (also see the separate Restoral Information chapter for more detailed information): |
| • | Signal ID - Enter the specific Signal Identifier that would indicate that the previously reported emergency condition, defined above, has been restored to its normal state. |
| • | Zone - Enter the Physical Zone Code, if one is transmitted with the Signal Identifier, that would indicate that the previously reported Physical Zone Code, defined above, has been restored to its normal state. |
| • | Minutes - Enter the number of minutes the Alarm Signal, defined above, will be placed on Hold (internally) while awaiting the Restoral Signals defined here. |
| ▪ | If the Restoral Signal is not received within this number of minutes, based on that original Alarm Signal , a Failed To Restore (FR*) signal will be sent to the next available Operator, with the original Alarm Signal information displayed in the Alarm Information Box at the top right of the Signal Processing screen. |
| ▪ | This feature is provided for intermittent conditions - like AC Loss signals for momentary power failures or Hi/Lo Temp signals for temporary spikes in temperature - which may be quickly corrected, and therefore would not require a Subscriber's response. |

| • | More - Click the More button if additional sets of CSID Restoral Zone Information are required. |
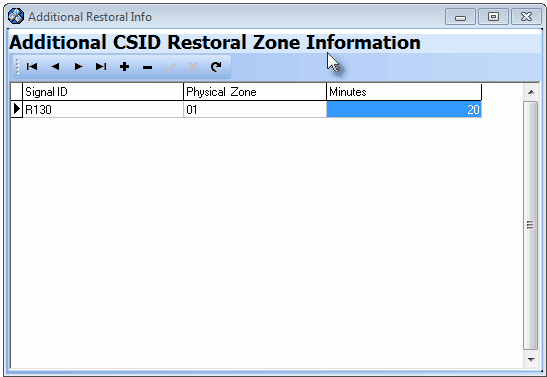
Additional CSID Restoral Zone Information dialog
| • | Click Add ("+") and enter the Restoral Information, as needed. |
| • | Signal ID - Enter the specific Signal Identifier that would indicate that the previously reported emergency condition, defined above, has been restored to its normal state. |
| • | Physical Zone - Enter the Physical Zone Code, if one is transmitted with the Signal Identifier, that would indicate that the previously reported Physical Zone Code, defined above, has been restored to its normal state. |
| • | Minutes - Enter the number of minutes the Alarm Signal, defined above, will be placed on Hold (internally) while awaiting the Restoral Signals defined here. |
| • | Click the Save ("ü") to record Additional CSID Restoral Zone Information entry. |
| • | Repeat this process, as needed. |
| • | Cancel Information - An Alarm Signal, defined in the CSID Zones Form, may have a corresponding Cancel (Abort) Code that is transmitted by the Subscriber's communicator indicating that the previously reported emergency condition has been canceled by that Subscriber via a system reset/disarm action on their part (also see the separate Restoral Information chapter for more detailed information). |
| • | The Cancel (Abort) Code will usually not be displayed for the Operator because: |
| ▪ | When an Alarm Signal is defined with Cancel Information, when received, that Alarm Signal is automatically placed on Hold, for a defined number of Seconds, during which time it is displayed in the Alarm Stack. |
| ▪ | If the Cancel (Abort) Code is received within that defined number of Seconds: |
| 1. | The original Alarm Signal is taken off of Hold, and Internally completed. |
| 3. | The Alarm Signal is Logged into the Subscriber's Alarm History table with the Cancel (Abort) Code information. |
| ▪ | Therefore, no Operator Action would be required. |
| • | However, if the Cancel (Abort) Code is not received within the defined number of Seconds, then: |
| 1. | The original Alarm Signal is taken off of Hold status. |
| 2. | It is converted to a Pending alarm. |
| 3. | The Alarm Signal is sent to the next available Operator in the normal manner. |
| ► | Note: Be aware that, if an Operator manually pulls an Alarm Signal from the Alarm Stack) which had been automatically placed on Hold pending receipt of the Cancel (Abort) Code), but then places it back on Hold manually, when (if) the Cancel (Abort) Code is subsequently received, it will not be processed automatically and so must be completed by an Operator thereafter. |
| • | Defining the Cancel Information: |
| ▪ | Signal ID - Enter the specific Signal Identifier that would indicate that the previously reported emergency condition, defined above, has been canceled by the Subscriber via a system reset/disarm action on their part. |
| ▪ | Zone - Enter the Zone Code, if one is transmitted with the Signal Identifier, that would indicate that the previously reported physical zone code, defined above, has been canceled by the Subscriber via a system reset/disarm action on their part. |
| ▪ | Hold (Seconds) - Enter the number of seconds that the originating Alarm Signal should be placed on Hold (automatically) while awaiting a possible Cancel (Abort) Code from the Subscriber. |
| • | Click the Save ("ü") to record the CSID Zone Override entry. |

