| □ | Action Plans provide every Central Station using MKMSCS Central Station Monitoring module for Processing Alarms, the ability to customize the Signal Processing instructions - that are to be performed by the Operator - for every type of Active Signal (which is any Alarm or Supervisory Signal requiring an Operator's Response). |
| • | Therefore, Action Plans are provided for those Active Signals needing a Response by an Operator that cannot be precisely documented using the system's standard Operator Guided Responses. |
| □ | Action Plans offer a precise, step by step, set of user defined Signal Processing instructions ("Action Steps") that can define virtually every variable an Operator may encounter while Processing an Alarm. |
| • | Action Steps - An Action Step within an Action Plan may include (any or all of) these additional instructions: |
| a. | A Title (called the Action Step's Subject) that indicates the type of Action Step that is being performed. |
| b. | A Script for the Operator that will not only show the Operator exactly what to do, but also will instruct the Operator as to exactly what to say. |
| c. | A Force Note command which will require that an Operator enters a brief note or comment explaining the results of a (just completed) Action Step. |
| d. | A Next Step based on the results identified by the Operator as the current Action Step is completed. |
| • | This combination of Show & Tell, coupled with the resulting Do & Say instructions, and pre-establishing the options for the next action, make Action Plans the ultimate solution to managing how specific Active Signals will be processed. |
| □ | Creating an Action Plan: |
| • | To create an Action Plan, on the Main Menu Select Maintenance and Choose Central Station, then Click Action Plans. |
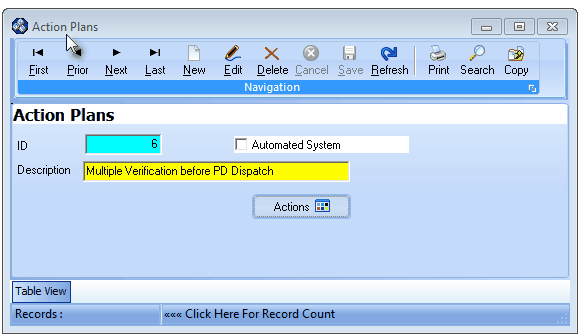
Action Plans Form
| • | This Action Plans Form may be Re-sized by Dragging the Top and/or Bottom up or down, and/or the Right side in or out. |
| • | Navigation Menu - The Navigation Menu is located at the top of the Action Plans Form. |

| • | This Navigation Menu provides the normal Record Movement, New, Edit, Delete, Cancel, Save, and Refresh options; as well as special Print, Search and Copy functions. |
| • | Record Editing section - The details of the currently selected record are displayed below the Navigation Menu at the center (Main Body) of the Action Plans Form. |
| • | Table View tab - A tabular (spreadsheet style) Table View of the currently defined Action Plans is accessible by Clicking the Table View tab at the bottom of the Action Plans Form. |

| • | To display a specific Action Plan record in the Record Editing section, Click on that record within the Table View section, or use the Search Icon (see the "Using the Special Functions" section later in this chapter). |
| • | This Table View information may be Pinned in Place by Clicking the Pin Icon on the right. |
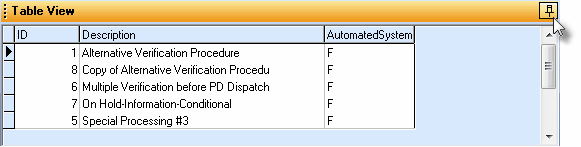
Action Plans Form - with Table View tab Pinned Open
| ▪ | You may Un-Pin this Table View by Clicking the Pin Icon again. |
| ▪ | Click on any listed record to display that information in the center (Main Body) of the Form. |
| • | There are two columns of data in this Action Plan Record Listing: |
| 1) | ID - The system assigned record number for this Action Plan. |
| 2) | Description - The description for this Action Plan. |
| 3) | Automated System - Indicates where this record is an Automated System record - True (T) or False (F). |
| • | Each column's Header Name describes the data contained in that column. |
| ▪ | Clicking on a Header Name will set the order in which the Action Plans will be listed. |
| ▪ | Clicking on the same Header Name will set the order in the opposite direction (ascending vs. descending). |
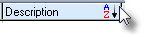
| ▪ | The Header Name that is determining the Order of the list will have an Icon indicating the Order displayed next to that Header Name. |
| ◆ | Follow these basic steps to create an Action Plan record: |
| 1. | Enter a brief Description of the Action Plan and save that entry. |
| 2. | Click the Actions button to open the Action Plans dialog. |
| 3. | Define the processing instructions (the required Action Steps): |
| a. | Select a processing instruction Action Step from the Available Action column. |
| b. | Insert that Action Step into the Action column in the appropriate place (i.e., in its proper sequence). |
| c. | Define any of these Action Plan Properties for the Action Step, when required: |
| i. | Subject - Enter a Subject (a brief description) which will then be included in the Subject column, and displayed for the Operator on the Signal Processing screen to describe the significance of Action Step that is being performed by the Operator. |
| ii. | Force Note Check Box - Force the Operator to enter a Comment relating to the Action Step when it's completed. |
| iii. | Content - Provide a Script which the Operator to follow (read to the Contact) while executing the Action Step. |
| iv. | Identify the Next Step by Selecting the processing instruction Action Step from the Available Action column. |
| □ | Action Plans Designer Dialog: There are three columns within this Action Plans dialog: |
| ► | Note: This is an Overview. |
See the Defining an Action Plan chapter for more detailed instructions
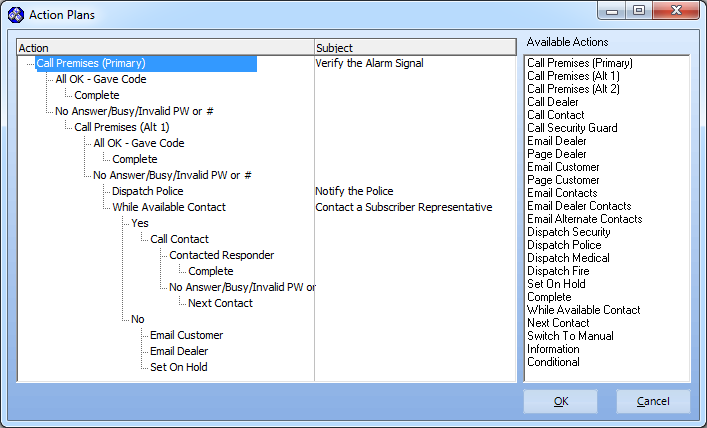
Actions Plans dialog with Action, Subject and Available Actions columns
| 1. | Action - The column containing a list of the Action Steps (processing instructions) that have been assigned to this Action Plan. |
| 2. | Subject - The column containing the Title of an Action Step, entered using the Action Plan - Properties Form. |
| 3. | Available Actions - The column containing the complete list of all available Action Steps. |
| □ | Understanding each Column in the Action Plans dialog (documented from left to right): |
| • | Action Column - The Action Plans Designer Dialog allows you to insert, into the Action column, a series of predefined Action Steps which are listed in the Available Actions column. |
| • | These Action Step entries, inserted into the Action column within the Actions Plans Designer Dialog, define the step-by-step processing requirements for this Action Plan. |
| ▪ | Any of the Action Steps in the Available Actions column may be inserted into the Action column, where required. |
| ▪ | Some of these Action Steps contain predefined Response Steps (see "Response Steps" below). |
| • | Using either the Drag & Drop method supported within Windows® applications, or the Right-Click Menu Selection method, an Available Action item is copied into the Action column, thus creating an Action Step. |
| o | In the Available Actions Column, Left-Click on, and - while holding that left mouse button down: |
| o | Drag the selected Available Action to the position in the Action Column where you want that Action Step to be performed by the Operator. |
> You can practice this procedure as often as you like, then delete any unnecessary Action Step entries, when finished.
> To Delete an Action Step, Right-Click on the Action Step to be removed, and then Choose Delete from the option list that is presented.
| ◆ | Right-Click Option List method: |
| o | Click on the Action Step in the Action Column, under which you need to insert another Action Step. |
| o | In the Available Actions Column, Right-Click on the required Action Step |
| o | Select Add on the option list presented. |
| o | This Selected Action Step will be inserted immediately below the Action Step Clicked on in the Action Column. |
> You can practice this procedure as often as you like, then delete any unnecessary Action Step entries, when finished.
> To Delete an Action Step, Right-Click on the Action Step to be removed, and then Choose Delete from the option list that is presented.
| • | Action Steps added to the Action Column - which require that an Operator has a Conversation with the Contact during a Verification or Notification procedure - will have one or more predefined Response Steps (see Verification Responses) which are automatically inserted immediately beneath the new Action Step when that Action Step is placed in the Action Column (see the "Response Steps" section below). |
| ▪ | As noted above, Response Steps are automatically inserted beneath the Action Steps that require a Contact. |
| o | If any automatically inserted Response Step is not needed in the Action Plan being created, it is easily removed. |
| o | To Delete a Response Step from the Action Column: |
| i. | Right-Click on the Response Step to be removed. |
| ii. | Choose Delete from the Menu option list that is presented. |
| o | To restore a Deleted Response Step: |
| ii. | Choose Add Response from the Menu option list presented. |
| iii. | In the Add Response dialog, use Drop-Down Selection List provided to Choose the desired Response Step. |
| • | Subject Column - Using the Action Plan - Properties dialog, a Subject (the Title of the Action Step) may be defined that represents a Brief Explanation of the Action Step being performed (see "Defining the Properties of an Action Plan Entry" in the Defining an Action Plan chapter for more information). |
| • | These Titles are displayed for the Operator on a special tab in the Signal Processing Form when this Action Step is required. |
| • | The Title you enter should briefly describe the type of Action Step which the Operator is currently required to perform. |
| • | Available Actions Column - The Available Actions Column contains all of the possible Action Steps that an Operator may be required to perform as part of an overall Action Plan. |
| • | The difference between the use of the Operator Guided Response method, and the use of an Action Plan, is that the Action Steps in an Action Plan may be specifically sequenced, titled, have additional steps specified, actions renamed, contain scripted Operator comments, etc.; and so an Action Plan becomes completely "customizable". |
| • | Some Action Steps may have one or more Response Steps (see "Response Steps" below) attached to them, based on the type of Response the Operator encounters when performing a Verification or Notification procedure for the Signal. |
| □ | Response Steps - Some of the Action Steps that are listed in the Available Actions column, have one or more Response Steps attached to them, based on the type of Response the Operator encounters when performing a Verification or Notification Action Step while processing an Active Signal. |
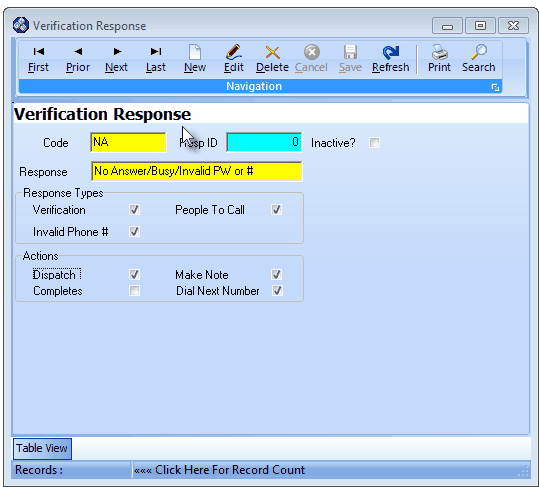
Verification Response Form
| • | These Response Steps were previously defined as Verification Responses by Checking the Verification and/or People To Call Response Types options illustration below. |

Response Types options
| • | The description of each Response is attached to all of the Action Steps that are used for performing a Verification and/or Notification Contact, based on whether the Verification and/or People To Call boxes are Checked on the Verification Response Form. |
| • | Therefore, when a Verification or Notification related Action Step is inserted into the Action column, all Response Steps that are available for that type of Action Step (the Verification and/or People To Call boxes for these records are Checked on the Verification Response Form) will automatically be inserted directly below that Action Step. |

Verification Response - Actions options
| ► | Note: Dispatch related Actions (those with the Check next to the Dispatch field within the Actions section of the Verification Response Form) must have a Verification, and may also have an Invalid Phone # Response Type. |
| • | Before you begin to actually implement Action Plans, it is critical to Test the Results of the Action Steps and Response Steps you've created for your Action Plans, to ensure that what you thought you entered - actually provides the results you wanted! |
| • | Assign an Action Plan, where appropriate, to these records. |
| • | With these sample records in place, Test the validity and proper functionality of your sample Action Plan(s). |
| • | Enter enough sample Active Signals to properly Test each of the Action Steps defined for the Action Plan being tested. |
| • | Being able to exit from an active Action Plan while Processing Alarm Signals is a necessary feature because one or more of the following situations may occur: |
| 1. | It allows an Operator to escape from an Action Plan that contains a dead-end entry. |
| ► | Note: A dead-end entry is one that, when implemented and the Operator gets to a particular Action Step, there is no Next Step defined, yet the Signal is still not Completed. |
| a. | These situations are indicated in Red within the Action Plans Designer Dialog. |
| b. | However, it may be accidentally ignored by the data entry person. |
| c. | The Manual Mode provides for a temporary solution until that data entry error can be corrected. |
| 2. | It allows an Operator to escape from an Action Plan when the Operator is presented with a situation that is not able to be appropriately managed using the currently active Action Plan. |
| 3. | An Action Plan was incorrectly assigned to the current Active Signal. |
| □ | Using the Special Functions on the Navigation Menu at the top of the Action Plans Form: |
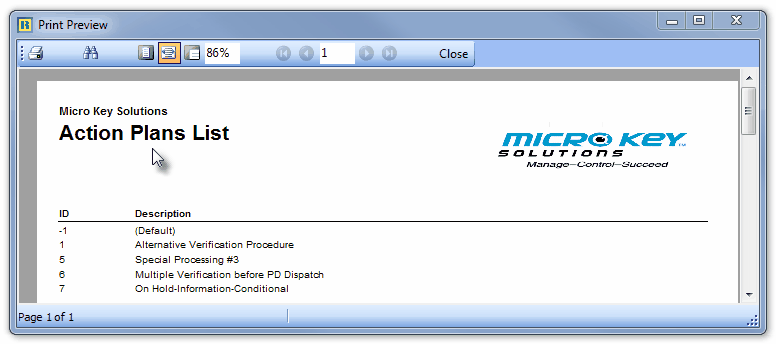
| • | Print - Click the Print Icon to View and/or Print a list of the Action Plans. |
| • | Yes - Click the Yes button to View a copy of the report. |
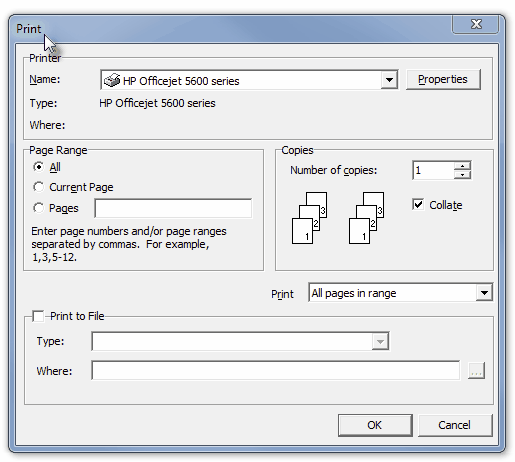
| • | No - Click the No button to open the Windows® Print dialog where a copy of the report may be sent to a selected Printer, or Printed to a File. |
| • | Cancel - Click the Cancel button to close this Print question and return to the Form. |
| • | Search - Click the Search Icon to open the Search Action Plans dialog. |
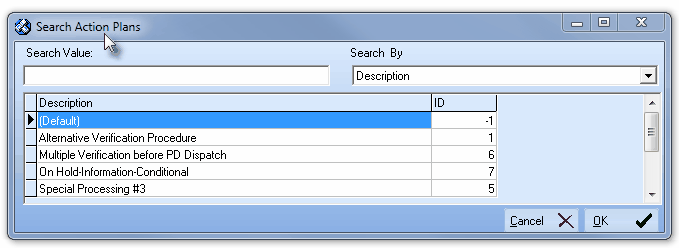
Search dialog
| • | See the "Using the Generic Search dialog" section in the Advanced Search Dialog chapter for more information about this Search dialog. |
| • | Copy - Click the Copy Icon to open the New Action Plan dialog. |
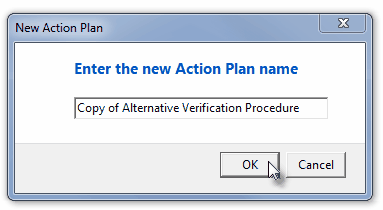
| • | This function will copy the Actions Steps defined for the currently selected Action Plan to another - new - Action Plan record. |
| • | Then additions and/or changes may be entered into that Action Plan - as needed - to quickly define a similar (but not exact) set of Actions Steps. |

