| □ | Notification - If the Operator has attempted to Verify the Alarm Signal (if required) and then Dispatched the proper authorities (if required), in most cases a person on the Subscriber's People to Call list should be notified, also. |
| • | The Alarm Processing screen presents a series of tabs the Operator may use, as needed, to properly Notify a responsible party - among those designated by the Subscriber and entered in the People To Call Form - that this Alarm Signal has occurred. |
| • | Contacts - The Contacts tab will be displayed automatically if the Operator Guided Response requires that the Operator makes Contact with a member of the Subscriber's People To Call list for Notification purposes. |
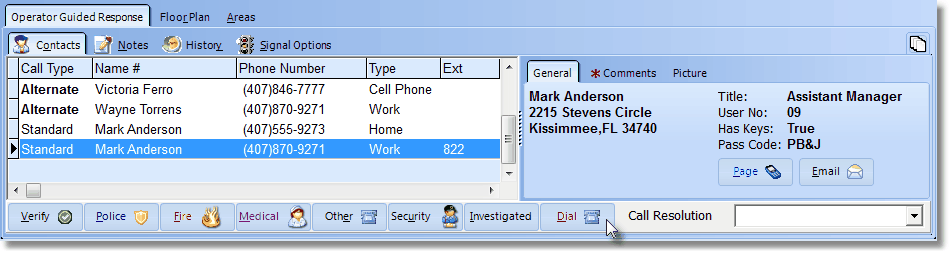
Contacts tab on the Signal Processing screen
| • | When a Telephone Notification is required, and the Contacts tab is displayed: |
| • | The first Contact's information will be shown - with complete information about the contact - on the General tab. |
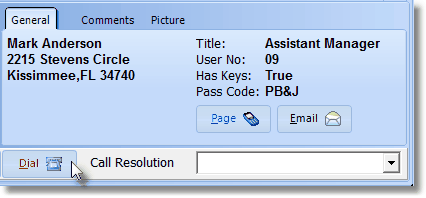
| ▪ | Press the <Space Bar>, or Click the Dial button to automatically dial the telephone number of the first Contact on the Contacts tab. |
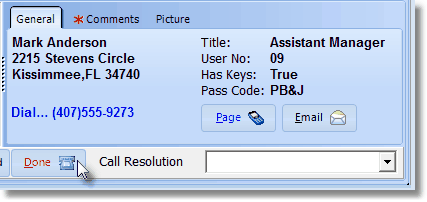
| ▪ | Validate the name of the person who answers, then Notify the person of the alarm event and the steps taken by the Operator to Verify the Alarm Signal and Dispatch the appropriate Emergency Response Service Provider, if either were required. |
| ▪ | Press the <Space Bar>, or Click the Done button to automatically hang up the phone. |
| ▪ | Use the Drop-Down Selection List on the General tab to Choose the appropriate Verification Response Code (only those designated to be used to document People To Call contacts will be listed). |
| ▪ | In some cases, based on the instructions entered for this Verification Response Code, an explanatory Note may be required (see Entering a Note below). |
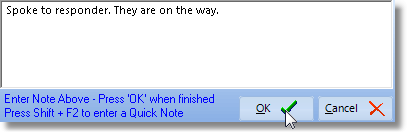
| ▪ | Pressing Shift+F2 when inside the Note field in the MKMSCS Signal Processing mode, enables the Selection of an appropriate predefined Quick Note from a Drop-Down Selection List presented. |
| ▪ | More than one Quick Note may be used in the same Notes field. |
| ▪ | Manually entered Notes may also be added at that time, or used instead of any predefined Quick Notes. |
| ▪ | Finally, Click the OK button to indicate that you have completed the Note. |
| ▪ | These Quick Notes and any manual additions are then inserted into the Subscriber's Alarm History for the Alarm Signal or Event currently being processed. |
| • | If you were unable to reach that Contact, or could not get them to respond, Select the next name on the Contacts list. |
| ▪ | This contact's information will be shown - with complete information about the contact - in the General tab. |
| ▪ | Press the <Space Bar>, or Click the Dial button to automatically dial the telephone number of the next Contact listed on the Contacts tab. |
| ▪ | Validate the name of the person who answers, then Notify the person of the alarm event and the steps taken by the Operator to Verify the Alarm Signal and Dispatch the appropriate Emergency Response Service Provider, if either were required. |
| ▪ | Press the <Space Bar>, or Click the Done button to automatically hang up the phone. |
| ▪ | Use the Drop-Down Selection List on the General tab to Choose the appropriate Verification Response Code (only those designated to be used to document People To Call contacts will be listed). |
| ▪ | In some cases, based on the instructions entered for this Verification Response Code, an explanatory Note may be required (see Entering a Note above). |
| • | Repeat this procedure until you have exhausted the available names to contact, or until an appropriate contact has been made. |
| • | Then follow the Completion instructions by putting the Alarm Signal on Hold (if appropriate), or Complete it, based on the results of the Dispatch and the Notification. |
| • | When Email or Pager information is available and the Communications Module is installed, in addition to the Dial button, the General tab will also display the Page and/or Email buttons based on whether or not the People To Call Form has a Pager number and/or an Email address for the selected Contact. |
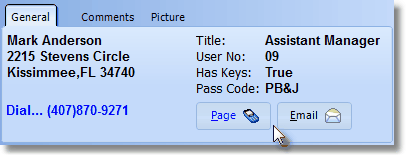
| • | Pager - If the Page button is not "grayed out" there is available Pager information and the Communications Module has been registered. |
| ▪ | Click Page to initiate a Pager message to the selected Contact. |
| ▪ | The Target, Sent To and Contact fields will be predefined. |

Manual page dialog
| ▪ | Message - Choose the type of message to be transmitted. |
Enter the Message Text - Use the Drop-Down Selection List to Choose the appropriate Predefined Message.
| o | Custom - Click this button to create a specific message. |
Enter the Message Text - Type the required message text.
| ▪ | Close - Click the Close button to close this Form. |
| ▪ | Click Email to initiate sending an Email message to the selected Contact. |
| ▪ | The Target, Sent To and Contact fields will be predefined. |
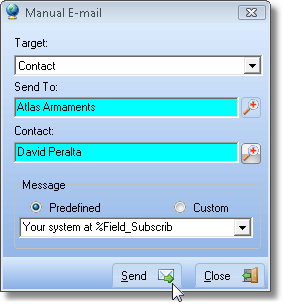
Manual Email for Contact
| ▪ | Message - Choose the type of message to be transmitted. |
Enter the Message Text - Use the Drop-Down Selection List to Choose the appropriate Predefined Message.
| o | Custom - Click this button to create a specific message. |
Enter the Message Text - Type the required message text.
| ▪ | Close - Click the Close button to close this Form. |
| • | Completion - Finish the process or place the signal on Hold for later follow up, as appropriate. |

