|
Processing Alarm Signals This Help File Page was last Modified on 03/12/2014 |

|

|
|
|
Processing Alarm Signals This Help File Page was last Modified on 03/12/2014 |
|
|
Processing Alarm Signals
This Help File Page was last Modified on 03/12/2014
|
Processing Alarm Signals This Help File Page was last Modified on 03/12/2014 |
|
|
|
|
Processing Alarm Signals This Help File Page was last Modified on 03/12/2014 |
|
|
| □ | How are Alarm Signals distributed to the available (Processing) workstations? |
| • | Incoming Alarm Signals acknowledged by your Receivers are sent to SPA (the Signal Processing Application) where they are interpreted. |
| • | So, SPA must be running at this, or another computer on the Network to which you are attached, for it to initially insert Alarms Signals into the Alarm Stack. |
| • | The Alarm Stack assigns the Order in which the Alarm Signal should be Processed based on the Priority Level of the signal's Alarm Condition Code, the Alarm Processing Group to which the Subscriber is assigned, and the Date and Time that the Alarm Signal was Received. |
| • | Once SPA inserts an Alarm Signal into the Alarm Stack for Processing it is available to a qualified Operator at any workstation running MKMSCS that has activated the Processing function, or any workstation that has access to the Alarm Stack display from which an Alarm Signal may be specifically selected for Processing. |
| • | A Qualified Operator is one that has the Skills and also - where required - has been assigned to the Alarm Group that has permission to respond to the Alarm Signal for the Subscriber whose signal is pending in the Alarm Stack. |
| • | The Manual Alarm Entry function also requires that SPA is actually running because a Manually Entered Alarm Signal must also be interpreted in the same manner as it would if it was an Alarm Signal sent from an actual Receiver. |
| • | Once an Alarm Signal is inserted into the Alarm Stack, it may be processed at and by any workstation - whether or not SPA is running. |
| □ | How are Alarms Signals actually Processed? |
| • | Operator Guided Responses - The UL® 1981 CLASSIFIED (and Non-UL) Central Station Monitoring modules provide a Operator Guided Response for all known (predefined) Alarm Signals - on a Subscriber by Subscriber, and signal by signal basis. |
| • | This Operator Guided Response for the processing of Alarm Signals "walks" the Operator through each required step, assuring the proper completion of each required step, executing them in the proper order, and so virtually assures that each signal - regardless of which steps are needed - is handled correctly. |
| • | A tab will be displayed on the Signal Processing screen indicating that the current Alarm Signal is being processed using the Operator Guided Response method. |
| • | As each step is completed, a notation is automatically entered in the Signal History table. |
| • | The many predefined Operator accessible Codes, Notes and Actions make documenting of each of these steps consistent, accurate and so they will be professionally notated. |
| • | Action Plans - Customized Action Plans for the Processing of Alarm Signals may also be created, and, if assigned to the Alarm Signal being processed: |
| • | The Action Plan List will be displayed on the Signal Processing screen showing the Operator all of the Action Steps that will be required to properly handle the current Alarm Signal. |
| • | An Action Plan related tab will be displayed on the Signal Processing screen describing for the Operator the currently required Action Step. |
| • | A predefined Dialog may also be displayed on the Signal Processing screen to tell the Operator exactly what they should say when speaking to a Contact during a Verification, Dispatch, or Notification procedure. |
| • | As with all Alarm Signals, when each Action Step is completed, a notation is automatically entered in the Signal History table. |
| □ | Start Processing Alarms: |
![]()
| • | To notify the Alarm Stack that an Operator is prepared to accept incoming Alarm Signals at the current Workstation, Press the F9 key, or Click the Processing Icon on the Shortcuts bar. |
![]()
| • | The Micro Key Solutions™ Globe Icon (see the mouse pointer in the illustration at the top of this page) on the top left of the MKMSCS Central Station Monitoring dialog will change structure and intermittently flash Amber and Green (see the mouse pointer in the illustration immediately above and below) to indicate that this is an active alarm processing workstation. |
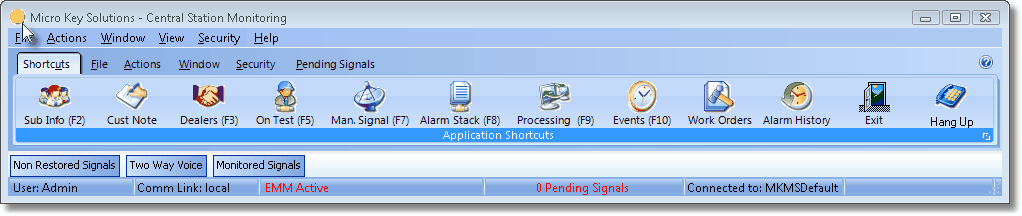
Signal Processing lighted button indicates that this is an active alarm processing workstation
| • | To terminate the Signal Processing mode at this Workstation, Press the F9 key, or Click the Processing Icon on the Shortcuts bar, again. |
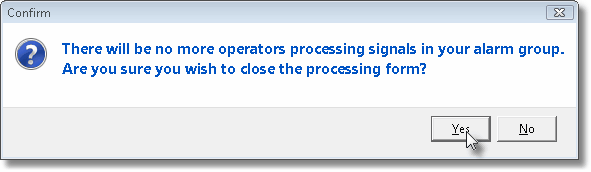
There will be no more operators processing signals in your alarm group.
Are you sure you wish to close the processing form?
| • | If the current Signal Processing Operator exiting mode is the last Operator that is Processing Alarm Signals who is covering Alarm Signals for a specific Alarm Group, a Confirmation message will be displayed indicating that this situation exists. |
| • | Answer Yes to exit anyway, or No to continue Processing Alarm Signals. |
| □ | Acknowledging the Alarm Signal: |
| • | Assuming that the Processing function is active at the Operator's workstation, the Alarm Signal just appears on screen, announced with an Alert message and the sounding of a warning tone. |
| • | Specifically, the Signal Pending... message will be displayed and the appropriate Alarm Sound heard. |
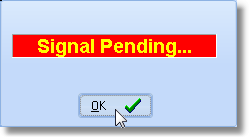
Signal Pending alert
| • | Acknowledging an Alarm - To acknowledge an Alarm Signal do any of the following: |
| ▪ | Press the <Space Bar>, |
| ▪ | Press 8 Enter, or |
| ▪ | Click the OK button. |
| • | Performing any of these actions indicates that you are ready to accept an incoming Alarm Signal. |
| • | Recent Alarm Signal Activity Reminder - If there has been recent Alarm Signal Activity on this Account, you may request that this Alarm History be displayed for this Account. |
| ► | Note: To turn on this Recent Alarm Signal Activity Reminder function, on the Alerts tab in the Central Station Options Form the Alert Operator box must be Checked, and the time frame since the last alarm was received must be set. |
| ► | Otherwise, the Recent Alarm Signal Activity Reminder function described below will not be active. |
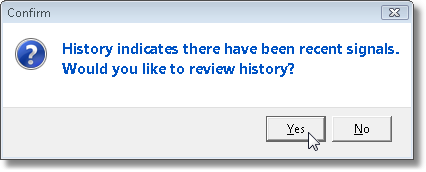
Answer Yes to have the Signal History Form displayed
| • | If you Click the Yes button (or Press 8 Enter), the Alarm History Form for this Account will be displayed. |
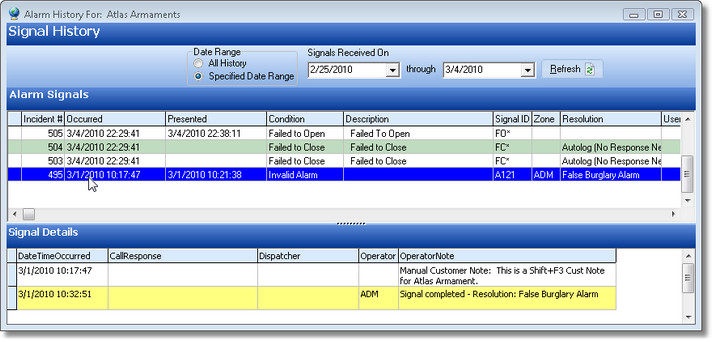
Previous Signal History for incoming alarm
| • | You may Click the No button to skip this Alarm History look up step. |
| • | Once an Alarm History Form is displayed, the Operator must Click the Close T button to close the Alarm History Form to continue Processing the Alarm Signal. |
| • | Subscriber has Other Signals On Hold - If there other signal(s) On Hold for this Account, you may request to review them. |
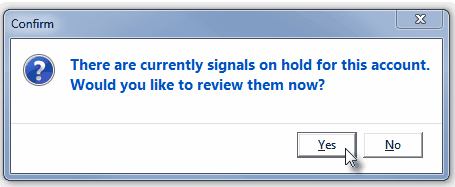
Answer Yes to display the Signal On Hold Form
| • | If you Click the Yes button (or Press 8 Enter), the Signals On Hold Form for this Account will be displayed. |
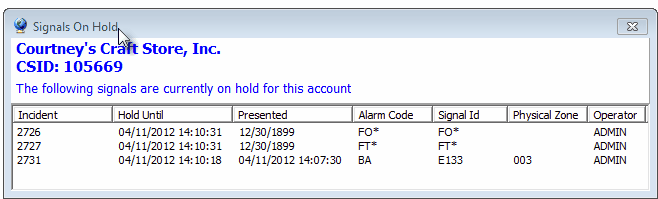
Signals On Hold Form
| • | You may Click the No button to skip viewing this Signals On Hold Form. |
| • | Once a Signals On Hold Form is displayed, the Operator must Click the Close T button to close the Signals On Hold Form to continue Processing the Alarm Signal. |
| • | Temp Notes - If there is an active Temp Note for the Subscriber whose Alarm Signal is currently being displayed on the Signal Processing Form, that Temp Note Form will be displayed when the Alarm Signal is presented with any Active Notes shown in Bold. |
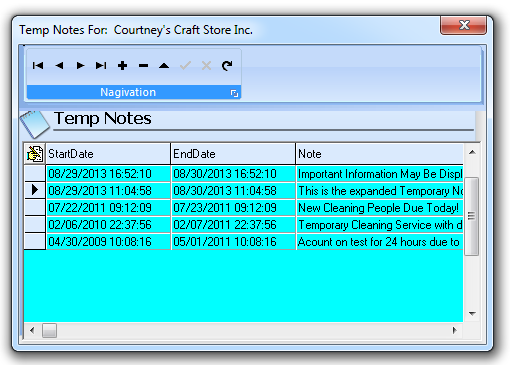
Active Temp Note (within Date & Time range for display) boldly displayed
| • | Click the Close T button to close the Temp Notes Form and return to the Signal Processing Form. |
| □ | Understanding the Signal Processing Form's Look Up buttons: |
| • | There are several Look Up buttons and special Fields located next to the Subscriber's Name and Address information box on the Signal Processing Form. |

Look Up buttons and special Fields on the Signal Processing Form
| • | Password: - The Password entered in the Central Station Data Form for this Subscriber. |
| • | Duress: - The Duress code entered in the Central Station Data Form for this Subscriber. |
![]() Unverified Zones - This button opens the Unverified Zones dialog which is a maintenance Form that may be used to cancel all Test Status codes, or to selectively remove specific CSID Zones from a Waiting ("W") Test Status for the current CSID (the Unverified Zones feature and it's related Zone Test Verification Report will become available only when the VerifyZones option is set to True ("T") in the Company Settings Form).
Unverified Zones - This button opens the Unverified Zones dialog which is a maintenance Form that may be used to cancel all Test Status codes, or to selectively remove specific CSID Zones from a Waiting ("W") Test Status for the current CSID (the Unverified Zones feature and it's related Zone Test Verification Report will become available only when the VerifyZones option is set to True ("T") in the Company Settings Form).
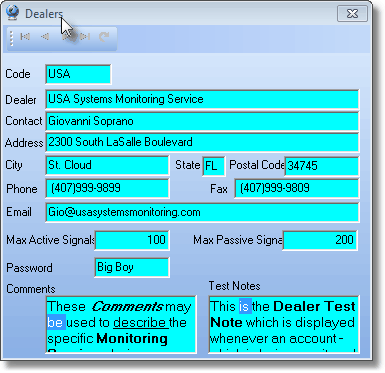
![]() Dealer: - If this Subscriber is being monitored for another Alarm Dealer, this is that Dealer's Name.
Dealer: - If this Subscriber is being monitored for another Alarm Dealer, this is that Dealer's Name.
| ▪ | Click the Dealer Look Up button and Select whether you want to: |
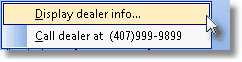
| a. | Display information about this Dealer. (To view their full content, Double-Click the Comments and/or Test Notes fields to open a Read Only Edit Rich Text dialog.) |
| b. | Call the Dealer at the Telephone Number shown (see the second Dealer Menu's Option illustrated above). |
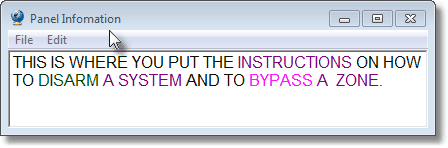
![]() Panel: - This is the Control Panel identified for this Subscriber in the Subscriber Panel(s) section of the Central Station Data Form.
Panel: - This is the Control Panel identified for this Subscriber in the Subscriber Panel(s) section of the Central Station Data Form.
| ▪ | Click the Panel Look Up button and Select whether you want to view the: |
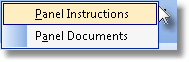
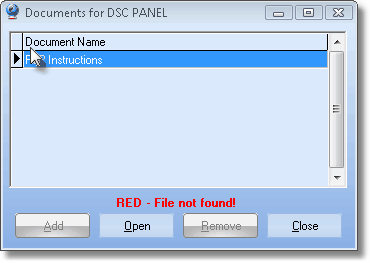
| a. | Panel Instructions information the Control Panel |
| b. | Panel Documents information the Control Panel |
![]() Sec.: - If this Subscriber has a Security Company identified that can provide Emergency Response, this is that Security Company's Name.
Sec.: - If this Subscriber has a Security Company identified that can provide Emergency Response, this is that Security Company's Name.
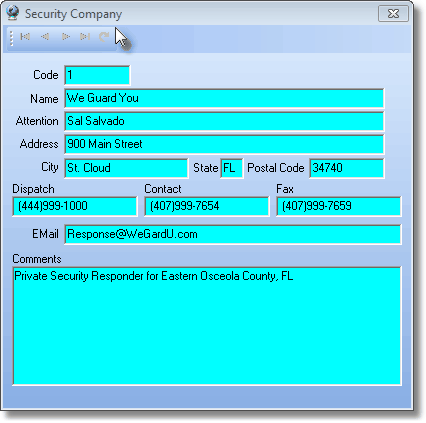
| ▪ | Click the Security. Look Up button and Select whether you want to: |
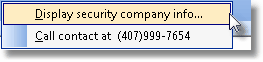
| a. | Display the Security Company's information. |
| b. | Call the contact at the Security Company using the Telephone Number shown (see the second Security Menu's Option illustrated above). |
| • | Acct. Type: - The Description of the Account Type that was entered in the Central Station Data Form for this Subscriber. |
| • | O/C Status: - The current Status of this Account, if it is being Supervised. |
| • | Special Info: - This may be the current step within an Action Plan or Operator Guided Response, the Description of the Area of this event, or some other pertinent information about this account and/or this Signal. |
| • | Keys Held? - This box will be Checked if your Company holds the Keys to this Premises. |
| • | PD Permit Number: - This is the Permit or Registration Number for the Burglar Alarm System installed at this account. |
| • | FD Permit Number: - This is the Permit or Registration Number for the Fire Alarm System installed at this account. |
| • | UL Grade: - If this account has been issued a UL® Certificate, this is the UL® Grade of that certificate. |
| □ | Processing the Alarm Signal: |
| • | There are up to four basic steps (whether using the standard Operator Guided Responses or specialized Action Plans) for the Operator to perform when Processing Alarm Signals: |
| 1. | Verification - Telephone the Subscriber's Premises in an attempt to Verify whether the Alarm Signal is False, or is apparently Valid and requires a Dispatch. |
| 2. | Dispatch - Telephone the appropriate Responding Authority to notify them about the Alarm Signal. |
| 3. | Notification - Notify the Subscriber (or their designee) that the Alarm Signal was received and what steps the Operator has taken. |
| 4. | Completion - Enter the appropriate Resolution Code and mark the Alarm Signal as Completed, or place it on Hold for further Processing later. |
| • | Once an Alarm Signal has been acknowledged, and any recent Signal History examined, the Signal Processing Form will be displayed - using either the Operator Guided Response format or the Action Plan format - containing all of the necessary information related to the current signal or event. |
| • | Operator Guided Response format example: |
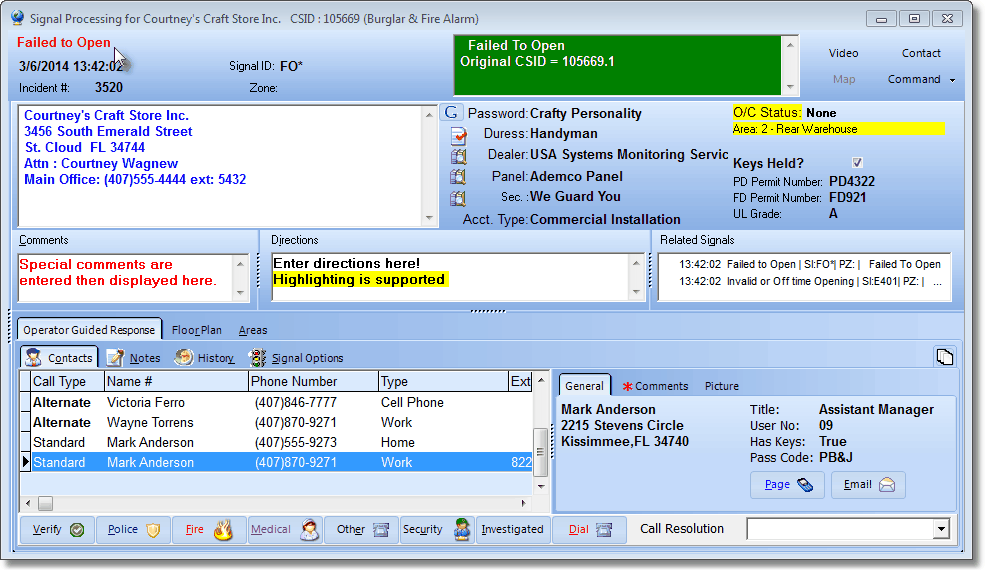
Signal Processing Form with Operator Guided Response
| • | Action Plan Operator Interface with vertical Action Plans and Alarm Detail tabs on left: |
| ► | Note: An entry is inserted into the Alarm Signal History indicating that Action Plan ID #nn was initiated. |
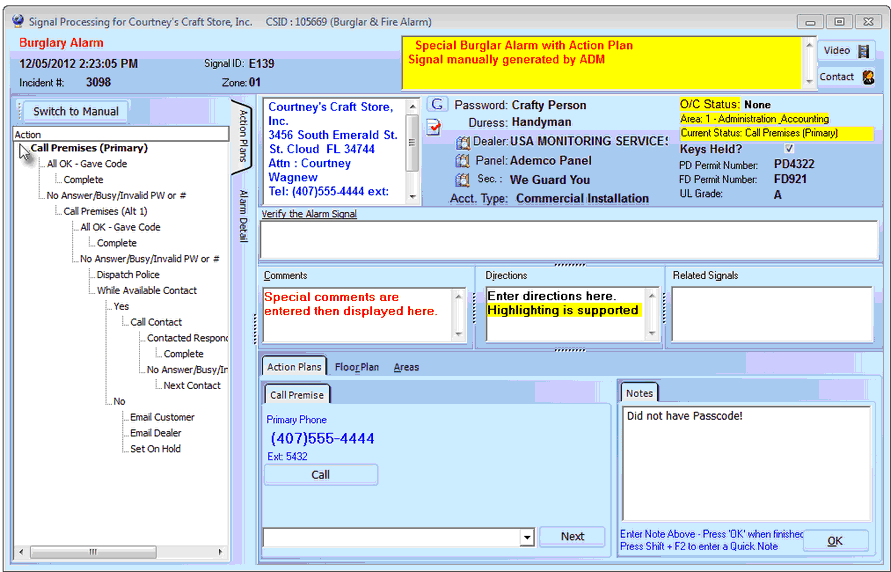
Signal Processing Form with Action Plan tabs
| □ | Verification - The CSID Zone (or Panel Zone) for this Signal contains instructions as to whether or not the Operator should Verify this Alarm Signal or Supervised Event. |
| • | If Verification is required, the Verification dialog will be displayed automatically. |
| • | If this is a Operator Guided Response step that tab will appear, Click the Call Primary button to initiate Verification procedure. |
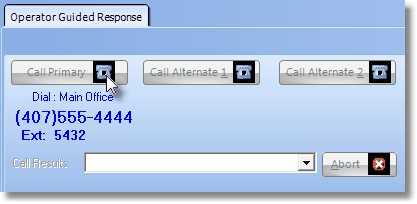
Operator Guided Response - Verification dialog
| • | If this is an Action Plan step, the Action Plans tab will appear and the Call Premises sub tab will be active. |
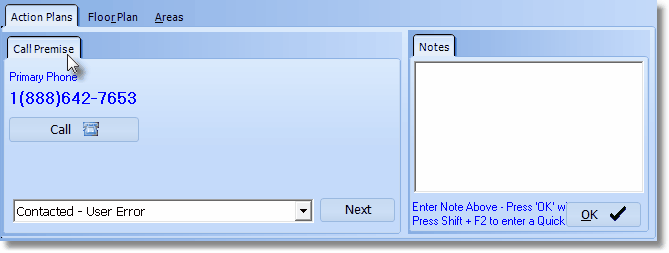
Action Plan - Call Premises - Verification dialog (with Note required)
| □ | Dispatch - Contact the Responding Authorities. |
| • | If a Dispatch is required, the Dispatch dialog will be displayed automatically. |
| • | Assuming that you have implemented Automatic Dialing, Click the Dispatch button to automatically dial the proper - predefined - responding authority. |
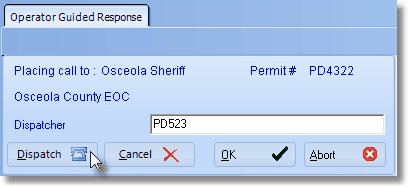
Dispatch dialog
| □ | Notification - If the Operator has attempted to Verify the Alarm Signal (if required) and subsequently Dispatched the proper authorities (if required), a person defined in the Subscriber's People to Call list should be notified that this event has occurred and told of the steps that the Operator has taken. |
| • | If a Notification is required, the Contacts tab will be displayed automatically. |
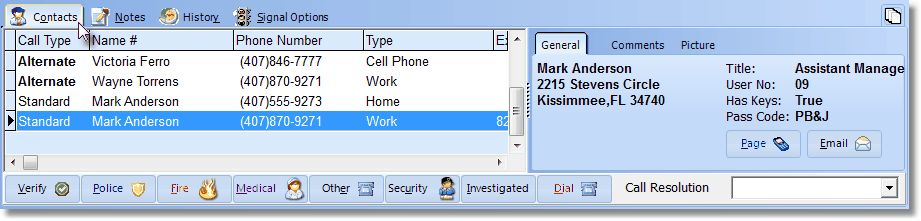
Contacts tab with the General Information tab activated on the Signal Processing Form
| □ | Completion - The Signal Options tab provides all of the functions to Complete and alarm (or place an alarm On Hold). |
| • | When all of the predefined steps required by the Operator Guided Response feature have been finished, the Signal Options tab will be displayed automatically. |
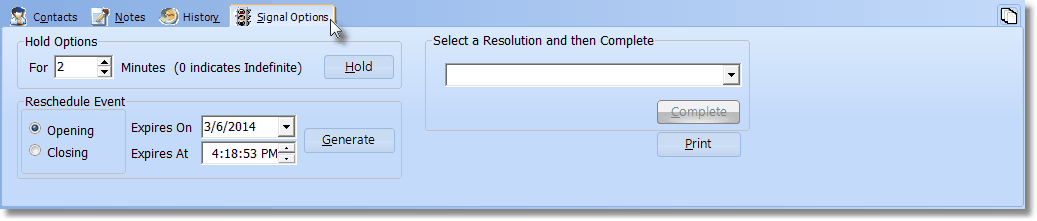
Signal Options tab with the Hold Options dialog on the Signal Processing Form
| □ | Process & Data tabs - there are several Process & Data tabs on the Signal Processing Form that provide access to additional functions and information that may be required by an Operator, from time to time, while processing an Alarm Signal. |
| • | Not all tabs will appear on all Processing screens. |
| • | The Floor Plan, Areas, and Temp Notes tabs are optional and will only be presented when there is data entered for these tab's topics. |
| • | Press the Alternate Key and the Title's underlined letter of any Process & Data tab or keyboard commend (e.g., Alt+L) - at the same time - to display that Process & Data tab. |
| □ | Converting to Manual Mode - Manual Mode allows the Operator to switch from an Action Plan to the Operator Guided Response Operator interface. |
| • | If the Operator needs to exit from an Action Plan, Click the Switch to Manual button at the top of the Action Plans tab (see the mouse pointer in the illustration below), or Press Ctrl+Shift+M. |

| • | Click Yes to Confirm that you do want to go to manual mode. |
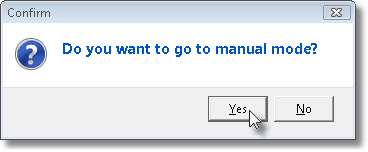
| • | Click the Yes button to Confirm the switch to Manual Mode. |
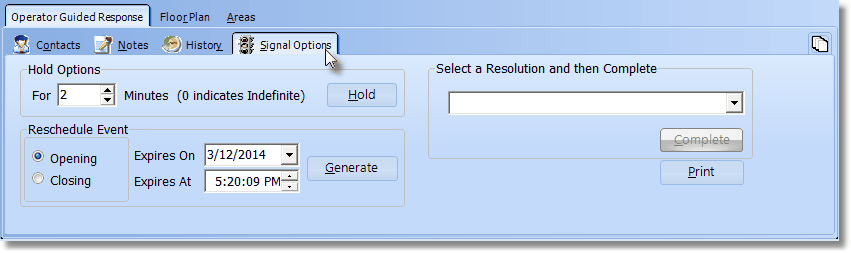
Operator Guided Response view with Signal Options tab activate
| • | The Action Plan Operator Interface will be converted to the generic Operator Guided Response view with the Signal Options tab selected. |
| • | The Floor Plan and Areas tab will only be displayed if this data has been entered for the current Subscriber. |
| • | The Contacts, Notes, History, Temp Notes and Signal Options tabs may now be accessed, as needed. |
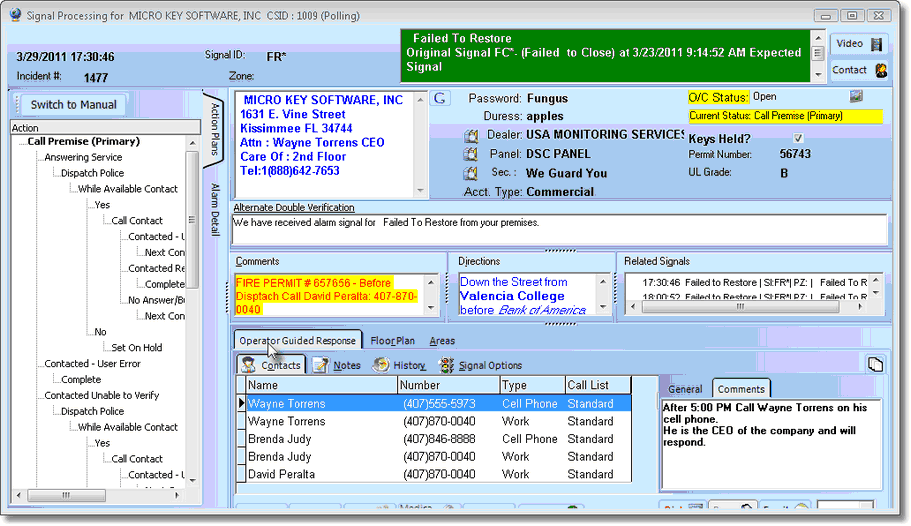
Signal Processing converted to Operator Guided Response using Switch to Manual button showing Action Tab still displayed
| • | Although the Operator Interface switches to Operator Guided Response, the Action Tab will still be displayed for reference. |