| □ | For the Central Station Manager, the Receiver Groups Form allows her/him to define which Receiver(s) and any associated Line Card(s) combinations are part of each Receiver Group. |
| • | The Receiver Groups Form allows the Central Station Manager to define any number of Groups, and indicate the Receiver IDs and their related Line Card Numbers which are to be included in each of those Receiver Groups. |
| • | Receiver Groups typically represent a specific Alarm Dealer for whom monitoring services are being provided. |
| • | The data entered in the Receiver, and Line fields within the Subscriber Panels section of the Central Station Data Form is used to identify the Receiver Group's Members (i.e., the CSIDs defined in the Subscriber Panels section) who are attached to each Receiver and Line combination defined as a Receiver Group. |
| □ | For UL® Monitoring Module users: |
| • | UL® requires that the Central Station is able to report the number of accounts that are programmed to transmit signals to each of the Receivers in the Central Station. |
| • | To report the number of Subscribers reporting to each Receiver (and each of its Line Cards) within each Receiver Group use the Receiver Distribution Report. |

| • | Data entry in Subscriber Panels establishing which Accounts belong to which Receiver Groups (by entering the correct Receiver and Line card information) must be carefully performed to assure the accuracy of the Receiver Distribution Report. |
| ◆ | This data is not able to be cross validated when it is entered. |
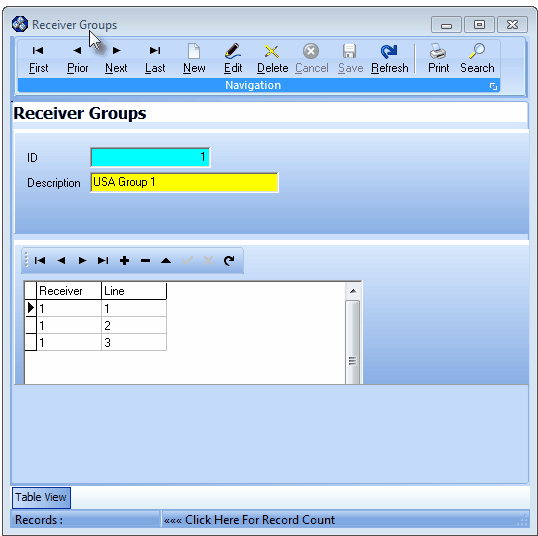
Receiver Groups Form
| • | This Receiver Groups Form may be Re-sized by Dragging the Top and/or Bottom up or down, and/or the Right side in or out. |
| • | Navigation Menu - The Navigation Menu is located at the top of the Receiver Groups Form. |

| • | This Navigation Menu provides the normal Record Movement, New, Edit, Delete, Cancel, Save, and Refresh options; as well as special Print and Search functions. |
| • | Record Editing section - The details of the currently selected record are displayed below the Navigation Menu at the center (Main Body) of the Receiver Groups Form. |
| • | Table View tab - A tabular (spreadsheet style) Table View of the currently defined Receiver Groups is accessible by Clicking the Table View tab at the bottom of the Receiver Groups Form. |

| • | To display a specific Receiver Group record in the Record Editing section, Click on that record within the Table View section, or use the Search Icon (see the "Using the Special Functions" section later in this chapter). |
| • | This Table View information may be Pinned in Place by Clicking the Pin Icon on the right. |

Receiver Groups Form - with Table View tab Pinned Open
| ▪ | You may Un-Pin this Table View by Clicking the Pin Icon again. |
| ▪ | Click on any listed record to display that information in the center (Main Body) of the Form. |
| • | There are two columns of data in this Receiver Groups Record Listing: |
| 1) | Receiver Group ID - The record number which identifies this Receiver Group. |
| 2) | Description - The description for this Receiver Group. |
| • | Each column's Header Name describes the data contained in that column. |
| ▪ | Clicking on a Header Name will set the order in which the Receiver Groups will be listed. |
| ▪ | Clicking on the same Header Name will set the order in the opposite direction (ascending vs. descending). |

| ▪ | The Header Name that is determining the Order of the list will have an Icon indicating the Order displayed next to that Header Name. |
| • | To define the Receiver Groups being used: |
| • | Click the  Icon to start the Receiver Groups entry in the Record Editing section. Icon to start the Receiver Groups entry in the Record Editing section. |
| • | ID - This is the system assigned record number which is inserted automatically when the record is initially saved. |
| • | Description - Enter a Description of this Receiver Group which is used a Group, |
| ▪ | The Receiver Group Description may up to 40 characters in length and include upper and/or lower case letters, numbers, spaces and normally used punctuation marks. |
| ▪ | After a Receiver Group is defined, the Receiver IDs and their related Line Card Numbers which are part of the Receiver Group must be identified (see the "Entering Receiver IDs & Line Numbers" section below). |
| • | Click the  Icon to record this Receiver Group entry. Icon to record this Receiver Group entry. |
| • | Repeat this as needed to identify additional Receiver Groups. |
| □ | Entering Receiver IDs & Line Numbers - |
| • | Identify the actual Receiver IDs and their Line Numbers that are (to be) assigned to this Receiver Group: |
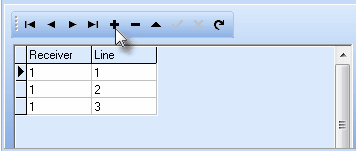
| • | Click Add ("+") at the middle of the Receiver Groups Form. |
| • | Receiver - Enter the Receiver's ID being added to this group. |
| ▪ | The Receiver ID is generally identified as the Port Number on which the Receiver is connected. |
| ▪ | The Receiver's ID may be used multiple times (as in the illustration above) to further identify the individual Line cards installed in that Receiver. |
| • | Line - Enter the Line Card Number of the Receiver being inserted into this Receiver Group. |
| • | Click Save ("ü") at the middle of the form to record your Receiver and Line entry. |
| • | To enter another Receiver/Line combination: |
| • | Click on the last Receiver/Line record, then Press the down arrow ê key; or |
| • | Click Add ("+") - Notice the mouse pointer in the illustration above showing the correct Navigation & Tool Bar Add button used for inserting a new Receiver/Line record. |
| • | Repeat this as needed to identify additional Receiver and Line Card combinations within this group. |
| □ | Using the Special Functions on the Navigation Menu at the top of the Receiver Groups Form: |
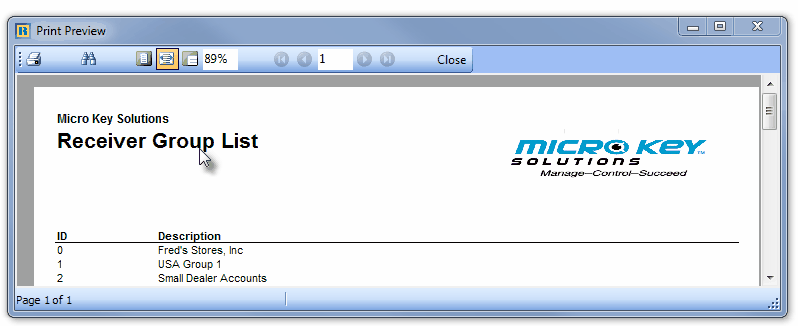
| • | Print - Click the Print Icon to View and/or Print a list of the Receiver Groups. |
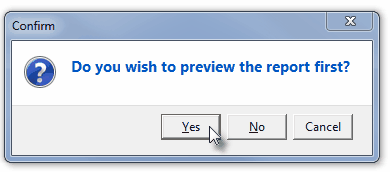
| • | Yes - Click the Yes button to View a copy of the report. |
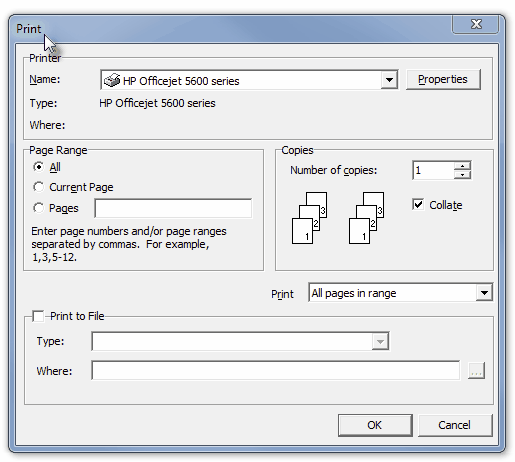
| • | No - Click the No button to open the Windows® Print dialog where a copy of the report may be sent to a selected Printer, or Printed to a File. |
| • | Cancel - Click the Cancel button to close this Print question and return to the Form. |
| • | Search - Click the Search Icon to open the Search Contract Types dialog. |

Search dialog
| • | See the "Using the Generic Search dialog" section in the Advanced Search Dialog chapter for more information about this Search dialog. |


![]()

![]()


