| □ | Running SPA for the first time: |
| • | Double-Click the SPA Icon. |

Custom made Program Folder for MKMS applications
| • | The SPA application will immediately minimize, and then display itself in the system tray at the bottom right corner of your Windows® Desktop. |
| • | Locate the SPA Icon on the system tray at the bottom of your screen. |

| • | There are two ways to display the SPA program's Main Menu and it's Shortcut Menu Buttons: |
| 1. | Double-Click on the Cloud & Lightening Bolt Icon in the system tray |
| 2. | Right-Click that SPA Icon to display its menu options, and Select Show |
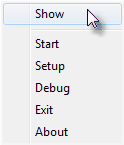
SPA - menu options
| • | In either case, the SPA program will display the Signal Processing Application's Main Menu and it's Shortcut Menu Buttons. |
| • | The four Main Menu choices and each of these choice's options are: |
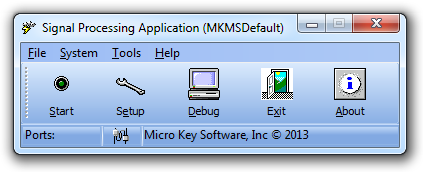
SPA - Signal Processing Application - Main Menu
| 1. | File - There are four options available within the File Menu. |

| a. | Start - This option (also available as a SPA Shortcut button) is used to Start/Stop SPA communications with your Receiver(s). |
| ▪ | When SPA is not communicating with your Receiver(s), the option will read Start. |
| ▪ | When SPA is communicating with your Receiver(s), the option will read Stop. |
| b. | Setup - This option (also available as a SPA Shortcut button) allows you to configure each of the modifiable features in SPA. |
| c. | Debug - This option (also available as a SPA Shortcut button) Opens the Debug Data dialog for viewing the data being received from Receivers attached to SPA. |
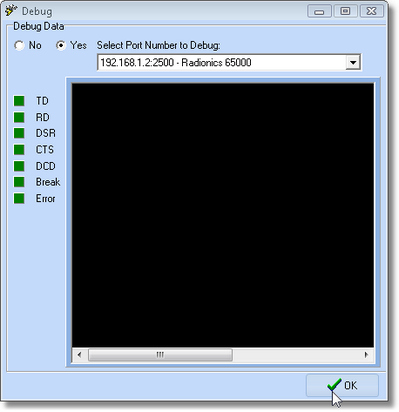
SPA Debug dialog
| ▪ | SPA must be started for this Debug Data function to operate. |
| ▪ | Click the Yes button to proceed with the data analysis. |
| ▪ | Select a Receiver using the Drop-Down Selection List provided. |
| ▪ | The information box below the selected Receiver will display any data being transmitted from that receiver to SPA. |
| o | TD - Transmit Data or Loop. |
| o | DCD - Data carrier detected. |
| o | Break - In transmission. |
| o | Error - In transmission. |
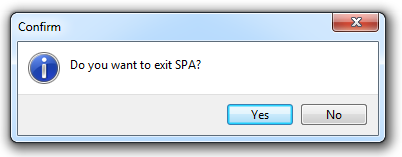
| d. | Exit - This option (also available as a SPA Shortcut button) Closes the SPA application (after a warning message requiring Confirmation). |
| 2. | System - There are eleven options available within the System Menu. |
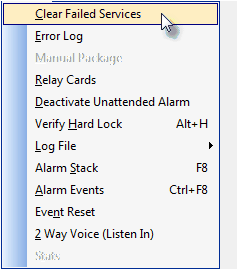
SPA System menu options
| a. | This will be the most used menu selection because it provides access to several important functions and Forms. |
| b. | See the SPA System Menu chapter for detailed information about these options. |
| 3. | Tools - There is one default option available within the Tools Menu. |
| ▪ | You may create your own set of Tool menu options and utilities following the instructions in Tool Menu Setup. |
| ▪ | To establish one of these personal menu selections, Select Tools, then Choose Setup to view the Form shown below. |
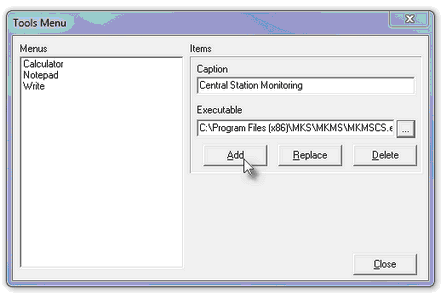
Tools Menu Setup dialog
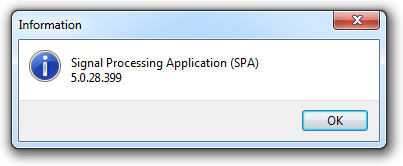
| 4. | Help- The only option on the Help Menu is About. |
| ▪ | Click About to view the current version of the SPA application. |
| □ | SPA Shortcut Menu Buttons: |
| • | There are five Shortcut Menu Buttons displayed below the Main Menu (outlined above). |
SPA - Signal Processing Application menu
| 1. | Start - Click the Start button to run the alarm processing function of SPA. |
| ▪ | To make any changes to SPA, the processing action must be stopped. |
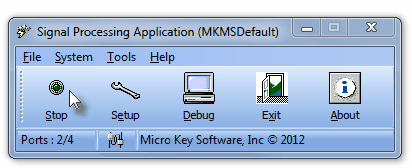
| ▪ | Click the Stop button to stop SPA. |
| 2. | Setup - Click the Setup button to view all of the Setup Form's tabs. |
| 3. | Debug - Click the Debug button to view the Debug Data dialog for viewing the data packages being transmitted from the Receivers attached to SPA. |
| 4. | Exit - Click the Exit button to Close SPA. |
| 5. | About - Click the About button to view the About box. |
| • | See SPA Set Up Instructions, where you learn about all of the ways that you may configure SPA for your specific needs. |

