| □ | Requiring the use of Purchase Orders, particularly when acquiring Inventory Items, allows you to better track an control your Company's spending. |
| • | Purchase Orders will by be the foundation of a purchasing process that should include at least two of these three procedures: |
| 2. | A spending authorization from someone in charge of tracking the Budget. |
| 3. | A (different) Manager's approval. |
| • | This combination of an OK to buy, and an OK to spend, provides just enough structure to restrain Employees from making frivolous and/or unnecessary Purchases. |
| • | Another advantage to using Purchase Orders to buy products and services is that it helps insure that you know exactly what you have ordered (and more importantly, so does the Vendor), and you also know how much you agreed to pay for those items. |
| □ | The Purchase Order system's capabilities: |
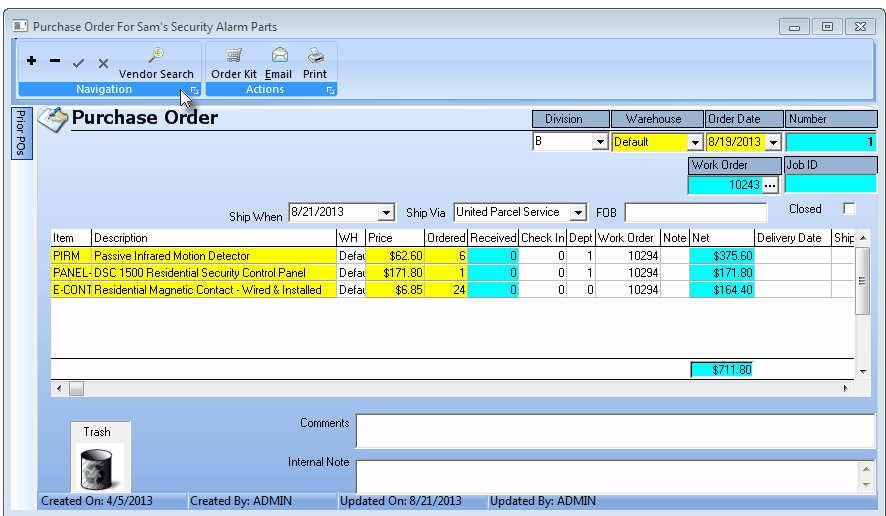
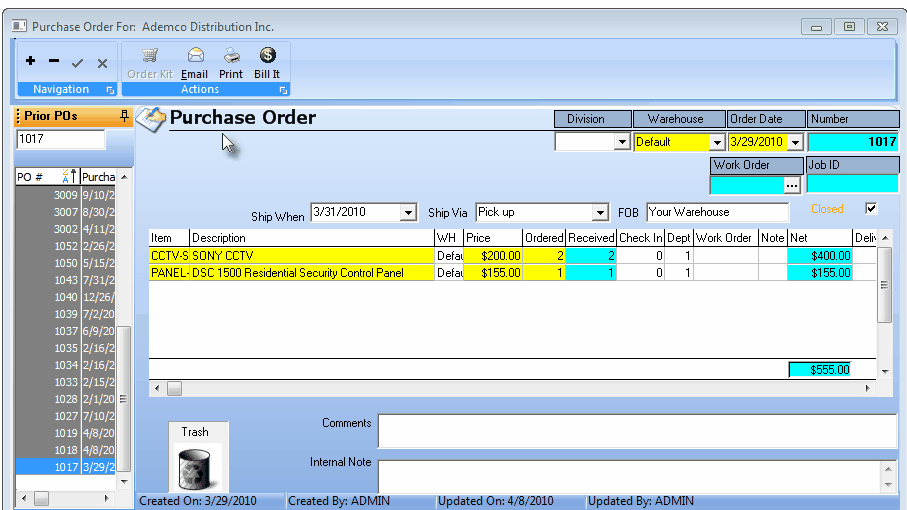
| A. | Purchase Orders, in the MKMS Accounts Payable module, may have any number of line items, any length of specific explanation for each line item, default as well as custom Pricing, totals, shipping instructions and the Warehouse assignment for the Receiving Department. |
| B. | Purchase Orders may be Printed and/or Emailed. |
| C. | When completed, by using the Bill It button, Purchase Orders will automatically be converted to a Bill. |
| D. | You may print the Description and also include your internal Purchase Item ID code, or the Vendor's Part Number, on the Purchase Orders. |
| E. | There are two places from which you may access the Purchase Orders Form: |
| □ | An Overview of Purchase Order Procedures: |
| • | Print and mail (and/or Email) the Purchase Order to the Vendor. |
| • | Once any of the ordered Items are received for this Purchase Order: |
| • | Create a Bill for what was shipped. |
| • | If any items were Backordered: |
| ▪ | Wait for those Items to also be shipped. |
| ▪ | Create a Bill for what was received. |
| o | A Warning will be displayed indicating that doing so will make the remaining items Inaccessible. |
| o | If they may be available, and you still want to wait for them to be shipped from this Vendor, do not Close the Purchase Order. |
| • | Whenever the last open Item is Checked In: |
| ▪ | Create a Bill for the final portion of the shipment. |
| ▪ | The Purchase Order will be permanently Closed. |
| ▪ | It is now Inaccessible but stored as a historic record, until manually deleted. |
| • | Click the PO on the Accounts Payable Menu. |
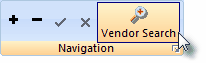
| • | Click the Vendor Search Icon on the Purchase Order Form |
Purchase Order Form with Vendor Search button
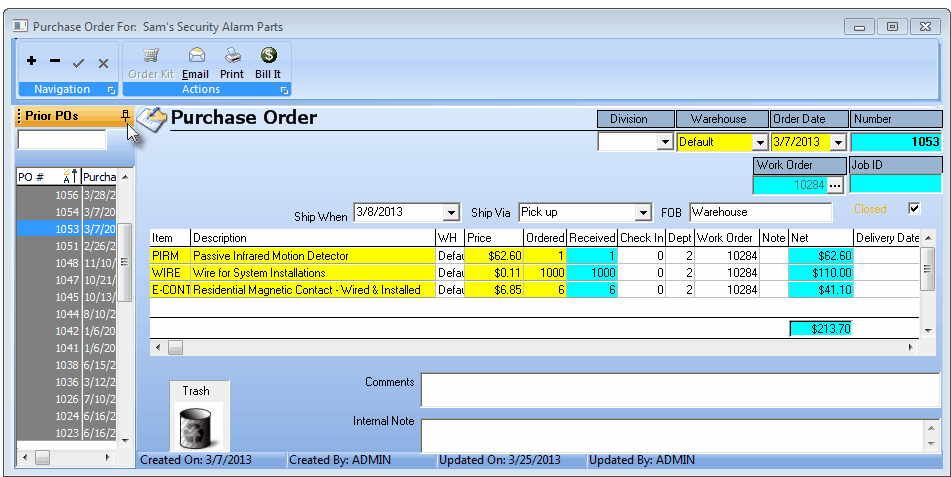
| □ | Prior POs tab - Click the Prior POs tab to open the list of Prior Purchase Orders - in the order selected by the user - that were previously entered for this Vendor. |
| • | The Prior POs tab is located on the left of the Form and is used to open a List of Purchase Orders from which to select and display a specific Purchase Order previously created for this Vendor. |
| • | Click on the Prior POs tab on the Purchase Order Form to view a list of all of the previously created Purchase Orders. |
Purchase Order Form showing Prior POs columns Pinned Open
| • | You may Click the Pin Pointer (see mouse pointer in illustration above) to keep this list of Purchase Orders displayed. |
| • | Once you have pinned the list open, the Prior POs List for each Vendor stays pinned opened until you specifically unpin it. |
| • | Search - The Prior POs list contains a Search box into which you may enter a Purchase Order Number . |
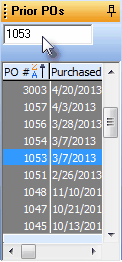
| • | Click the word PO# at the top of the Purchase Order Number column. |
| • | Enter the Purchase Order Number in the Search field for the Purchase Order record you want to view. |
| • | That Purchase Order - as long as it belongs to the currently selected Vendor and has not been deleted - will be instantly displayed on the Purchase Order Form. |
| • | Sorting the Prior POs List - The list of Prior Purchase Orders may be displayed in any order you choose, based on the information in one of the columns. |
| ▪ | Click the word PO# at the top of the Purchase Orders Number column (PO#) to sort the records by their Purchase Order Number (newest to oldest). |
| ▪ | Click the word PO# again to reverse the order (oldest to newest). |


| ▪ | You may sort the Prior POs List based on the information in either column simply by Clicking on that column's Name. |
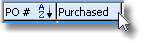
| ▪ | This sorted order remains in effect whenever the Prior POs List is displayed, until you choose a different sorting order. |
| • | Generally, it is best to keep the list sorted by the Purchase Order Number unless you have a specific need for sorting by the Purchase Order's Date, but if you do, reset it to Purchase Order Number Order before closing the Purchase Order Form. |
| • | Retrieve the specific Vendor to whom you want to issue a Purchase Order. |
Purchase Order Form
| • | Creating a Purchase Order - Regardless of how you started the Purchase Order Form (see above), once the correct Vendor is chosen and the Purchase Order Form is opened, you must actually create the Purchase Order. |
| □ | Special on the Purchase Orders Form - In addition to the standard Navigator buttons on all Data Entry Forms within MKMS, there are three special purpose available on the Purchase Order Form. |
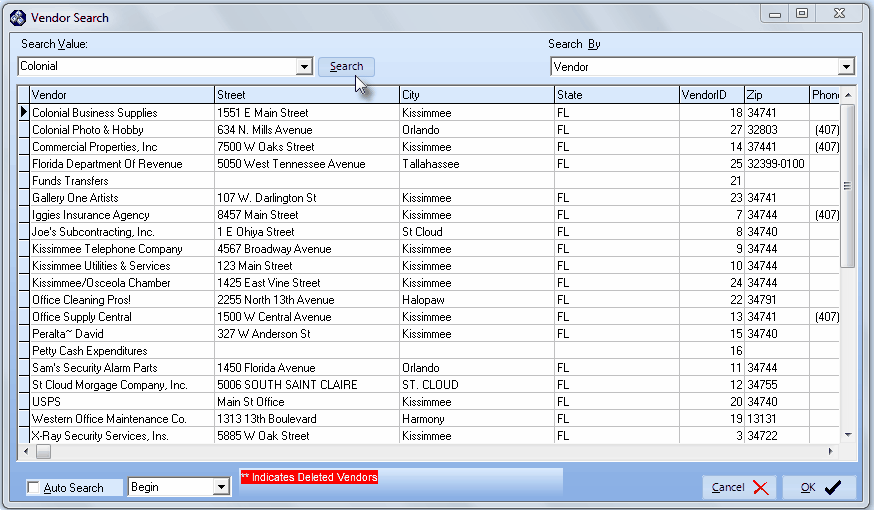
| 1. | Vendor Search - This will only appear when the Purchase Order Form is opened from the main Accounts Payable Outlook® Style Menu. |
Search Vendors form used to locate the desired Vendor record
| b. | Use the Drop-Down Selection List to Choose the Search By method. |
| c. | Enter the appropriate Search Value. |
| d. | Select the desired Vendor. |
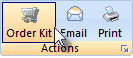
| 2. | Order Kit - Click the Order Kit button to place an order for a predefined Kit on this Purchase Order. |
| ▪ | Once that Kit is defined, the Sale-Purchase Item Code assigned to that Kit may be selected to place an order for all of the Inventory Items required to make the Quantity of Kits that are to be Purchased. |
| ▪ | This will insert, on this Purchase Order, as many individual Detail Line Items and Quantities required to make up the contents (Inventory Items and individual Quantities) of the selected predefined Kit. |
| • | To order the purchase of specific quantity of a User-Defined Kit, Click the Order Kit button at the top of the Purchase Order Form. |
| ▪ | The Order/Purchase Kit dialog will be displayed. |
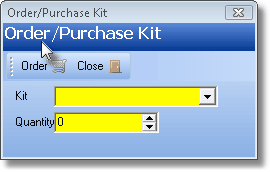
Order/Purchase Kit dialog
| a. | Kit - Use the Drop-Down Selection List to Choose the desired Kit. |
| b. | Quantity - Enter the number of Kits that are required. |
| c. | Order - Click the Order button to execute this request. |
| d. | Close - Click the Close button to return to the Purchase Order Form. |
| e. | The Inventory Items and Quantities required to make up the number of Kits ordered will automatically be inserted into the Purchase Order. |
| 4. | Email - To Email this Purchase Order to the Vendor, that Vendor must have an Email address defined on their Vendor Information Form. |
| a. | Click the Email to open your default Email account software (such as Outlook®) |
| b. | Enter the appropriate Email address. |
| c. | The Purchase Order will be attached when you Click Send. |
| 5. | Print - To View and/or Print this Purchase Order, Click the Print . |
| 6. | Bill It - To convert this Purchase Order into a Vendor's Invoice, Click the Bill It . |
| ► | Note: The Purchase Order must be opened from within the Vendor Information Form for the Bill It button to be available. |

Bill It Icon on Actions Menu
| • | Before you can use the Bill It button, you must Check In the items that were Ordered and have been Received. |
| ▪ | The Bill It button is not available if the Purchase Order Form is opened from the main Accounts Payable Outlook® Style Menu. |
| ▪ | Only Click the Bill It to have this Purchase Order automatically converted to a Bill, and, once everything is received that was ordered, or is backordered and another Purchase Order will be used to re-order those items, to mark the Purchase Order as Closed. |
| ▪ | Once the Purchase Order is Closed, it is finalized and can no longer be changed in any way. |
The Inventory Counts are not updated (based on what has been received that are Inventory Items) until you Click the Bill It Button on the Purchase Order Form accessed through the Vendor Information Form.
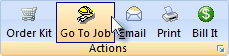
| ▪ | If this Purchase Order was created for a Job Costing Task, Click the Go To Job button to open the associated Job Costing Form for the Job ID number shown. |
| o | Click the Purchase Orders tab to view all previously entered Purchase Orders for this Job ID |
| o | Double-Click any PO# to display that Purchase Order Form. |
| 7. | Delete - You may also Delete ("-") the entire Purchase Order, if appropriate. |
| □ | To view all the Purchase Orders from the Main Menu, Select the File menu, Choose the Accounts Payable sub-menu and Click the PO . |
| ► | Note #1 - As noted above, you may also access this Form by selecting the PO on the Accounts Payable Menu Bar on the Main Shortcut Bar. |
| ► | Note #2 - The Bill It button (see #6 above) is not available when the Purchase Order is accessed this way. |
| □ | Closing a Purchase Order - When a portion, or all of the order is Received: |
| • | The requested items on your Purchase Order have arrived, What do you do? |
| ► | Note: You cannot use the Bill It button when the Purchase Order was located with the PO Search function. |

