| □ | All (or some) of the requested items for a Purchase Order have been received: |
What Do You Do?
| 2. | Check in those Items that were delivered (see those instructions in the Check in chapter). |
| 3. | Create a Vendor Bill for these items. |
| □ | Locate the specific Purchase Order (for the items that were received) in MKMS: |
| • | Press F2 to locate the Vendor to whom you issued the Purchase Order, |
| • | Click the Prior POs tab on the Purchase Order Form. |
| □ | Bill It - Use the Bill It Button on the Purchase Order Form to record the Bill (Invoice) from the Vendor (Supplier of the Purchased Items) for the items that were received. |

Bill It Icon on Actions Menu
| • | If you have received everything that was ordered, or simply want to create an interim Invoice (Bill) because the remainder of the items are temporarily back ordered: |
| • | Click the Bill It button. |
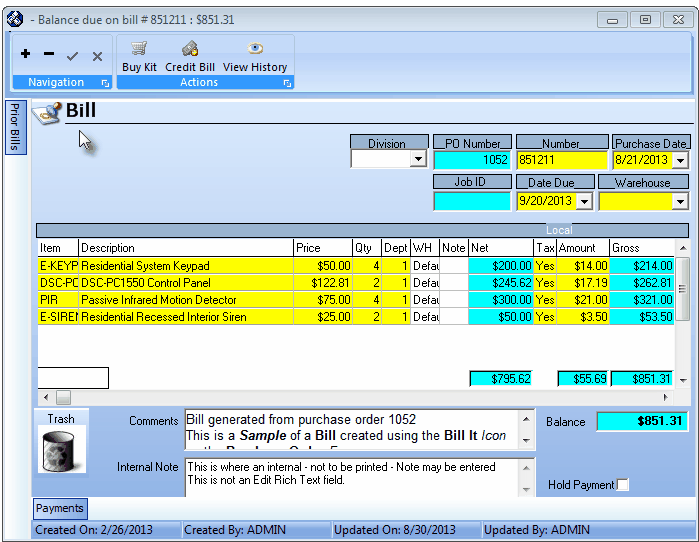
Bill create with using the Purchase Order Bill It button
| • | This will automatically convert whatever part of the Purchase Order that was Checked In, to a Bill. |

| • | Received - Once a Bill is created, the Checked In amounts on the Purchase Order Form will be moved to the Received column, and the Check In column's Quantity will be re-set to to zero (0). |
| • | When you Click the Bill It Button, if all of the Items that were Ordered have been delivered and Checked In, you will be asked if you want to mark the Purchase Order as Completed. |
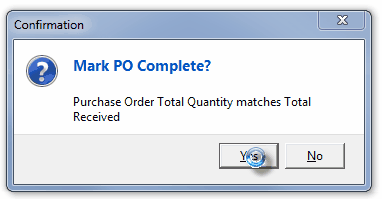
Mark PO Complete?
| o | This is the default choice, and in most cases what you should Choose. |
| o | The only exception to this is if you want to be able to add additional items to this Purchase Order for some reason |
You may have also received Back Ordered items which were included in the delivery of this Purchase Order,
but for which a different Bill will be coming later.
Therefore, once you've Billed what was ordered on this Purchase Order, add those Back Ordered items to this Back Ordered items, and then use the Bill It feature again for those specific Back Ordered items.
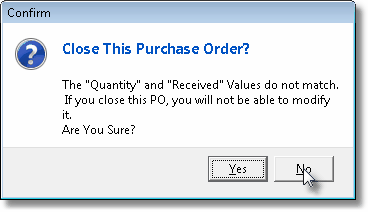
Finally, after recording and billing those Back Ordered items, Close the Purchase Order.
| ▪ | No - If, for some reason you think this Purchase Order will need to be modified later (see the Note above), Select No. |
| • | The Bill will be displayed immediately after answering this question. |
| • | Number - You must enter the Vendor's Invoice Number once the Bill is created (there will be a reminder message displayed). |
| ▪ | Initially, the Invoice Number will be randomly generated. |
| o | A Reminder message - to enter the correct Vendor's Invoice Number - will be displayed |
| o | You must Modify this Invoice Number field (see mouse pointer in illustration below) to match the actual Invoice Number assigned by the Vendor. |
| o | If the actual Invoice Number is not yet available, accept the random assignment, then change it when the Vendor's Invoice is eventually mailed to you. |
| • | Tax - Also, Check the Taxation Status on each Invoice Item because some items may, and others may not, need to be charged Sales Taxed. |
| ▪ | If you must pay Sales Tax on Purchases For Resale, usually because the installation will not be taxable to the Subscriber, modify the Tax status and Amount based on the Vendor's Invoice. |
| ▪ | Because of this, you may have to modify the Tax status and amount |
| ▪ | Also, add any shipping charges that were not included in the original Purchase Order as an additional line item. |
| • | Amount - If the Purchased Item on the Bill Form is to be Taxed, enter the Amount of the Tax shown on the Vendor's Invoice. |
| • | You may use the Bill It button any number of times - creating separate Vendor Invoices each time - until all of the Purchase Order's Items that have been delivered are Checked In. |
| • | The Inventory Counts for the Items that you Check In are not updated (based on what has been received that are Inventory Items) until you Click the Bill It button. |
| • | Only after you have used the Bill It button to create a Bill for all of the items that have been delivered and Checked In, should you mark the Purchase Order as Closed. |
| ► | Note 2: Once the Purchase Order was Checked Closed, the Bill It button will no longer work because all of the Checked In fields will be re-set to Zero (0). |

