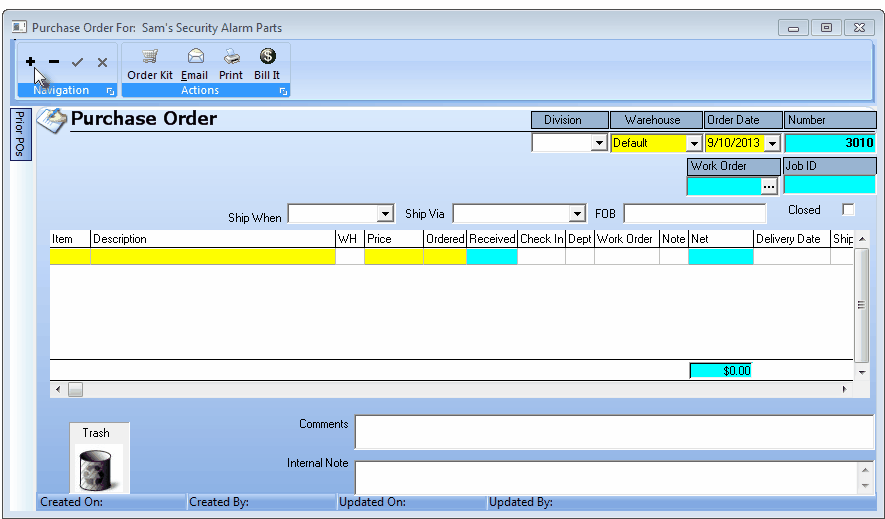
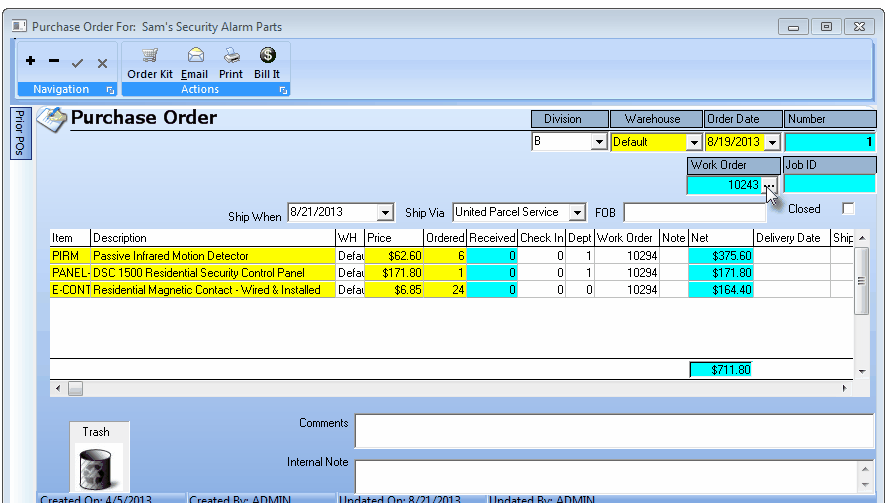
Purchase Order Form - New Entry
| • | Click Add ("+") to create the new Purchase Order. |
| • | Use the Drop-Down Selection List to Choose a different (or new) Division Code, if appropriate. |
| • | Warehouse - By default, it will be the Default Warehouse. |
| • | Use the Drop-Down Selection List to Choose a different Warehouse. |
| • | Order Date - By default, Today's date is inserted. |
| • | You may use the Drop-Down Date Selection Box to Choose a different date, if appropriate. |
| • | Number - The next available Purchase Order Number will be inserted automatically. |
| • | Work Order - May represent any of the following (See "Understanding and Using the Work Order Number field" section below): |
| 1. | The Work Order Number of the Service Request for which this Purchase Order is being created. |
| 2. | The Work Order Number manually assigned to this Purchase Order after (or as) it is created. |
| 3. | The default Work Order Number to be assigned to any Detail Line Item which had not previously been assigned a Work Order Number. |
| • | Ship When - Use the Drop-Down Date Selection Box to Choose the Preferred Shipping Date, if appropriate. |
| • | Ship Via - Enter the desired Shipping Method using the Drop-Down Selection List provided, if appropriate. |
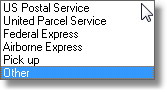
Ship Via Selections
| • | FOB - Enter the location from where the order will be shipped. |
| • | This location selection often determines how much you have agreed to pay for shipping. |
| • | If the Vendor changes this, and the charges more for shipping, you may want to contest the additional cost of shipping based on that originally agreed upon FOB. |
| • | Detail Line Item Information: |
| ► | Note: Items may be ordered individually, or as User-Defined Inventory Kits. |
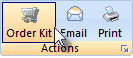
| ▪ | To order one of those User-Defined Kits, Click the Order Kit button to place an order for a predefined Kit on this Purchase Order. |
| • | Item - Using the Drop-Down Selection List provided, Choose the Purchase Category code for this ordered item. |
| • | Description - By default, it will be the default Description assigned to the selected Purchase Category. |
| ▪ | You may Modify this Description, if needed. |
| • | WH - By default, it will be the Default Warehouse unless it was changed when you Selected the Warehouse above. |
| ▪ | Use the Drop-Down Selection List to Choose a different Warehouse, if needed. |
| • | Price - By default, it will be the Price In (if it was entered in the Sale-Purchase Items Form) that was assigned to the selected Purchase Category. |
| ▪ | You may Modify this Price, if a different price is to be specified. |
| • | Ordered - By default, it will be 1. |
| ▪ | You may Modify this quantity to be ordered, as needed. |
| • | Received - This number will be maintained by the system and represents what you have previously Checked In and Billed. |
| • | Check In - When the Vendor has shipped the order to you, enter the number that you have actually received. |
| • | Dept - Departments are used in the General Ledger to identify a Work Group or Profit-Center within your Company that is responsible for installing, servicing or monitoring your Subscribers. |
| ▪ | If appropriate, enter the Departments that is responsible for, and will use, the items requested on this Purchase Order. |
| • | Note - Double Click (Memo) within the Note field to open a Note Pad to enter additional information related to the Detail Line Item. |
| • | Net - The cost of this line item based on the Price and Ordered amounts entered. |
| • | Delivery Date - Use the Drop-Down Date Selection Box to Choose a Delivery Date for the current Detail Line Item, if and when available. |
| • | Shipper - Use the Drop-Down Selection List to Choose a Shipping Method for the current Detail Line Item, if and when appropriate. |
| • | Tracking Number - Enter a Tracking Number for the current Detail Line Item, if and when available. |
| • | Work Order - Displays the Work Order Number - if one was assigned to the Purchase Order (using the Order Inventory button on the Service Request Form) or has been specifically assigned to this Detail Line Item, that appropriate Work Order Number may be assigned individually (see below). |
| o | Click on the Work Order field to activate the Ellipse |
| o | Click that Ellipse to display the Select Subscriber dialog from which the Subscriber - for whom these Sale-Purchase Items are being Ordered - may be identified. |
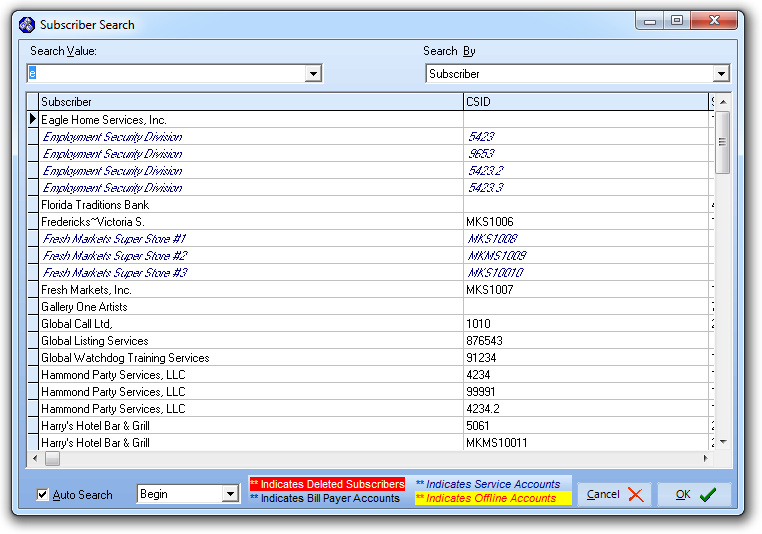
Subscriber Search dialog
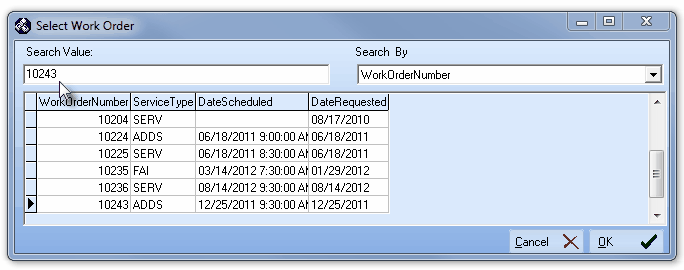
| o | Click OK to Select that Subscriber and the Select Work Order dialog will be displayed. |
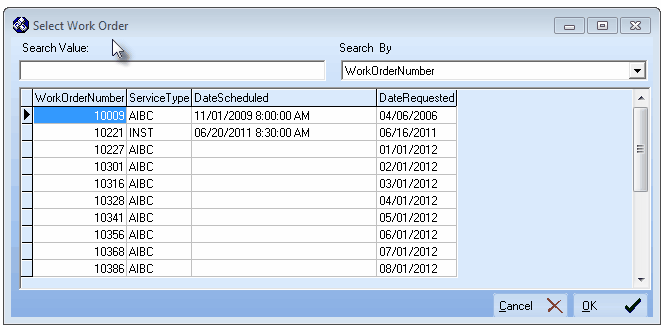
Select Work Order dialog
| o | Choose the Work Order Number that is to be assigned to this Purchase Order. |
| o | Click OK to Select that Work Order Number which will then insert it into the Work Order field on the Purchase Order Form. |
| • | Total - Sum of all the Net amounts. |
| • | Comments - Enter any additional Comments that will help the Vendor better understand the items being ordered on this Purchase Order. |
| • | You may also Double Click the Comments field to open a Rich Edit Text box. |
| • | Internal Notes - Enter any information that would be useful for the User to see when viewing this Purchase Order. |
| • | These Internal Notes are not Printed on the Purchase Order. |
| □ | Understanding and Using the Work Order Number field on the Purchase Order Form: |
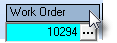
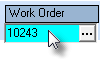
Work Order
| • | Work Order - This is a multi-purpose field which may identify one of the following: |
1. Indicates the Work Order Number of the Service Request for which this Purchase Order is being (or was previously) created from and for that Service Request:
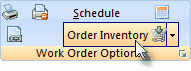
Service Request Form - Order Inventory Icon
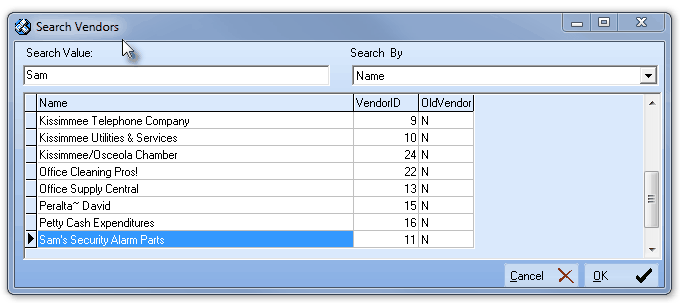
Search Vendors dialog
| ▪ | This Search Vendors dialog is used to Choose the Vendor to whom the Purchase Order will be submitted. |
| ▪ | Click on the desired Vendor and Click the OK button. |
Purchase Order Form - Work Order field
| ▪ | The Work Order Number assigned to that Service Request will automatically be inserted in the Work Order field (as shown above). |
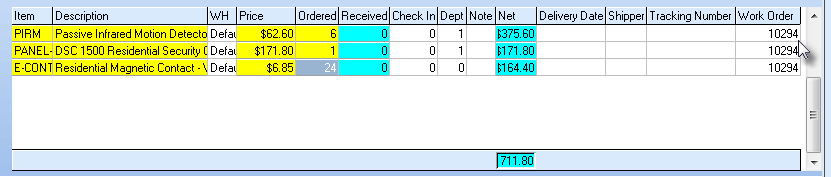
Work Order column on Purchase Order Form
| ▪ | Each Detail Line Item (as shown above) on the Purchase Order Form will also have that Work Order Number assigned. |
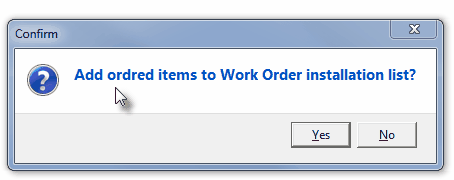
Add ordered items to Work Order installation list?
2. Allows a specific Work Order Number to be manually selected and then assigned to a Purchase Order (which is being created to order Inventory Items for a specific Subscriber's Service Request:
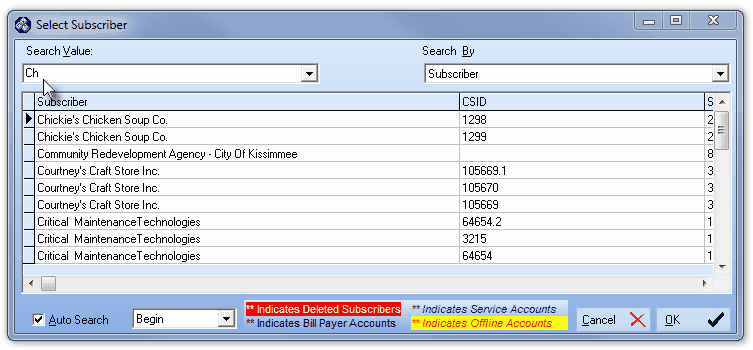
Select Subscriber dialog
| ▪ | Once the Subscriber is Selected, a Select Work Order dialog is provided. |
Select Work Order dialog
| ▪ | The Work Order Number assigned to that Service Request will automatically be inserted in this Work Order field. |
| ▪ | Each Detail Line Item subsequently added to this Purchase Order Form will also have that Work Order Number assigned. |
3. To identify the default Work Order Number to be assigned to any additional Detail Line Item(s) which are (or may be) added to an existing Purchase Order:
| ▪ | Follow the directions in item 2. immediately above. |
| □ | Completing a Purchase Order when a portion, or all of the order is Received: |
| • | The requested items on your Purchase Order have arrived, What do you do? |
| 1. | Retrieve the appropriate Vendor. |
| ► | Note: You cannot use the Bill It button when the Purchase Order was located with the PO Search function or the PO Icon on the Accounts Payable Menu. |

