| □ | Working with the Service Request Form to create, update and/or complete a Work Order: |
| • | Creating a Service Request (which is also referred to as a Work Order) is actually a multi-stage process where certain information is entered initially, then additional information is added later, and when the work is completed, the Service Request is finalized and Invoiced. |
| • | The steps required to create, schedule, update, track, and ultimately complete a Work Order are outlined below: |
| b. | If appropriate, identify specific Technician Skills that will be required for this Work Order. |
| d. | Assign a Technician to the Work Order . |
| • | Click Add ("+") to enter a new request for Service. |
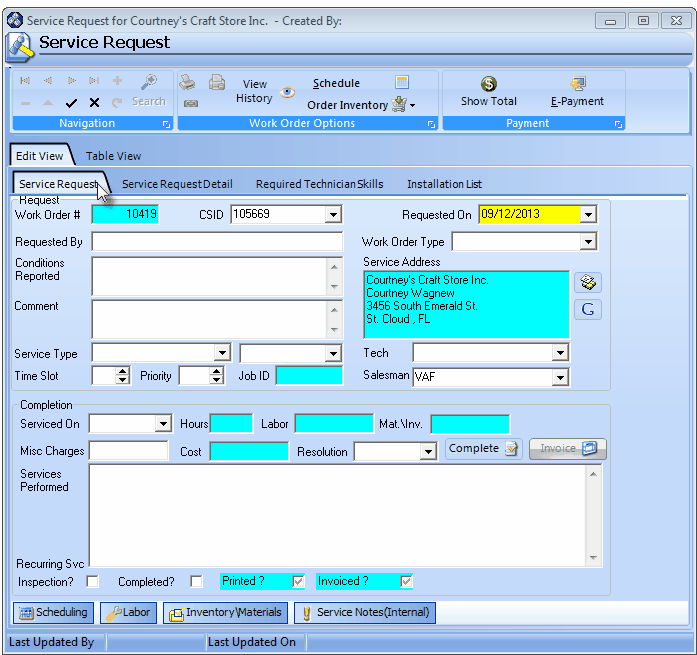
Entering a new Service Request
| • | Request box on the Service Request tab at the top of the Service Request Form |
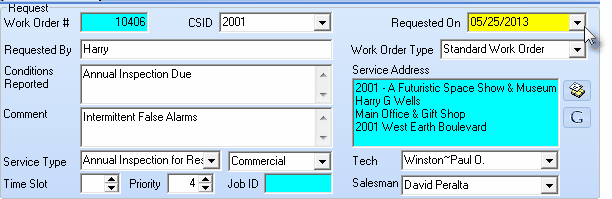
| • | Work Order # - Automatically assigned by the system. |
| • | CSID - By default, if defined, the Primary CSID for the selected Subscriber will be inserted. |
| ▪ | If the Subscriber has multiple CSIDs defined, and the Primary CSID is not the Subscriber Panel that requires service, use the Drop-Down Selection List provided to Choose the appropriate CSID for this Service Request. |
| • | Requested On - By default, Today is inserted. |
| ▪ | Use the Drop-Down Date Selection Box to change the Date, if appropriate. |
| • | Requested By - Enter the name of the person requesting the service. |
| ▪ | If there is a special contact number for her/him (i.e., Cell or a direct internal Phone line) you may also include that information in this field. |
| • | Work Order Type - There is no default. |
| ▪ | Using the Drop-Down Selection List provided, Choose the Type of Work Order this will be. |

Work Order Types
| 1) | Standard Work Order - Most Service Requests will be of this kind. |
| 2) | Fire Alarm Test - For periodic Fire Alarm Testing. |
| 3) | Fire Extinguisher Inspection - For required Fire Extinguisher Inspections. |
| 4) | Installation Order - For documenting the Inventory requirements of a New Installation. |
| • | Conditions Reported - Enter a description of the service problem. |
| ▪ | You may enter up 150 characters (this is not an Edit Rich Text field). |
| ▪ | Upper & Lower case letters, all numbers and most punctuation marks are permitted. |
| • | Comment - Enter any comments that may help the Technician better understand this service issue. |
| ▪ | An entry of up to 500 characters is permitted (this is not an Edit Rich Text field). |
| ▪ | Upper & Lower case letters, all numbers, spaces and most punctuation marks may be used. |
| ▪ | If there is a special contact number for them (i.e., Cell or a direct internal Phone line) and it was not able to be entered above, include that information in this field, also. |
| • | Service Type - This will better categorize the type of Installation or Service Call that is required for this Work Order. |
| ▪ | Use the Drop-Down Selection List provided to Choose the appropriate Service Type. |
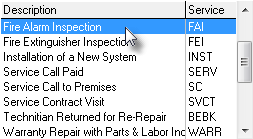
Sample Service Types Drop-Down Selections
| • | Service Category - Optionally, a sub-category of the Selected Type of Service may also be chosen. |
| ▪ | Use the Drop-Down Selection List provided in the field to the right of the Service Type field to Choose the appropriate Service Category. |
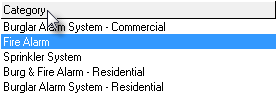
Sample Category - Drop-Down Selections
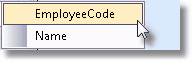
| ▪ | If you are ready to assign this Work Order to a Technician, use the Drop-Down Selection List - which lists both the Employee Code and each Technician's Name - to Choose the desired Technician. |
| ▪ | The list of Technicians can be sorted by either the Employee Code or by their Name. |
| ▪ | To do so, Right-Click the Tech field to display the Search by... option. |
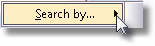
| ▪ | Then Click the right arrow „ to display the Search by options. |
| ▪ | This allow you to sort the list of choices by the chosen field name. |
| ▪ | Click on the selection type you prefer. |
| ▪ | This will be the Users default order of the selection list for this field unless a different field name is selected later. |
| ▪ | But a different Salesperson may also be identified, if appropriate. |
| ▪ | To do so, use the Drop-Down Selection List provided. |
| o | When assigning a Salesperson to a Service Request, only those Employees whose Employee Type is identified as either Sales or All will be available (in the Drop-Down Selection List list) for populating the Salesman field. |
| ▪ | The list of Salespersons can be sorted by either the Employee Code or by their Name. |
| ▪ | To do so, Right-Click the Tech field to display the Search by... option. |
| ▪ | Then Click the right arrow „ to display the Search by options. |
| ▪ | This allow you to sort the list of choices by the chosen field name. |
| ▪ | Click on the selection type you prefer. |
| ▪ | This will be the Users default order of the selection list for this field unless a different field name is selected later. |
| • | Time Slot - The general time position the Subscriber has requested, if applicable. |
| ▪ | Time Slots are numbers from 1 (the earliest) to whatever number of time slots you offer in a day (the latest). |
| • | Priority - A Priority Number of 3 will be inserted if no other number is entered. |
| ▪ | Although typically, it is set to 3, it may be changed as needed to indicate more and less critical situations. |
| o | That Service Type Priority Number may be changed as needed to indicate more and less critical situations. |
| • | Click the Save button ("ü") to record this Work Order before moving to the Service Request Detail or Technician Skills tab(s). |

| ▪ | This current User Name becomes the Created By name and cannot be changed. |
| ▪ | Whenever this Service Request Form is viewed in the future, the Created By information will appear at the top of the Form. |
| • | System supplied Information |
| • | Job ID - If this Work Order was created as a Job Task within the Job Costing system, the appropriate Job ID will be inserted automatically at that time, otherwise it will be blank. |
| • | Service Address - The Service Address of the Subscriber is displayed. |
| ▪ | However, if you may want to mail this Work Order to the Subscriber once it has been completed and the preferred Mailing Address is different from the displayed Service Address: |
| ► | Note: Be sure the Technician has completed the required service before you make the change described below. |
Once the address in this Service Address field is changed to the Billing Address, it cannot be changed back!

| o | Click the Select Billing Address button (illustrated above) to the right of the Service Address field. to open the Search Billing Addresses dialog shown below. |
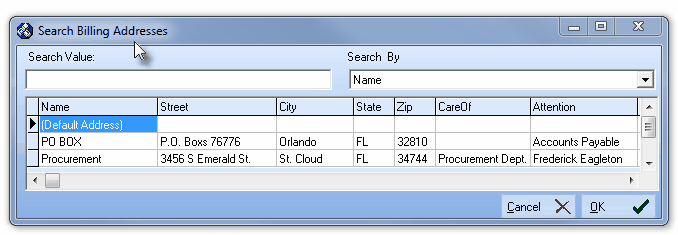
| o | Select the Billing Address and Click the OK ü button. |
| • | Google Maps® - Click the  to open a Digital Map Display showing the exact location of this Subscriber. to open a Digital Map Display showing the exact location of this Subscriber. |
| • | Technicians having a Coverage Area Zip Code that matches that of the Subscriber, will also be identified on the map. |
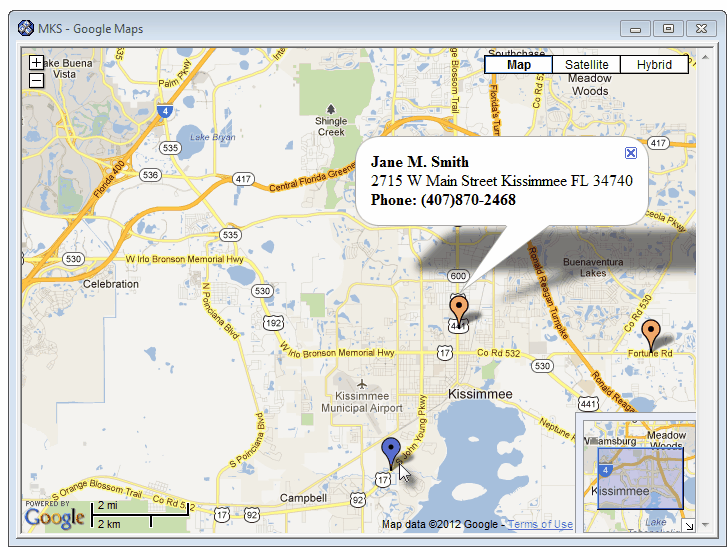
Google Maps showing location of Subscriber's Service Request (in Blue) and Technicians assigned to that Coverage Area (in Orange)
| □ | Verify Skills - Often specialized type of skill(s) will be required for a Service Request: |
| • | Thereafter, when a Technician is Selected, that Technician's Skill Sets will be compared (automatically) with the required Skill Set, and if they do not match, a Warning Message will be displayed. |
| • | To assure that the Lead Technician has the necessary Technical Skills that will be required for this Work Order: |
| • | The first Technician assigned to a Work Order should be (and by default is) the Lead Technician. |
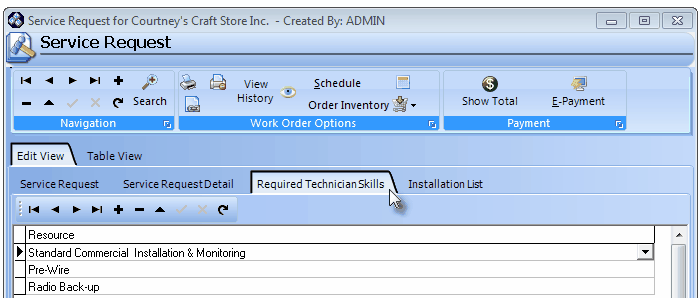
Service Request Form - Required Technician Skills tab
| • | Tech - If you are ready to assign this Work Order to a Technician, use the Drop-Down Selection List provided to Choose that Technician. |
| • | The first Technician assigned to a Work Order should be (and by default is) the Lead Technician. |
| □ | Working within the Scheduling section, and Using the Schedule button: |

| • | Click the Scheduling option (at the bottom of the Service Request Form) to view the Scheduling section. |
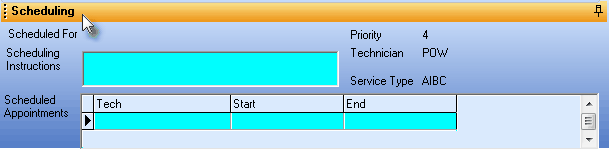
Work Order Not Scheduled
| • | If no Scheduling Information is shown (as illustrated above), one of two cases exist: |
| 1. | It has not been scheduled (be sure to do so!). |
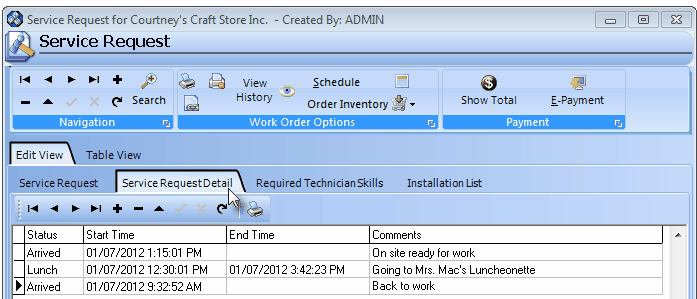
Service Request Detail tab with Technician Status entries
| □ | Creating an Installation List - See Installation List tab for important information about Creating and Using an Installation List. |
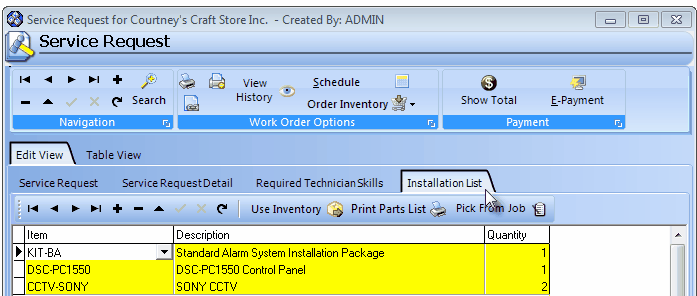
Installation List tab on the Service Request Form

