| □ | It's a typical day in the Service Department. |
| • | The telephone rings and there is a Subscriber with a problem. |
| • | They can't get a green light to set their alarm. |
| • | They need service A.S.A.P. |
| • | Using the Quick Work Order Form, you enter the basic Service Request information in the system, with appropriate Comments describing why this service dispatch was done verbally, versus using the Service Request Form coupled with the Technician Scheduling process. |
| • | You contact the Technician by Cell Phone, (providing the information verbally) and are able to immediately dispatch the Technician to the Subscriber's premises. |
| □ | It's a typical day in the Central Station. |
| • | An Alarm Signal is received and deemed by the Operator to be a False Alarm caused by a system malfunction. |
| • | Checking the Technician Status board, the Operator identifies the Technician that is closest to that Subscriber and can respond in a short time. |
| • | Using the Quick Work Order Form, the Operator enters the basic Service Request information in the system, with appropriate Comments describing why this service dispatch was done verbally |
| • | The Operator contacts the Technician by Cell Phone, (providing the information verbally) so (s)he is able to dispatch the Technician immediately to the Subscriber's premises. |
| ◆ | Note: Within these Help Files, the terms "Work Order" and "Service Request" mean the same thing and so either may be used to reference a record of (or the printed document stating) what task(s) are to be performed at a Subscriber's premises - whether requested by the Subscribers themselves, or created by the system as part of an automatic Work Order (i.e., Service Request) creation process. |
| □ | Starting a Quick Work Order: |
| • | There are three possible scenarios leading up to selecting the Work Order (Shift+F10) option: |
Quick Work Order Form
| ▪ | When an Operator opens the Quick Work Order Form while actually processing an Alarm Signal, the Quick Work Order Form (as shown above) will be pre-populated with that Subscriber's information. |
| ▪ | When an Operator opens the Quick Work Order Form while looking at Subscriber information, the Quick Work Order Form (as shown above) will be pre-populated with that Subscriber's information. |
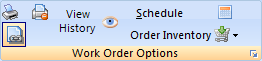
| 3. | In any other case (doing nothing specific, just logged into MKMS or MKMSCS), the User or Operator may Click the Work Order button on this Shortcuts Tool Bar (or the Quick WO Icon on the Service Tracking Quick Access Menu) to open a blank (as shown below) Quick Work Order Form. |
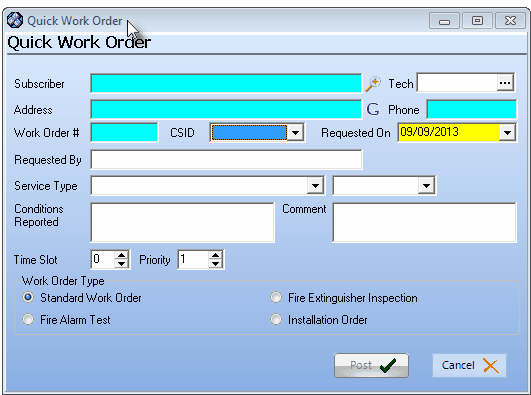
Quick Work Order Form

| ▪ | Once the appropriate Subscriber has been located, the Quick Work Order Form will be populated with the Subscriber + Address + Phone information. |
| ▪ | Once that Subscriber is located (selected), the Quick Work Order Form will be pre-populated with that Subscriber's information. |
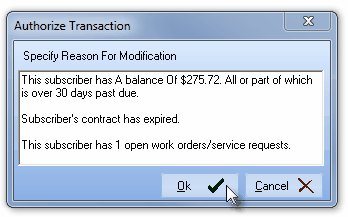
| • | If the Subscriber has any of these conditions a Warning message will be displayed: |
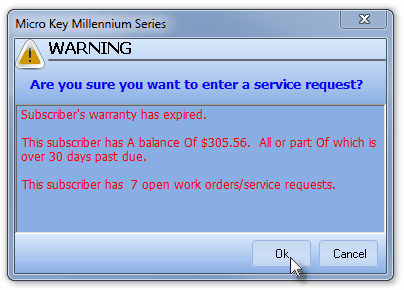
Are you sure you want to enter a service request?
| ▪ | Has an Outstanding Balance which some or all of it is Past Due |
| o | See the "What to do if the Subscriber has a Past Due Balance" section below, and/or |
| ▪ | Has no Warranty or Extended Service Agreement |
| o | Consider offering them an Extended Warranty Agreement now, and/or |
| ▪ | Has one or more Open Service Request(s) - see the "Subscriber already has an Open Work Order" section below. |
| • | Based on the appropriate next step: |
| ▪ | OK - Click the OK button to proceed anyway. |
| ▪ | Cancel - Click the Cancel button to abort the Quick Work Order entry. |
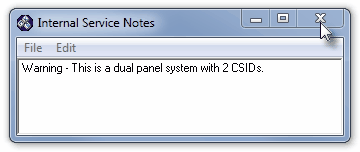
Internal Service Notes dialog
| ▪ | Read the information carefully and then Close the Internal Service Notes Form. |

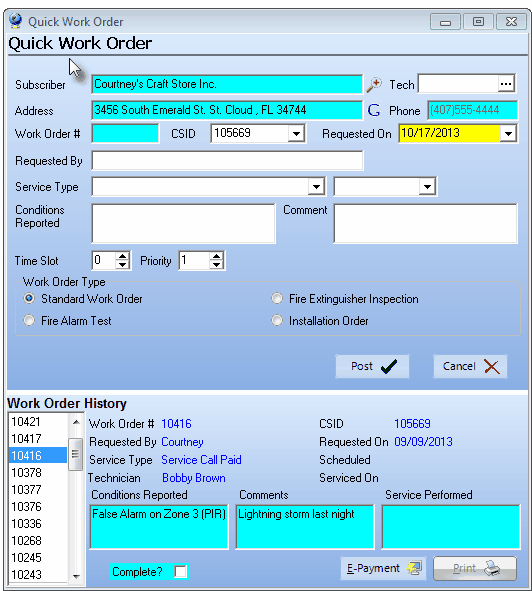
Quick Work Order Form with Subscriber Information inserted
| • | Google Maps® - Click the  to open a Digital Map Display showing the exact location of this Subscriber. to open a Digital Map Display showing the exact location of this Subscriber. |
| • | Technicians having a Coverage Area Zip Code that matches that of the Subscriber, will also be identified on the map. |
| □ | Entering a Quick Work Order for a Subscriber's Service Request |
Authorize Transaction
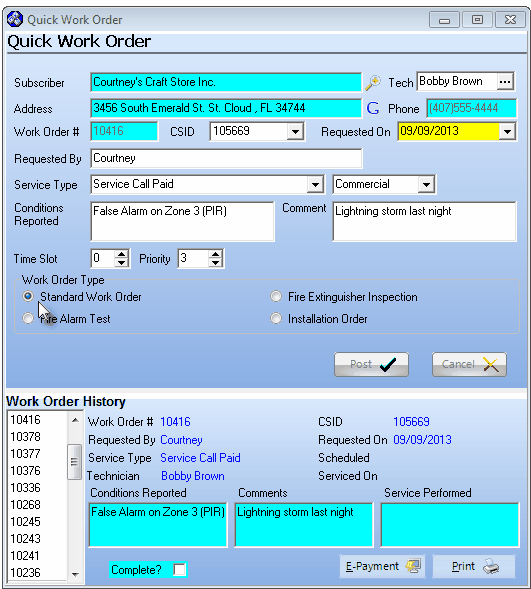
Quick Work Order Form
| • | Provide the information for the fields listed below: |
| • | Tech - Click the Ellipse button to open the Employee Search dialog. |
| ▪ | Select the appropriate Technician for this service call. |
| ▪ | The Employee Search dialog closes and the Technician's Name will be inserted in the Tech field. |
| • | CSID - By default, the Primary CSID will be inserted. |
| ▪ | Because some Subscribers may have multiple CSIDs being Monitored, a Drop-Down Selection List is provided to Select the appropriate CSID. |
| • | Requested On - By default, Today's date will be inserted automatically. You may modify this date using the Drop-Down Date Selection Box . |
| • | Requested By - Enter the name of the person requesting service. |
| • | Service Type - Use the Drop-Down Selection List provided to Choose the appropriate Service Type code. |
| ▪ | Optionally, use the Drop-Down Selection List provided to Choose the appropriate Sub-Category (if available) for the selected Service Type. |
| • | Conditions Reported - Enter the reason for this Quick Work Order entry. |
| • | Comment - Enter any additional comments that would be helpful to the Technician. |
| ▪ | If there is a special contact number for them (Cell or a direct internal Phone line) include that information in this field. |
| • | Time Slot - The general time position the Subscriber has requested, if applicable. |
| ▪ | Time Slots are numbers from 1 (the earliest) to whatever number of time slots you offer in a day (the latest). |
| • | Priority - A Priority Number of 3 will be inserted if no other number is entered. |
| ▪ | Although typically, it is set to 3, it may be changed as needed to indicate more and less critical situations. |
| ▪ | When a Service Type is assigned to this Quick Work Order entry, the Priority Number is reset to the Priority Number established for that Service Type. |
| o | That Service Type Priority Number may be changed as needed to indicate more and less critical situations. |
| ▪ | The Service Manager (or other User) who is scheduling this Work Order using the Technician Scheduling Form, can use this Priority Number value to help in that process. |
| • | Work Order Type -By default, Standard Work Order is selected. |
| ▪ | Click the appropriate button if this Quick Work Order is for a Fire Alarm Test, a Fire Extinguished Inspection or an Installation Order instead. |
| • | Post ü or Cancel Ñ - Click Post to accept the entry or Cancel to abort the process. |
| • | Work Order # - Once the Work Order has been posted, a Work Order Number will be assigned automatically. |
| • | E-Payment - Under Development |
| • | Print - As soon as it is posted, if required, Click the Print button to produce a hard copy Work Order. |
| □ | Work Order History - At any time during this process you may Click on any Work Order Number to review their Work Order History. Each record includes: |
| • | Work Order # - The Work Order Number assigned by the system. |
| • | CSID - The CSID that was selected from those assigned to this Account. |
| • | Requested By - Who requested the service. |
| • | Requested On - When the service was requested. |
| • | Service Type - The service type selected for this Work Order. |
| • | Scheduled - When the Work Order was scheduled. |
| • | Technician - The Lead Technician who was responsible of the service performed. |
| • | Serviced On - When the service was performed. |
| • | Conditions Reported - The original reason for requesting the service. |
| • | Comments - Additional comments made by the Operator or who ever was the requester. |
| • | Service Performed - Description of the services performed. |
| • | Completed? - Checked when the Work Order is completed. |
| □ | What to do if the Subscriber has a Past Due Balance: |
| • | Press F2 Search to retrieve the appropriate Account. |
| • | Quickly verify that they are eligible for service: |
| • | The Past Due balance is OK because of special circumstances. |
| • | They have made a promise to pay that was noted on the Comments tab, and/or that: |
| • | They are still an active Account. |
| • | Company Policy may dictate that you refer them immediately to the Accounts Receivable Department. |
| • | This whole process should take less than half a minute. |
| • | Click Yes to proceed with entering the Work Order, or No to abort the Work Order process. |
| • | If they have been cleared for service, refer back to Entering a Quick Work Order for instructions, above. |
| □ | Subscriber already has an Open Work Order |
| • | Close the Quick Work Order Form. |
| • | Press F2 Search to retrieve the appropriate Account. |
| • | If a Past Due warning is displayed, Click Yes to continue. |
| • | Click the Table View tab and locate any Work Orders that have no date entered in the Date Serviced column. |
| • | One at a time, Click each one, and then Click the Edit View tab. |
| • | Determine if this request is similar, or in any way linked, to the other open request(s). |
| • | If so, consider either updating the existing open Work Order with new information, or Chaining (see Create a New Service Request Chained from This One below) this one to a new Service Request. |
| □ | Create a New Service Request Chained from This One - If you have decided to connect a new Service Request with this previously entered Service Request: |
| • | Abort this entry by Clicking the Cancel Ñ button. |
| • | Open the Service Request Form and Retrieve the Work Order Number in question (to which this New Service Request should be Chained). |
| • | Click Yes and a new Service Request Form will be created with the existing Work Order information already included. |
| • | Modify this new Work Order information to include the additional information provided by the Subscriber. |

