Technician Scheduling Form - Pending Work Orders Listing
| • | The Pending Work Orders Listing will be displayed in ascending (oldest to newest) Work Order Number order with the associated data for the Column Names listed below. |
| ▪ | Subscriber Panel CSID - CSID |
| ▪ | Subscriber Name - Subscriber |
| ▪ | Priority Level - PRIORITY |
| • | Based on the desired method to be used to Locate a Work Order, this list of Pending Work Orders may be sorted by any one of these, or any of the other Column Names as listed below. |
| • | To reset the sorted order of the Pending Work Orders Listing, Click the Column Field Name in the Header that represents the desired order. |
| ▪ | This same action will display the list in a reverse order by Clicking that Field Name in the Header again. |
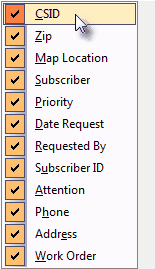
| • | Columns - These are the Columns of Work Order related data which are available: |
| • | Click the Down Arrow € on the right of the Columns Icon at the top of the Pending Work Orders Listing to display the complete list of all available Column Names. |
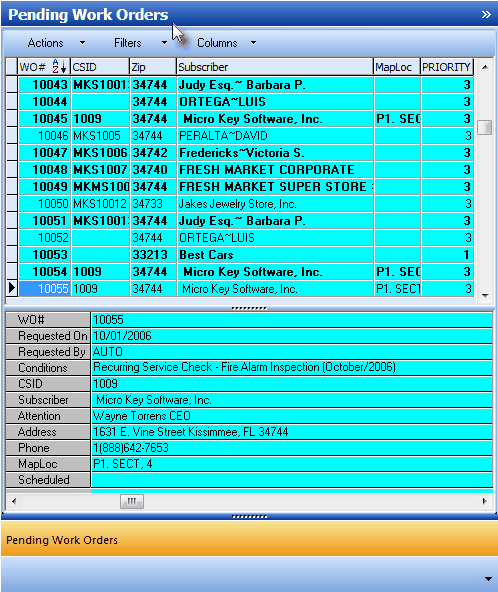
Pending Work Orders Listing
Available Columns
| • | Check any Column Names, one at a time, as may be needed. |
| • | Un-Check any Column Names, one at a time, that are not needed. |
| • | To Select a Work Order (make it the active Work Order record), Click that Work Order Number in the WO# Column. |
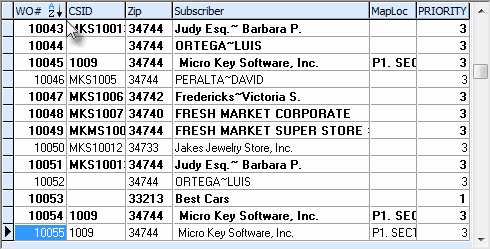
Pending Work Orders Listing
| • | To locate a specific Work Order Number, use the Action Icon's Search option at the top of the Pending Work Orders Listing (see the "Using the Pending Work Orders Menu Icons - Actions" section below), or Click and hold the Side (or bottom) Slide Bar's Up or Down (left or right) arrows to move through the list of Work Order Numbers. |
| • | As noted above, the order of the listed data may be changed in two ways: |
| 1. | Click any Column Name and all of the Work Orders will be sorted by the data in that Column - from lowest to highest - numerically or alphabetically based on the data type. |
| 2. | Click that same Column Name again and all of the Work Orders will be sorted in reverse order - from highest to lowest - numerically or alphabetically based on the data type. |
| ▪ | This is a very useful feature particularly when you need to view the list of Work Orders in Priority Order or by Zip Code. |
| • | The normally listed Pending Work Orders Columns are: |
| ▪ | Subscriber Panel CSID - CSID |
| ▪ | Subscriber Name - Subscriber |
| ▪ | Priority Level - PRIORITY |
| • | These Pending Work Orders Columns may be changed, relocated using the standard Windows® Drag & Drop process, and once relocated, will become the default order for that User. |
| • | As noted above, additional Columns of Pending Work Orders related data are available: |
| ▪ | Click the Columns Icon at the top of the Pending Work Orders Listing |
| ▪ | Check any additional Column Names, as may be needed. |
| ▪ | All of the Column Names (except Subscriber ID) are included in the Work Order Detail portion of the Pending Work Orders Listing (see "Work Order Detail" immediately below). |
| • | Work Order Detail - This area - located immediately below the Pending Work Orders Listing - displays key information about the Work Order which is currently Selected in the Pending Work Orders Listing above. |
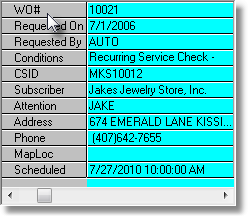
| • | WO# - The assigned Work Order Number. |
| • | Requested On - The Date the Service was actually Requested. |
| • | Requested By - The Person who requested the Service. |
| • | Conditions - Brief description of the reason the Service was Requested. |
| • | CSID - The CSID for the Subscriber which was assigned to the Work Order. |
| • | Attention - If entered, the Attention line entered in their Subscribers Form. |
| • | Address - The Address line entered in their Subscribers Form. |
| • | Phone - The Subscriber's primary Telephone number. |
| • | MapLoc - The Map book's page number and map coordinates for this location, GPS coordinates, or other methodology adopted to locate a Subscriber's premises. |
| • | Scheduled - If entered, the Date and Time Slot in which this Work Order is Scheduled. |
| □ | Using the Pending Work Orders Menu Icons - There are three Menu Icons at the top of the Pending Work Orders Listing section: |

Menu Icons for the Pending Work Orders Listing
| • | Actions - Click the Down Arrow € on the right of the Actions Icon to display the available options: |
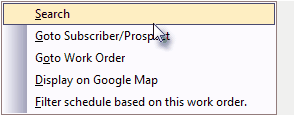
Pending Work Orders Listing - Action Icon Options
| • | Search - Choose the Search option to locate a Work Order. |
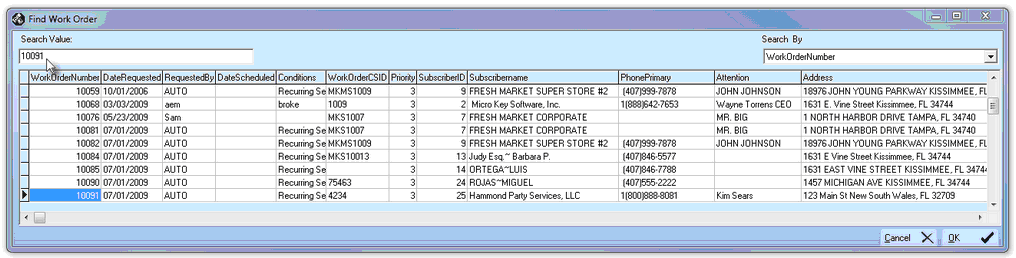
Technician Scheduling Form - Pending Work Orders Listing - Action Icon - Search option - Find Work Orders dialog
| ▪ | This will display the Find Work Order dialog. |
| ▪ | Choose the Search By field using the Drop-Down Selections Box provided. |
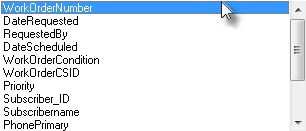
Search By field names
| ▪ | Enter the appropriate Search Value. |
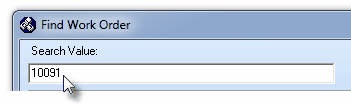
| ▪ | As the Search Value is entered, an incremental Search will occur. |
| ▪ | The desired Work Order is ultimately located. |
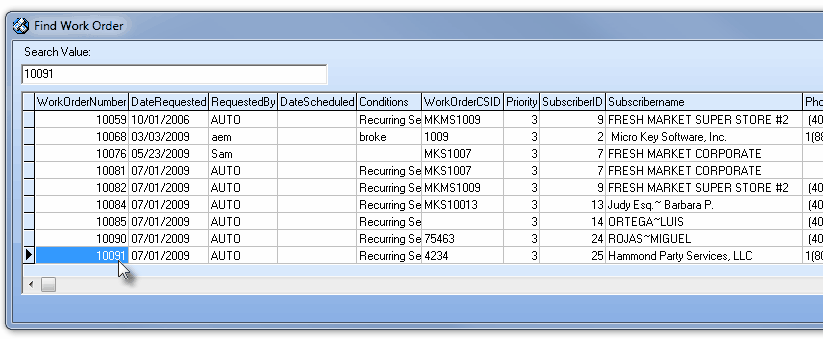
| ▪ | Click the OK bottom at the bottom of the Find Work Order dialog to Choose the desired Work Order. |
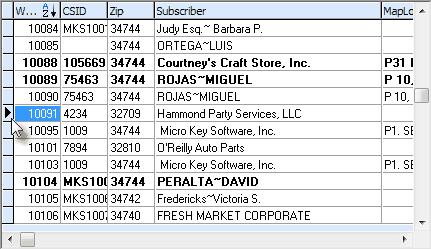
Pending Work Order Listing with the desired Work Order number selection
| ▪ | The record pointer4within the Pending Work Orders Listing will identify the selected Work Order. |
| • | Go to Subscriber/Prospect - Click this option to open the associated Subscriber or Prospect Form of the currently selected Work Order Number. |
| • | Go to Work Order - Click this option to open the associated Service Request Form for the currently selected Work Order Number. |
| • | Display on Google Map - Opens a Google Maps® graphic in a new Form showing the location of the currently Selected Work Order. |
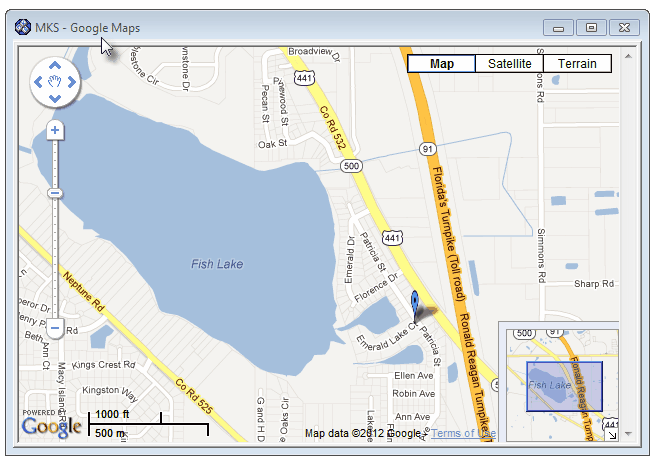
| ▪ | Unscheduled Work Orders will be identified with a Blue Flag and Scheduled Work Orders with a Red Flag. |
| • | Filter schedule based on this work order - If a Work Order is Selected from the Pending Work Orders Listing - and that Work Order has specific Required Skill(s) identified, and/or the Subscriber for whom that Work Order was entered is assigned to a specific Technician Group(s) - and then this Filter schedule based on this work order option is Chosen, the Technician Schedules Grid will be adjusted to only display those Appointments which match that Selected Work Order. |
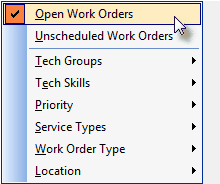
| • | Filters - Click the Down Arrow € on the right of the Filters Icon to display the available options: |
| • | Open Work Orders - Check this option to include any Work Order (Service Request) - either Scheduled or Unscheduled - in the Pending Work Orders Listing which has not been Completed. |
| • | Unscheduled Work Orders - Check this option to include any Work Order (Service Request) in the Pending Work Orders Listing which has not yet been Scheduled (thereby excluding those Work Orders which have been Scheduled but have not yet been Completed). |
Pending Work Orders Listing
Filter Icon Options
| ▪ | By default, none of the Filters (except for the Open Work Orders and Unscheduled Work Orders options) described above are active. |
| ▪ | The Filters described below may be activated singly or together is a set. |
| • | Tech Groups - Select this option to include only those Work Orders (Service Requests) in the Pending Work Orders Listing whose associated Subscribers are a Member of the Checked Tech Group(s). |
| • | Tech Skills - Select this option so the Work Orders to be scheduled may be limited to a specific Technician Skill. |
| • | Priority - Choose this option to include only those Work Orders (Service Requests) in the Pending Work Orders Listing with a Priority Level matching the one(s) Checked. |
| ▪ | Multiple Priority Levels may be Checked. |
| ▪ | If no Priority Levels are Checked, All Work Orders - regardless of their Priority Level, will be listed. |
| • | Service Types - Select this option to limit the Pending Work Orders Listing to those Work Orders with the Checked Service Type(s). |
| • | Work Order Type - Select this option to limit the Pending Work Orders Listing to those Work Orders with the Checked Work Order Type(s). |
Filters - Work Order Types
| ▪ | Multiple Work Order Type(s) may be Checked. |
| ▪ | By default, All Work Orders - regardless of their Work Order Type, will be listed. |
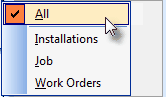
| • | Location - Select this option to limit the Pending Work Orders Listing to those Work Orders whose associated Subscribers are located within the designated Zip Code(s), City, or State. |

Filters - Location options
| ▪ | Zip Code - Choose this option and enter the desired Zip Code(s). |
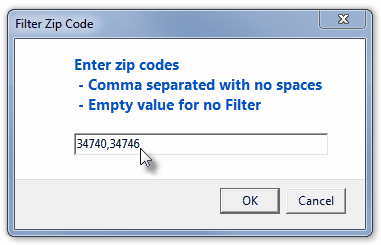
Filter Zip Code
| o | Enter the appropriate Zip Code. |
| o | Multiple Zip Codes may be entered, separated by a comma and with no spaces in between. |
> Click the OK button when finished entering the desired Zip Code(s).
| o | To remove this Zip Code Filter, Choose the Zip Code option and delete the Zip Code(s) previously entered. |
> Click the OK button and the Zip Code Filter will be canceled.
| ▪ | City - Choose this option and enter the desired City Name(s). |
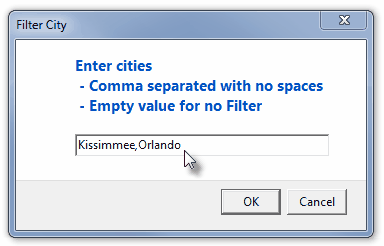
Filter City
| o | Enter the appropriate City. |
| o | Multiple Cities may be entered, separated by a comma and with no spaces in between. |
> Click the OK button when finished entering the desired City(s).
| o | To remove this City Filter, Choose the City option and delete the City Name(s) previously entered. |
> Click the OK button and the City Filter will be canceled.
| ▪ | State - Choose this option and enter the desired State(s). |
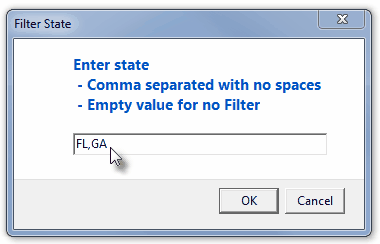
Filter State
| o | Enter the appropriate State. |
| o | Multiple States may be entered, separated by a comma and with no spaces in between. |
> Click the OK button when finished entering the desired State(s).
| o | To remove this State Filter, Choose the State option and delete the State(s) previously entered. |
> Click the OK button and the State Filter will be canceled.
| □ | Scheduling an Appointment for a Service Request on the Technician Scheduling Form: |
| • | Click on a Work Order Number to Choose a Work Order from the Pending Work Orders Listing section of the Technicians Scheduling Form. |
| • | Drag & Drop that selected Work Order Number onto an open Time Slot within the desired Technician's Column in the (Technician Schedules) Day View tab. |
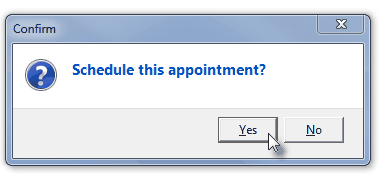
| • | Confirm that this Work Order is to be scheduled as an Appointment. |
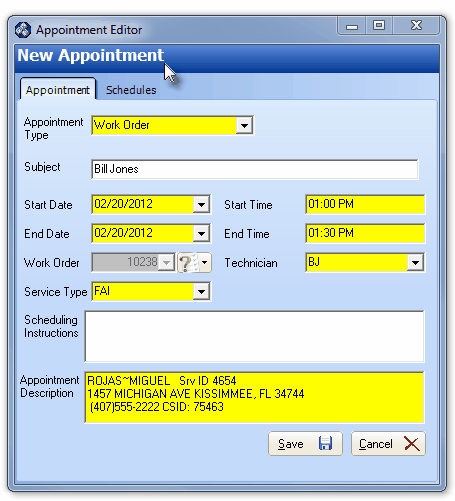
| • | See the Appointment Editor chapter for complete information about this New Appointment dialog. |
| • | Moving a Scheduled Appointment within the same day (or days - depending on how many days are simultaneously being displayed on the (Technician Schedules) Day View tab is easy. |
| • | Once an Appointment has been set, it can be quickly and easily moved (re-scheduled) within the Day View tab: |
| ▪ | On the Day View tab, Click on the Appointment that is to be moved to another Time Slot. |
| ▪ | Using your up and down #$ arrow keys, move that Appointment to a different open Time Slot, as needed. |
| ▪ | Using your left and right ! " arrow keys, move the Appointment to a different Technician's open Time Slot, if needed. |
| ▪ | The standard Windows® Drag & Drop method may also be used to move an Appointment. |
| ▪ | Regardless of the method used, these moves will instantly be updated with the appropriate information within the Appointment Editor. |
| ► | Note: If the Time Line is displayed Horizontally rather than Vertically (as they are shown in the Technician Scheduling screen illustrations at the beginning of that chapter), these directions are reversed. |
| □ | Special Features menu: Once the Appointments are set, use these Special Features to help manage the Technicians. |
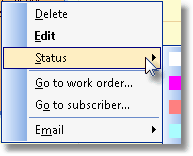
| • | Right-Click a selected Appointment to view the available options on this Special Features Menu. |
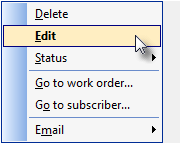
Quick Access Features
| • | Delete - Deletes the Selected Appointment following a Confirmation message. |
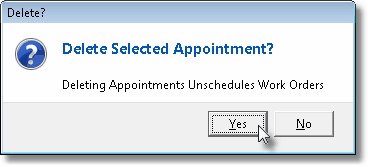
Delete Selected Appointment?
| • | Edit - Opens the Appointment Editor and displays the currently selected Appointment record. |
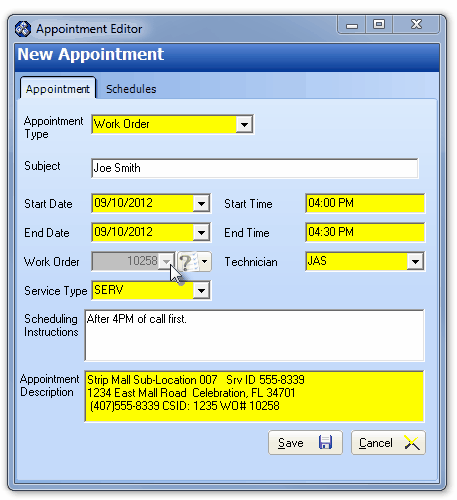
Appointment Editor Form
| • | Status - See "Updating a Work Order's Appointment Status" below. |
| • | Go to work order - Opens the Service Request Form for the currently selected Work Order. |
| • | Go to subscriber/prospect - Opens the Subscriber or Prospect Form for the currently selected Work Order. |
| • | Email - Allows the currently selected Appointment to be Emailed to the Technician (see "Emailing a specific Appointment" below). |
| • | Emailing a specific Appointment: |
| • | Regardless of the Email Option selected below, these requirements must be in place before this feature may be used: |
| a. | Outlook® must be installed on the workstation because the Email will be created automatically within Outlook. |
| b. | The Employee, to whom this Appointment is to be Emailed, must have an Email address entered on the Personal tab of their Employee record. |
| • | Right-Click on any Technician Scheduling Appointment |
| • | Select Email on the sub-menu presented. |
| ▪ | There are two Emailing options available: |
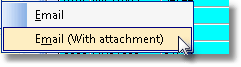
| 1. | Email - Choose the Email option to create an Email with the information on the selected Service Appointment. |
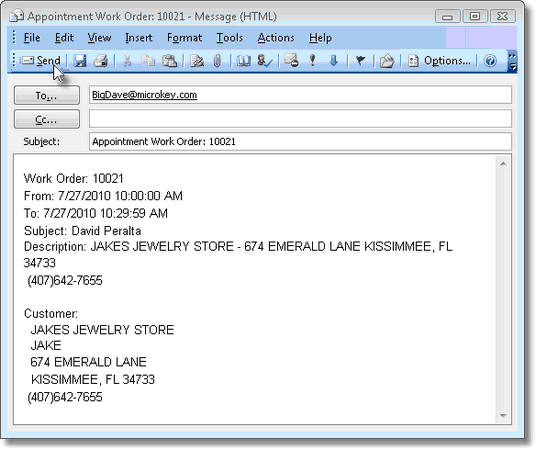
Sample Email for a Technician's Appointment
| 2. | Email (With attachment) - Choose the Email (With attachment) option to create an Email with the information on the selected Service Appointment (as shown above) plus a PDF file containing the actual Work Order in its normal printed format. |
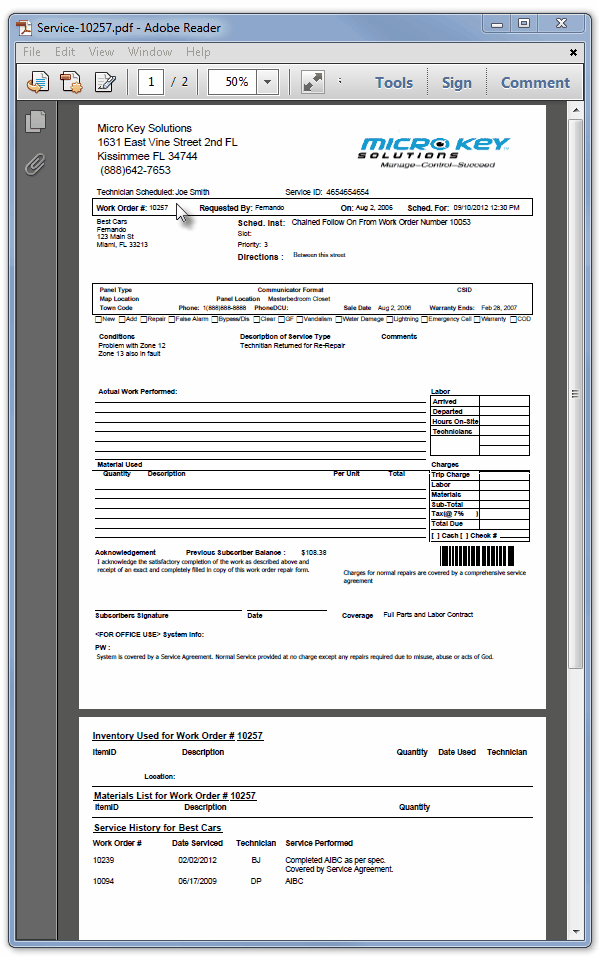
Email Service Request Attachment for a Technician's Appointment
| ▪ | Once the system creates the Email, you may modify it, as needed. |
| ▪ | Click the Send button to complete the process. |
| o | The Work Order will be formatted accordingly and attached as a PDF file to the Email with the Service Appointment information. |
| • | Updating a Work Order's Appointment Status: |
| • | Click on an Appointment for a Work Order on the Day View of the Technicians Scheduling Form. |
| • | Select Status from the pop-up menu that appears. |
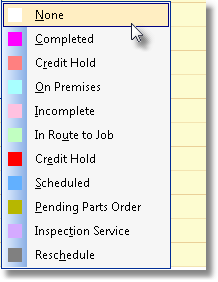
Appointment Status Choices
| • | The selected Appointment on the Technicians Scheduling Form will then be displayed in the Color of the selected Appointment Status (which was initially defined using the Appointment Status button on the Service Options tab of the User Options Form). |
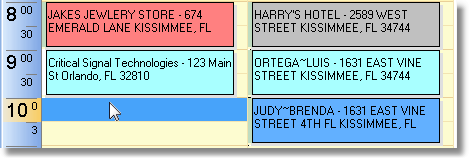
Color Coded Appointments showing each Work Order's Status

