| □ | The Appointment Editor provides a simple way to set an Appointment for a Technician to provide service, or to visit a Subscriber for some other reason. |
| • | The Appointment Editor usually, but not always, is used to Schedule a Service Request. |
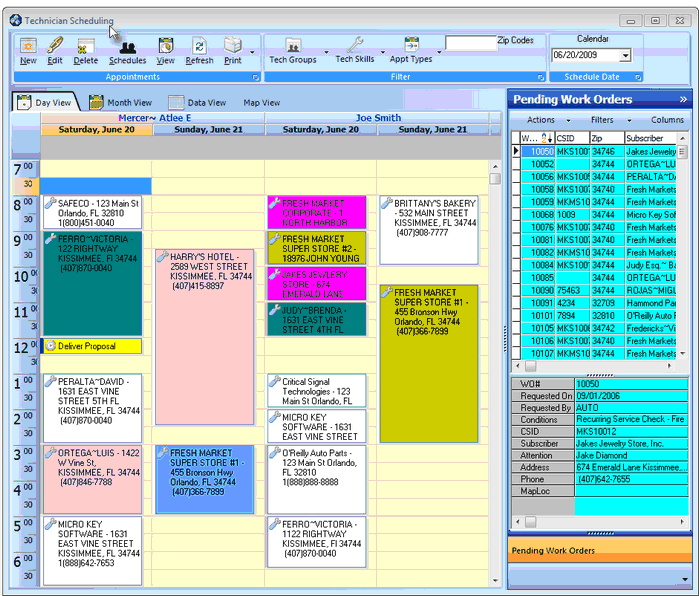
Technician Scheduling Form - Technician Schedules section - Day View tab
| • | Appointment Types Review: |
| • | By default, All Appointment Types will be included when Viewed in the Technician Schedules section of the Technician Scheduling Form. |
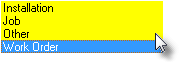
Work Order Types
| ▪ | When an Appointment is created for a Work Order (Service Request) in the Pending Work Orders Listing, that Appointment is automatically assigned an Appointment Type of Work Order, or Installation - based on the Work Order Type identified for that Service Request. |
| ▪ | When an Appointment is entered for a Work Order created for a Job Task, the automatically assigned Appointment Type will be Jobs. |
| ▪ | When an Appointment is entered for a visit to a Subscriber, when no Work Order is involved, the automatically assigned Appointment Type will be Work Order. |
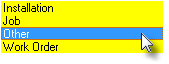
| o | Using the Drop-Down Selection List provided in the Appointment Type field, Choose Other and enter the remaining information, as appropriate. |
| • | The Appointment Editor (illustrated below) may be accessed in several ways. |
Appointment Editor opened using the New option
| 2. | Click on a Work Order Number (WO#) in the Pending Work Orders Listing, then Drag & Drop that selected Work Order Number onto an open Time Slot on the Technicians Scheduling Form. |
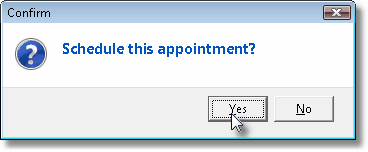
| ▪ | Following a Confirmation question, the Appointment Editor will open automatically. |
| 3. | Click Edit, after Selecting a specific Appointment listed on the Day View tab of the Technician Schedules section of the Technicians Scheduling Form, to update or modify that Appointment's information. |
| 4. | Double-Click on an existing Appointment listed on the Day View tab of the Technician Schedules section of the Technicians Scheduling Form to update or modify that Appointment's information. |
| □ | Using the Appointment Editor: |
| • | When a New Appointment is created by Clicking the New Icon on the Appointments section of the Technicians Scheduling Form, an open Work Order (Installation Order, or Job Order) is not required. |
| • | Before entering the remaining New Appointment information, use the Drop-Down Selection List provided to Choose the appropriate Appointment Type. |
| • | Beside those Appointment Types, Appointments for Other (a miscellaneous catch-all category) reasons to visit Subscribers are also needed. |
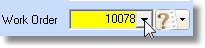
| • | If Work Order (Installation Order, or Job Order) is the selected Appointment Type, a Work Order Number must be chosen using the Drop-Down Selection List provided. |
| • | When Scheduling a New Appointment, |
| ▪ | Click the Drop-Down Selection List on the right of the Work Order field's Question Mark ?  to Choose Unscheduled Work Orders. to Choose Unscheduled Work Orders. |
| ▪ | Then Select the Work Order Number to be assigned to the Technician. |
| • | When Scheduling an additional Technician for an existing Appointment: |
| ▪ | Click the Down-Arrow ‚ next to the Question Mark ? and ensure that the Work Order field is set for Open Work Orders so any Service Request - whether Scheduled or not - is available in the actual Work Order field's Drop-Down Selection List . |
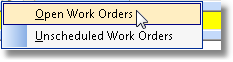
| • | Work Order - Using the Drop-Down Selection List provided, Choose the Work Order Number that was previously Scheduled and to which the additional Technician is to be assigned. |
| • | When using the Drag & Drop method to create an Appointment, the Work Order Number and the appropriate Appointment Type will be filled in automatically (see below). |
| □ | Accessing the Appointment Editor using the standard Windows® Drag & Drop method to assign an Appointment for a Work Order to a Technician: |
| • | On the Pending Work Orders Listing, there is a list of Work Orders (from oldest to newest) determined by whatever Filters were applied to the list. |
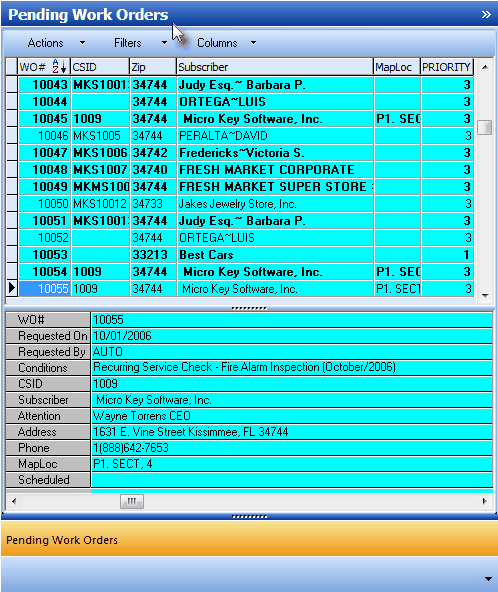
Technician Scheduling Form - Pending Work Orders Listing
| • | The easiest way to Schedule a Work Order is to Click on the desired Work Order Number (see the WO# column) in the Pending Work Orders Listing and then Drag & Drop it onto an open Time Slot for the appropriate Technician on the Day View tab of the Technician Schedules section. |
| • | The Appointment Editor will open automatically following a Confirmation message. |
| ▪ | That Work Order Number will be inserted automatically into the Appointment Editor Form, and cannot be changed (see the illustration below). |
| ▪ | The Appointment Editor Form will also be pre-populated with the following data: |
| o | Appointment Type - based on the Work Order Type based on the associated Service Request. |
| o | Technician's Name - matching the Technician column into which the Work Order Number was Dragged. |
| o | Start and End Dates and Times - based on the Time Increment established in the Planner View - which will usually be modified to better indicate the expected time required to complete the associated Service Request. |
| o | Work Order (Number) will be inserted automatically into the Appointment Editor Form, and cannot be changed (see the illustration below). |
| o | Technician Code - matching the Technician Name assigned above. |
| • | If it was not entered when the Service Request was created, enter the Service Type and Scheduling Instructions, if needed, and Save the Appointment. |
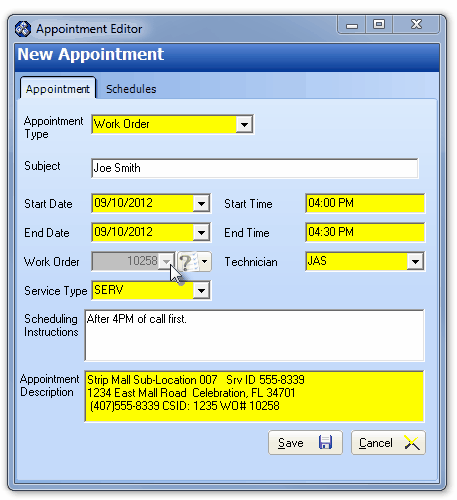
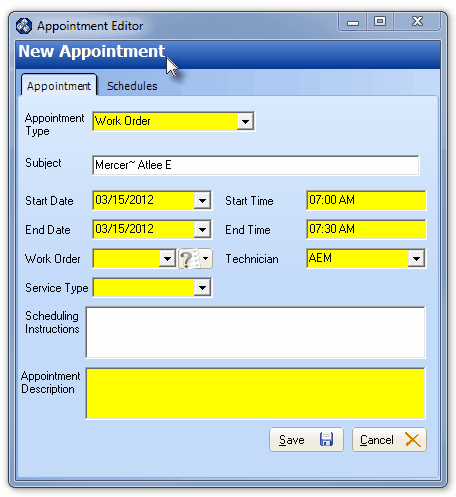
New Appointment - Work Order entry dialog
| • | Here is the complete list of the information required to properly define a Work Order Appointment: |
| • | Appointment Type - The type of Appointment is selected using the Drop-Down Selection List provided. |
| ▪ | In most cases, when using the Drag and Drop method to create an Appointment, the appropriate Appointment Type will be inserted automatically. |
| ▪ | This is because the selected Service Request has already been assigned its Appointment Type of Work Order. |
| • | Subject - The Name of the Technician who is being scheduled. |
| ▪ | When an open Time Slot in a Technician's column is selected, that will be the Technician's Name. |
| ▪ | When the Work Order Number Drag and Drop method was used to create an Appointment, the Technician assigned to that Work Order will be the default. |
| ▪ | If this is not the correct Technician, re-select a Technician using the Drop-Down Selection List in the Technician field (see below). |
| ▪ | The correct Technician's name will be inserted automatically. |
| ▪ | If a different Technician was assigned when the Service Request was initially created: |
| o | It will be ignored and the currently selected Technician will be used. |
| o | The newly selected Technician will replace the original Technician on that Work Order. |
| • | Start Date - By default, it will be Today. |
| ▪ | Use the Drop-Down Date Selection Box to change the Date, if appropriate. |
| ▪ | If the Start Date selected would not be displayed in the current Day View, the New Appointment will be recorded but the start of it will not appear until that day is selected (using the Calendar) for viewing in the Day View. |
| • | Start Time - By default, it is the starting time of the Time Slot selected (and so it will be highlighted in blue) in the Day View tab. |
| ▪ | You may enter a different Start Time. |
| ▪ | To preset the default Start Time for a New Appointment, Click on an open Time Slot. |
| ▪ | Optionally, once the Appointment is saved, you may Click and Drag down the column to select multiple Time Increment positions. |
| ▪ | This will properly populate the Start and End Time information on the New Appointment Form |
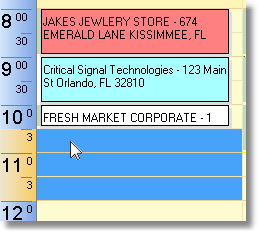
Highlighted Time Slot Area
| • | End Date - By default, it will be Today. |
| ▪ | You may use the Drop-Down Date Selection Box to change the date, if appropriate. |
| ▪ | You may enter an Ending Date and Time in a future day to schedule a multiple day installation or service. |
| ▪ | If the End Date selected would not be displayed in the current Day View, the New Appointment will be recorded but the end of it will not appear until that day is selected (using the Calendar) for viewing in the Day View. |
| ▪ | Multi-Day Appointments appear on the Day View above the Time Slots. |
| • | End Time - By default, it is the ending time of the Time Slot(s) highlighted in the Day View tab. |
| ▪ | You may enter a different End Time. |
| ▪ | To preset the default End Time for a New Appointment, Click on an open Time Slot. |
| ▪ | Optionally, you may Click and Drag down the column to select multiple Time Increment positions. |
| ▪ | Then, when you have selected the amount of time to be allocated for this Appointment, Click the New Appointment button. |
| ▪ | This will properly pre-populate the Start and End Time information on the New Appointment Form |
| • | Work Order - Use the Drop-Down Selection List to Choose the appropriate Work Order Number if it has not been inserted by the system. |
| • | Technician - By default, it will be the first Technician listed in the Day View area. |
| ▪ | If you have selected a Time Slot in a different Technician's column, that will be the default Technician. |
| ▪ | If this is not the correct Technician, re-select a Technician using the Drop-Down Selection List in the Technician field. |
| • | The Technician can be selected by Employee Code or by their Name. |
| ▪ | Right-Click the Tech field to display the Search by... option. |
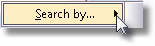
| ▪ | Then Click the right arrow „ to display the Search by options. |
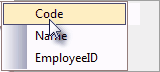
| ▪ | This will set the list of choices by the order selected. |
| ▪ | Click on the selection type you prefer. |
| ▪ | This will become the default order of the selection list for this field |
| • | Service Type - Unless the Service Type was entered when the Service Request was initially created, use the Drop-Down Selection List to Select the appropriate Service Type for this Work Order Appointment. |
| • | Scheduling Instructions - Enter any special instructions that might be needed by the Technician, or another Scheduler, that will assist them in better servicing this Subscriber. |
| • | Appointment Description - A message will be automatically inserted in this field based on the Work Order Number selected, the Subscriber, and the predefined Appointment Description message initially defined in the Service Options Form. You may add to, and/or edit, this information. |
| • | Click the Save button to record the Appointment information. |
| ▪ | If there are no additional Technicians to be scheduled for this Work Order, Close x the Form. |
| ▪ | See Scheduling Multiple Technicians below for instructions on using the Schedules tab on the Appointment Editor to add additional Technicians for this Work Order Appointment. |
| • | Here is the information you will need to define if you Choose a Service Request previously assigned the Install Appointment Type: |
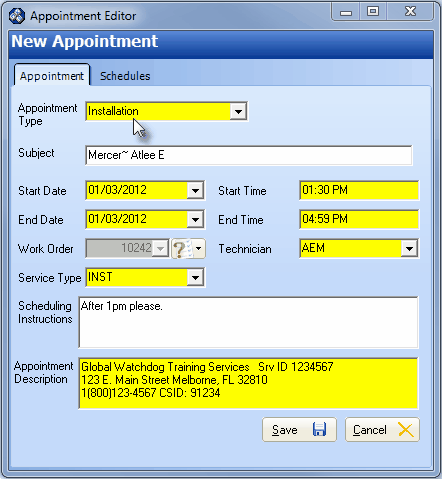
Appointment Editor for an Installation
| • | Here is the information you will need to define if you Choose a Service Request previously assigned the Job Appointment Type: |

Appointment Editor for a Job
| • | The Subject (name of the Technician), |
| • | Starting and Ending Dates and Times, |
| • | The Technician (Employee WDT) code, |
| • | The Service Type (in this case an Addition to an existing system - ADDS) assigned to the Work Order, |
| • | A place to enter and special Scheduling Information, (ASAP). |
| • | Here is the information you will need to define if you Choose the Other Appointment Type: |
| • | If you select the Other Appointment Type, there are fewer fields to complete (see below). |
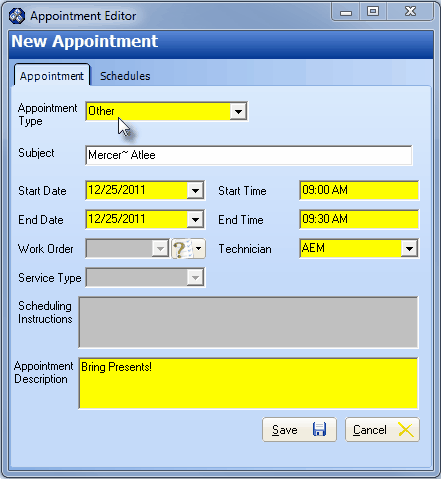
New Appointment Editor for the Other Appointment Type
| • | Subject - The Name of the Technician who is being scheduled. |
| ▪ | By selecting (Clicking on) an open Time Slot for a Technician, by default that will be the Technician's Name inserted here. |
| ▪ | If this is not the correct Technician, re-select a Technician using the Drop-Down Selection List in the Technician field. |
| ▪ | The correct Technician's name will be inserted automatically. |
| • | Start Date - By default, it will be Today. |
| ▪ | You may use the Drop-Down Date Selection Box to change the date, if appropriate. |
| ▪ | If the Start Date selected would not be displayed in the current Day View, the New Appointment will be recorded but the start of it will not appear until that day is selected in the Calendar for viewing in the Day View. |
| • | Start Time - By default, it is the starting time of the Time Slot selected (and so it will be highlighted in blue) in the Day View Area. |
| ▪ | You may enter a different Start Time. |
| ▪ | To preset the default Start Time for a New Appointment, Click on an open Time Slot. |
| ▪ | Optionally, you may Click and Drag down the column to select multiple Time Increment positions. |
| ▪ | Then, when you have selected the amount of time to be allocated for this Appointment, Click the New Appointment button. |
| ▪ | This will properly pre-populate the Start and End Time information on the New Appointment Form |
| • | End Date - By default, it will be Today. |
| ▪ | You may use the Drop-Down Date Selection Box to change the date, if appropriate. |
| ▪ | You may enter an Ending Date and Time in a future day to schedule a multiple day installation or service. |
| ▪ | If the End Date selected would not be displayed in the current Day View, the New Appointment will be recorded but the end of it will not appear until that day is selected for viewing in the Day View. |
| • | End Time - By default, it is the ending time of the Time Slot(s) highlighted in the Day View Area. |
| ▪ | You may enter a different End Time. |
| ▪ | To preset the default End Time for a New Appointment, Click on an open Time Slot. |
| ▪ | Optionally, you may Click and Drag down the column to select multiple Time Increment positions. |
| ▪ | Then, when you have selected the amount of time to be allocated for this Appointment, Click the New Appointment button. |
| ▪ | This will properly pre-populate the Start and End Time information on the New Appointment Form |
| • | Technician - By default, it will be the first Technician listed in the Day View area. |
| ▪ | If you have selected a Time Slot in a different Technician's column, that will be the default Technician. |
| ▪ | If this is not the correct Technician, re-select a Technician using the Drop-Down Selection List in the Technician field. |
| • | Work Order, Service Type, Scheduling Instructions, and Priority are not required, and so cannot be entered.. |
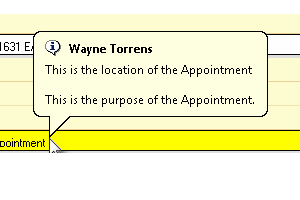
| • | Appointment Description - Enter information such as Name, Address Contact Information, etc., as required to identify the purpose and location of this Appointment. |
| ▪ | What you enter here is displayed in the Day View area to identify this Appointment. |
| ▪ | Holding the mouse over the Appointment on the Technician Scheduling Form will display this information in full. |
| • | Click the Save button to record the Appointment. |
| ▪ | If there are no additional Technicians to be scheduled for this Work Order, Close x the Form. |
| • | Editing an Existing Appointment may be accomplished in one of two ways: |
| • | Click Edit after you Select a specific Appointment listed on the Day View of the Technicians Scheduling Form. |
| • | Double-Click an existing Appointment listed on the Day View of the Technicians Scheduling Form. |
| • | In either case, the Appointment Editor will open and contain the information on the selected Work Order. |
| • | Modify the information as required. |
| ▪ | If there are no additional Technicians to be scheduled for this Work Order, Close x the Form. |
| ▪ | See Scheduling Multiple Technicians below for instructions on using the Schedules tab on the Appointment Editor to add additional Technicians for this Work Order Appointment. |
| • | Modifying the Date and Time of an Appointment - Changes to the Appointment record may easily be made without actually opening this Appointment Editor by using the keyboard's arrow keys: |
| • | Once an Appointment has been set, it can be quickly and easily moved (re-scheduled) within the Day View area of the Technicians Scheduling Form using these methods: |
| ▪ | Select the Appointment that you want to move to a different Time and/or Day slot on the Day View schedule and, using the up and down #$ arrow keys, move that Appointment to a different open Time Slot, as needed. |
| ▪ | If more than one Technician's Schedule is being displayed, Select the Appointment and using the left ! or right " arrow keys, move the Appointment to a different Technician's open Time Slot, if needed. |
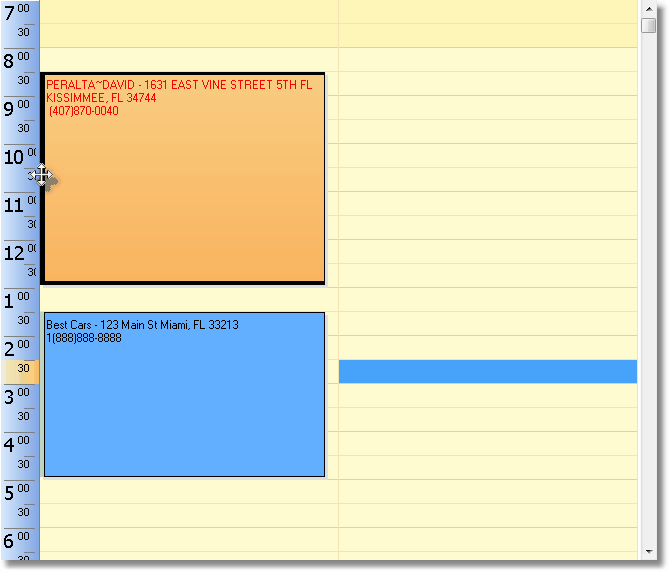
Technician Scheduling Form with the special Appointment Mover pointer activated
| ▪ | You may also Select an Appointment and then Click on the bold left side border of that Appointment which activates the special Appointment Mover pointer that enables the ability to Drag and Drop the Appointment up, down and/or laterally to another Time of Day, a different Day, and even to another Technician's column. |
| ▪ | Finally, after Selecting an Appointment, you may Click on the bold bottom or top border of that Appointment to enable the ability to Drag either (or both) of these borders to lengthen the time range for that Appointment. |
| • | These changes in Time of Day, a different Day, Length of Time and to another Technician will be instantly updated within the Appointment Editor. |
| ► | Important Note: If the change involved reassignment to a different Technician, Double-Click on the Appointment to open the Appointment Editor, then Click the Save button to update the Appointment with the correct Technician's Name in the Subject field. |
| • | It is not unusual to need more than one Technician to complete a Service Request - whether for a complete system installation or a complex repair. |
| • | To accommodate this need, any number of Technicians may be Scheduled for service on the same Work Order. |
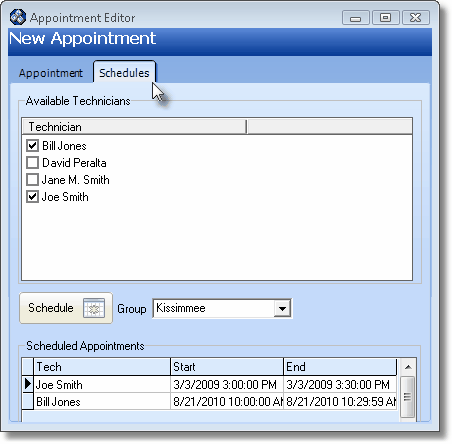
Schedules tab on the Appointment Editor Form

