| □ | What's on your schedule for today? |
| • | There are many generic scheduling tools available and most offer the same basic user interface. |
| • | The Employee Calendar included with MKMS follows this same basic design. |
| • | The advantage of using this Employee Calendar is that it is accessible from within the application that you almost always have active on your desktop. |
| • | Because of this, you will not be using extra memory and/or running an additional application to keep your calendar information. |
| • | Your Employee Calendar will be safely and automatically backed up when the system files are backed up. |
| • | For Network users, regardless of which workstation you've logged into, your Calendar and Tasks will be immediately viewable. |
| • | To open the Employee Calendar: |
| 1. | From the Main Menu Select Maintenance and Choose Employee Calendar. |
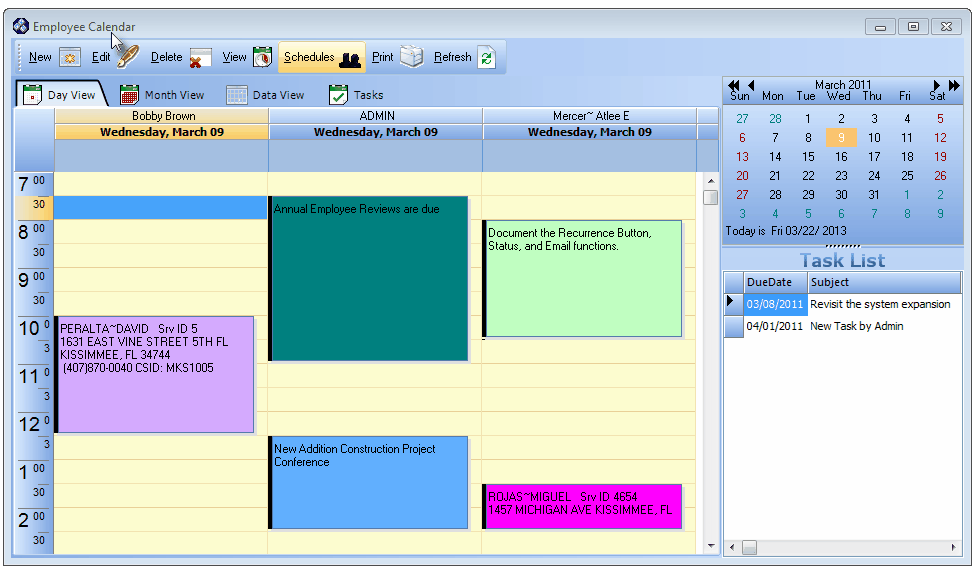
Employee Calendar - default interface
| □ | Features of the Employee Calendar: |
| • | Menu buttons - At the top of the Employee Calendar are seven buttons (see illustration below): |
| 1. | New - Click New to open the New Appointment dialog. |
| 2. | Edit - Select the desired Appointment, then Click Edit to modify that information. |
| 3. | Delete - Select the desired Appointment, then Click Delete to remove an Appointment. |
| 4. | View - Click View to open the Planner View dialog to set the screen display parameters for the Day View tab. |
| 5. | Schedules - Click Schedules to Choose the Employee Calendar(s) you wish to view. |
| 6. | Print - Click the Print to print the content of the Day, Month, or Data View tab, based on which is currently selected. |
| ▪ | Optionally, using the Appointment Options Email selection, a selected Appointment listed on the Employee Schedule may be Emailed to the person for whom the Appointment was scheduled. |
| 7. | Refresh- Click Refresh to update the Employee Calendar with the latest information (entered since you opened the Employee Calendar). |
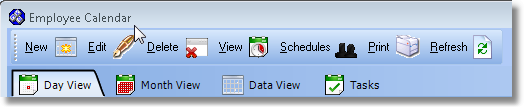
Menu Icons and Tabs on the Employee Calendar
| • | Tabs - Just below the Menu buttons (see illustration above), at the top of the Employee Calendar are four tabs: |
| 1. | Day View - Displays from one to seven days of the Employee Calendar starting from the Date selected on the Calendar (the exact format is defined using the View option) . |
| 2. | Month View - Displays a full month of the Employee Calendar based on the month selected on the Calendar |
| 3. | Data View - Displays a line-by-line presentation of all Appointments based on the format defined using the View button and the starting date selected on the Calendar.. |
| 4. | Tasks - Defines Task(s) to be performed by the current User (Employee) signed in to MKMS. |
| ▪ | They do not relate to the currently selected Employee, unless coincidentally, that Employee is the current User. |
| ▪ | These User Tasks will be shown in the Task List until they are assigned to an Employee and/or marked as Completed. |
| • | Calendar - To the right at the top of the Form is a Calendar. |
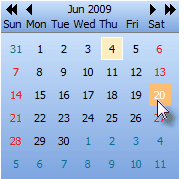
Employee Calendar Form's Calendar display
| • | Click the appropriate Date to determine which Day(s) Appointments are to be displayed. |
| • | Click the single arrow (left t or right u) to move to the Previous or Next month respectively. |
| • | Click the double single arrow (left tt or right uu) to move to the Previous or Next year respectively. |
| • | Task List - Displays all of the defined Tasks (using the Task tab) that were originally entered by the Current User and that have not yet been Completed or assigned as an Appointment. |
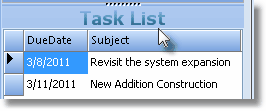
Employee Calendar Task List
| □ | Defining the View of the Employee Calendar: |
| • | Click the View on the top of the Employee Calendar to open the Planner View dialog to set the screen display parameters for the Day View tab. |
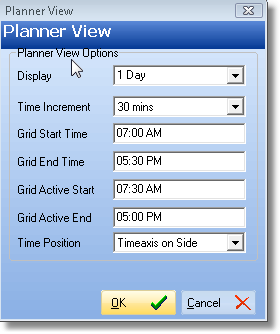
Planner View Form to define Day View
| • | Display - Use the Drop-Down Selection List to Choose the number of days to be displayed in the Employee Calendar Form's Day View (1 Day, 2 Days, 3 Days, 5 Days, or 7 Days are your choices with 1 Day being the default). |
| • | Time Increment - Use the Drop-Down Selection List to Choose the number of minutes each time block will contain in the Employee Calendar Form's Day View (1 Minute, 5 Minutes, 10 Minutes, 15 Minutes, 30 Minutes, or 60 Minutes are your choices with 60 Minutes being the default). |
| • | Grid Start Time - Enter the starting time for the Day View's grid. |
| • | Grid End Time - Enter the ending time for the Day View's grid. |
| • | Grid Active Start - Sets the Time when the Day View grid shows it is activated (by the color difference). |
| • | Grid Active End - Sets the Time when the Day View grid shows it is no longer activated (by the color difference). |
| • | Time Position - The Time Line on the Day View grid may be shown on the Top or Side of the Form. Use the Drop-Down Selection List to choose your preference. |
| □ | Understanding and Using the Employee Calendar's Tabs |
| • | Day View tab - Displays appointments of those Employees chosen using Schedules, based on the setup defined in the Planner View Form, and the starting Date selected on the Calendar. |
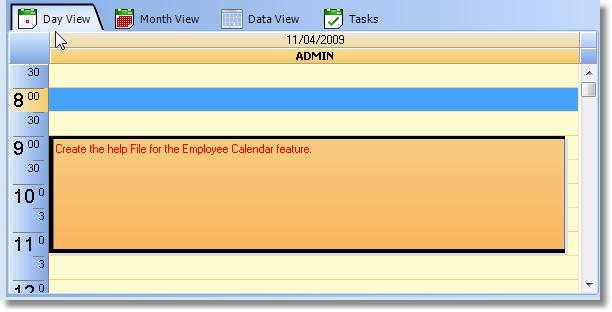
Employee Calendar - Day View
| • | Month View tab - Displays appointments of all Employees for the Month selected on the Calendar. |
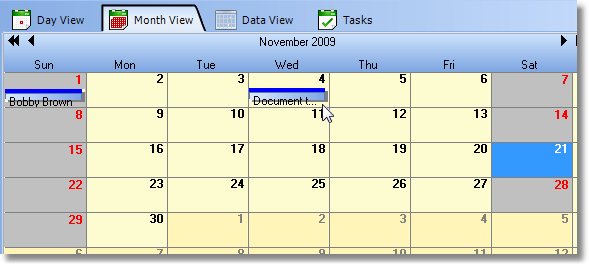
Employee Calendar - Month View
| • | Data View tab - Displays appointments of those Employees chosen using Schedules, in a tabular (spreadsheet like) format, based on the starting Date selected on the Calendar. |
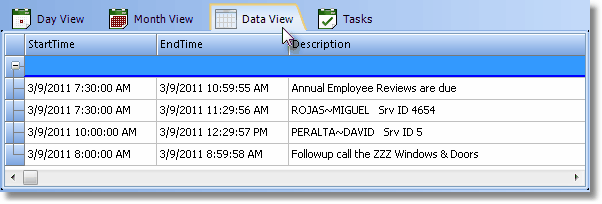
Employee Calendar - Data View
| • | Tasks tab - Displays the Tasks that were previously defined. |
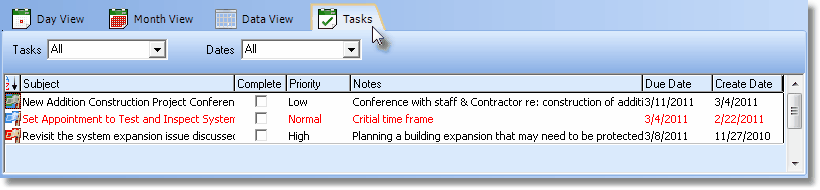
Employee Calendar Tasks tab
| • | Red Text indicates that Task is Past Due. |
| • | Check the Complete box only when a Task has been successfully completed. |
| • | Each Task has a Flag that is colored based on its assigned Priority: |
| □ | Visible Schedules - Selecting who will be displayed on the Employee Calendar. |
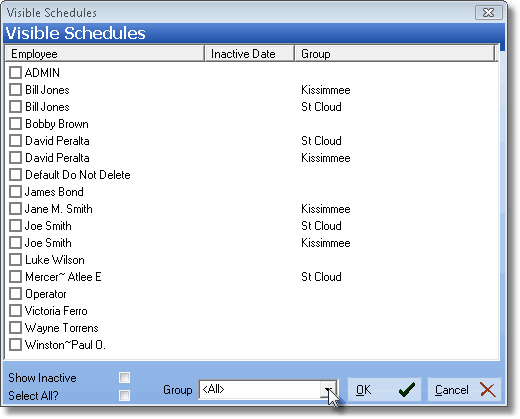
Visible Schedules dialog
| • | Open the Employee Calendar Form (the Day, Month, or Date View may be active). |
| • | The Visible Schedules Form will be displayed |
| • | Show Inactive - Check this box to have both Active and Inactive Employees included in the selection list. |
| • | Choose which Employees to include in the Visible Schedules. |
| • | Select All? - Check this box to Choose every Employee listed. |
| • | Individually Check the Employee(s) to be displayed (you MUST Check at least One Employee if you have not Checked the Select All? box). |
| □ | The Group field provides enhanced Selection Capability. |
| • | About Groups - You may limit the Employees displayed on the Visible Schedules Form by Choosing a Group: |
| • | Technician Groups may be created to identify certain Employees (Technicians) who have specific Skills, service special types of systems (such as UL® Installations or complex Commercial Accounts), work in specific locations (Town Codes), speak a particular Language, or are specifically assigned to a certain Company Division. |
| • | Technicians may be assigned to more than one Group. |
| • | Employees with the assigned Employee Type of All may be assigned to one or more of these Groups, also. |
| • | Group - By default, <All> is selected. |
| • | All Employees will be listed and available for Selection.. |
| • | Use the Drop-Down Selection List to Choose a predefined Group (Technician Group) of Technicians. |
| • | Check the Employee(s) you want displayed. |
| • | Only the Selected Employee(s) will be included in the Employee Calendar. |
| □ | Entering a New Employee Appointment - See Employee Appointments for detailed information about entering a new Appointment. |
| • | The Employee Calendar Form is accessible two ways: |
| 1. | On the Main Menu Select Maintenance and Choose Employee Calendar, or |
| ▪ | In either case, the Employee Calendar Form will be displayed. |
| • | Select the Day View tab. |
| • | If more than one Employee's Schedule is being displayed, Select the appropriate Employee's column. |
| • | Click the time slot for the proposed appointment. |
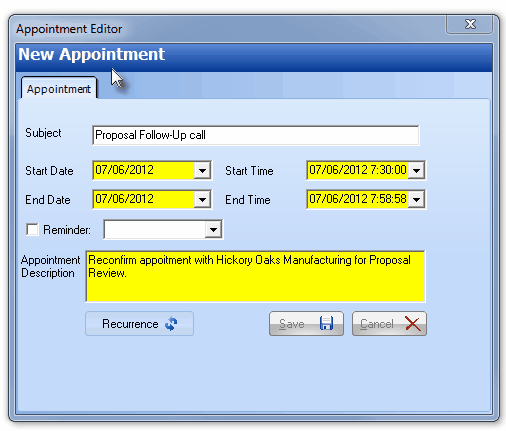
New Appointment Form
| • | The New Appointment dialog will be displayed. |
| • | Subject - By default, the selected Employee Name will be displayed. |
| • | You must enter a Description of the purpose for this Appointment in place of that name. |
| • | You may enter up to 40 characters: including Upper and lower case letters, numbers, spaces and/or punctuation marks. |
| • | Start Date - By default, this will be Today. |
| • | Use the Drop-Down Date Selection Box to Choose a different date, if necessary. |
| • | Start Time - By default, this will be the time slot which was selected when this New Appointment Form was opened. |
| • | Modify this Time as needed. |
| • | End Date - By default, this will be Today. Use the Drop-Down Date Selection Box to Choose a different date, if necessary. |
| • | End Time - By default, this will be the time period each grid represents as defined in the Planner View Form, added to the time slot that was selected when this New Appointment Form was opened. |
| • | Modify this Time as needed. |
| • | Reminder - To set-up a reminder (see About Reminders below) for this New Appointment, Check the Reminder box. |
| • | Use the Drop-Down Selection List to Choose a pre-appointment reminder time of either 0 minutes (Reminder appears at the time of the appointment),.5 minutes, 10 minutes, 15 minutes, 30 minutes, 1 hour or 1 day. |
| • | Appointment Description - Enter the description for this New Appointment that you want displayed on the Employee Calendar. |
| • | Save - Be sure to Click the Save button < at the bottom of the Appointment Editor Form to properly save this New Appointment record. |
| • | Recurrence - If this Appointment is an ongoing obligation, after saving the Appointment, Click the Recurrence button to open the Recurrency Form. |
| • | Click on an Appointment for an Employee on the Day View of the Employee Calendar Form. |
| • | Then, Right-Click the selected Appointment to view the Special Features menu. |
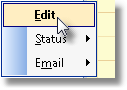
Special Features Menu
| • | Special Features Menu Options: |
| a. | Edit - Opens the Appointment Editor and displays the currently selected Appointment record. |
| b. | Status - Allows you to reset the Status of this Appointment (see "Updating the Status of an Employee Calendar Appointment" below). |
| c. | Email - Allows the currently selected Appointment to be Emailed to the Employee (see "Emailing a specific Employee Appointment to that Employee" below). |
| • | Click on an Appointment on the Day View of the Employee Calendar Form. |
| • | Right-Click the selected Appointment to view the Special Features menu. |
| • | Choose the appropriate Appointment Status from the list presented |
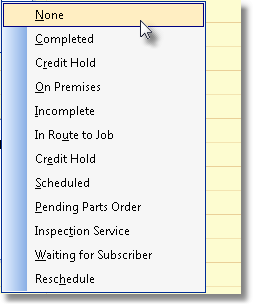
Appointment Status options
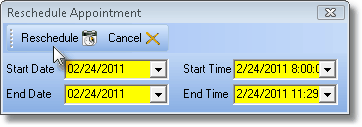
Reschedule Appointment dialog triggered by Reschedule Status
| ▪ | Enter the revised Date and Time for the Appointment. |
| ▪ | Click the Reschedule button. |
| • | Emailing a specific Employee Appointment to that Employee: |
| • | Regardless of the Email Option selected below, these requirements must be in place before this feature my be used: |
| a. | Outlook® must be installed on the workstation because the Email will be created automatically within Outlook. |
| b. | The Employee, to whom this Appointment is to be Emailed, must have an Email address entered on the Personal tab of their Employee record. |
| • | Right-Click on any Employee Calendar Appointment listed within the Day View tab. |
| • | Select Email on the sub-menu presented. |
| ▪ | There are two Emailing options available: |
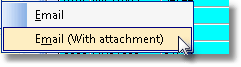
| 1. | Email - Choose the Email option to create an Email with the information on the selected Appointment. |
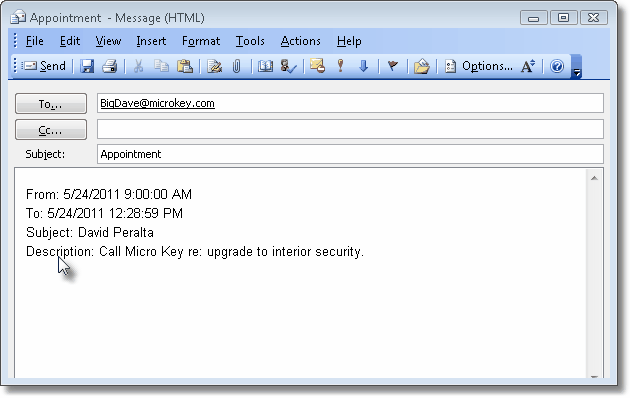
Appointment Format for Email to Employee
| 2. | Email (With attachment) - This option is not active within the Employee Calendar. |
| • | Once the system creates the Email, you may modify it, as needed. |
| • | Click the Send button to complete the process. |
| • | Each of your Employees are assigned an Employee Type of either Administrator, All, Technician or Operator. |
| • | Only Employees assigned an Employee Type of All or Technician are available to be viewed and/or scheduled on the Technician Scheduling Form. |
| • | However, All of your Technician's appointments on the Technician Scheduling Form are automatically included on the Employee Calendar - if the Employee is selected to be displayed here. |
| • | The same is true in reverse only for All or Technician classified Employees. |
| • | So, if an Employee that is a Technician, and therefore is assigned an Employee Type of All or Technician, is scheduled within the Employee Calendar, those appointments will also be shown on the Technician Scheduling Form, if that Employee is selected in Visible Schedules. |
| • | Conversely, those Employees who are not assigned an Employee Type of All or Technician are only available to be scheduled within the Employee Calendar Form, and are never available to be shown (or scheduled) within the Technician Scheduling Form. |

