| □ | The Tasks we are required to accomplish, both personally, and in the business world, are many and varied - and really hard to remember. |
| • | Clearly, knowing what Tasks are required of you, when those Tasks are due to be completed, and exactly what is to be accomplished in a Task - will make you more effective as an Employee and Person. |
| • | The Tasks tab, Task List, and New Task Entry Form provide the tools needed to track, perform and complete those Tasks. |
| • | The Task tab displays all Tasks meeting the chosen selection criteria. |
| • | The New Task Entry Form allows you to add a new Task and update Task information, if required. |
| • | The Task List displays any Task that has not been assigned as an Appointment and is not Completed, and were originally entered by the Current User . |
| • | All of these three features are illustrated below in a single composite view: |
| • | See "The Tasks tab, New Task Entry Form, and the Task List" below for detailed information. |
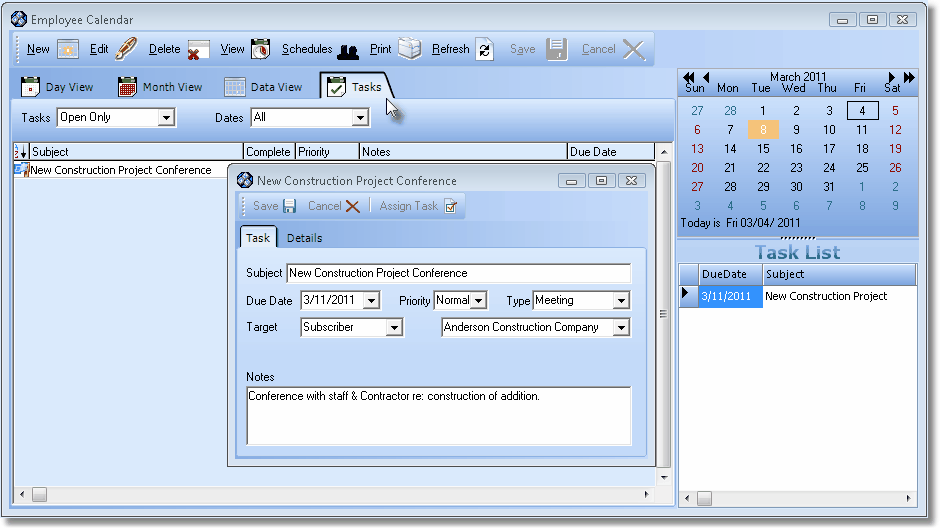
Employee Calendar with Task Tab selected and an open Task Entry that is included in the Task List
| • | The Tasks displayed in the Task List should be specifically assigned to the Employee who is responsible for accomplishing each listed Task. |
| • | Therefore, when viewing the Employee Calendar, without having to Click the Task tab, it is readily apparent which Tasks are outstanding and so need the attention of an Employee. |
| □ | The Tasks tab, New Task Entry Form, and the Task List - shown above on the Employee Calendar Form - displays the Tasks that have been defined as described below: |
| • | Tasks tab - Displays a list of Tasks based on two available User Choices |
| • | The Tasks tab may be temporarily sorted by Clicking on the Column Header of the data type in which the list is to be ordered. |
| • | Click the same Column Header to reverse the order of the list, based on that column's data type. |
| • | An arrow is displayed, on the Column Header that is determining the order of the list, indicating the selected sequence of the listed data. |
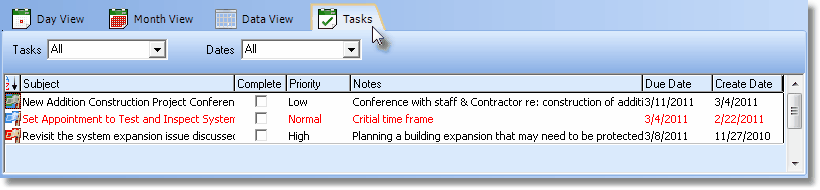
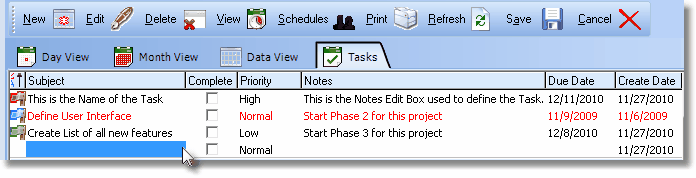
Employee Calendar Tasks tab
| • | Red Text indicates that Task is Past Due. |
| • | Check the Complete box only when a Task has been successfully completed. |
 Task Flags
| • | Each Task has a Flag the color of which is based on its assigned Priority Level: |
| 1. | Tasks - The User may Choose to list All, Completed Only or Open Only as the Status of the Tasks that are to be displayed. |
| ▪ | Open is the default Status of a Task and it is considered Open until it is Checked off as Complete. |
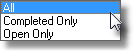
Task Status Choices
| 2. | Dates - Based on the Task's Due Date, using the Drop-Down Date Selection Box provided, the User may Select from various Due Date Options: |
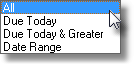
Due Date Options
| a. | All - All Tasks - regardless of the Due Date, will be displayed. |
| b. | Due Today - Only those Tasks that are Due Today will be displayed. |
| c. | Due Today & Greater - Those Tasks that are Due Today, or beyond Today, will be displayed. |
| d. | Date Range - Those Tasks, which have Due Dates within the specified Date Range, will be displayed. |

Employee Calendar's Task Tab Selection Options with Dates: Date Range option Chosen
| o | Use the two Drop-Down Date Selection Boxes provided to Choose the Starting and Ending Dates. |
| • | Task tab Form - Provides the Form which is used to Add a new Task and/or to Edit the information previously entered for a Task (see "Entering a New Task" below). |
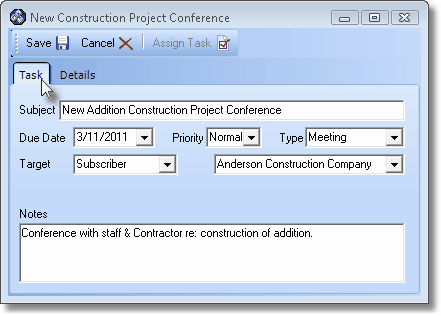
Employee Calendar Task tab Task Entry Form
| • | Task List - Displays the Due Date and Subject of each Task that has not been assigned to an Employee as a Task Appointment until the Task has been Completed. |
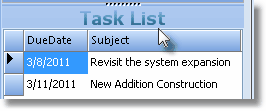
Employee Calendar Task List
| • | A blank line will be inserted (as shown at the mouse pointer in the illustration above) and the Untitled Task dialog will be displayed automatically (see illustration below). |
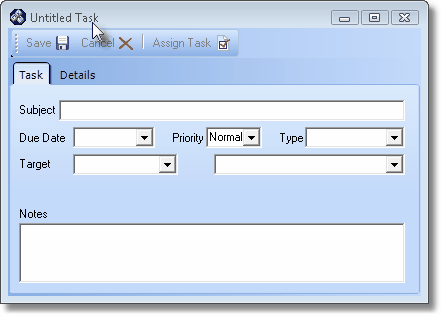
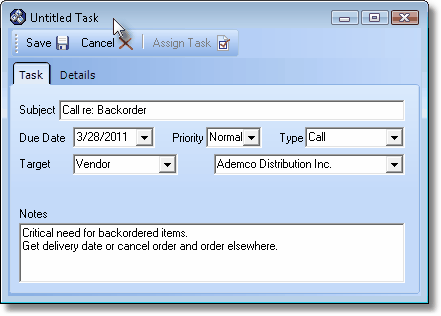
Enter a new Untitled Task dialog
| • | Subject - Enter a Name for, or concise description of, this Task. |
| ▪ | The Subject may include Upper and lower case letters, numbers, spaces and/or punctuation marks, up to 40 characters in length. |
| ▪ | It should briefly describe the purpose of, or goal for, the Task. |
| • | Due Date - By default, this will be Today. |
| ▪ | Use the Drop-Down Date Selection Box to Choose the appropriate Due Date for this Task. |
| • | Priority - By default, the Priority will be set to Normal. |
| ▪ | Use the Drop-Down Selection List to Choose the appropriate Priority (Low, Normal, or High) of this Task. |
| • | Type - Use the Drop-Down Selection List to Choose a category for this Task. |
| ▪ | The list of these Task categories are User Defined in the Reminder Type Form. |
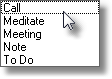
Task Types
| • | Target - Use the Drop-Down Selection List to Choose the "target" of this Task (a Prospect, Subscriber, or Vendor). |
| • | Select Target - Once the "Target" type has been Chosen, use the Drop-Down Selection List to Choose the appropriate person or Company. |
| ▪ | This is an incremental search box so as you type, the Target (Prospect, Subscriber, or Vendor) with the Name closest to what has been entered will be offered. |
| ▪ | Press 8 Enter when you have the desired Target located. |
Entering a Task
| • | Notes - Enter a detailed description of the Task's parameters, schedules, interim steps, etc. to explain this Task. |
| ▪ | The first line, which is displayed in the Notes column on the Task Tab, should provide a brief explanation of the Task. |
| ▪ | The remainder of the entry should provide the details of the Task. |
| ▪ | Notes may include Upper and lower case letters, numbers, spaces and/or normal punctuation. |
| ▪ | You may enter any number of characters. |
| • | Save - Click the Save button < on the Task Editor dialog to properly save this Task record. |
| • | Click the Close box x on the Task Editor dialog to return to the Task tab. |
| • | Create Date - The default Creation Date, inserted by the system in the Create Date column, is Today. |
| ▪ | Use the Drop-Down Date Selection Box to Choose a different date, if appropriate. |
| ▪ | Be sure to Click the Save button < at the top of the Employee Calendar Form if you modified the date in the Create Date column. |
| □ | To Modify and/or Update a Task |
| • | Click on the Task line to be modified. |
| • | Select the Task sub-tab (next to the Task sub-tab) on the Task Editor dialog: |
| • | Enter the modification(s), as needed. |
| • | Save - Click the Save button < on the Task Editor to properly save this modified Task record. |
| • | Click on the Task line to be deleted. |
| • | Click on the Task line that has been completed. |
| • | Select the Details sub-tab (next to the Task sub-tab) on the Task Editor dialog: |
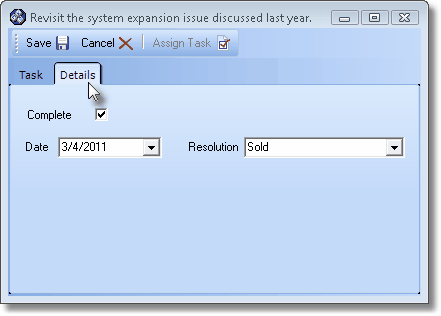
Details sub-tab on Task tab of Task Appointment Editor
| i. | Complete - Check this box when the Task has been completed. |
| ii. | Date - Use the Drop-Down Date Selection Box to Choose the appropriate Date for the completion of this Task. |
| iii. | Resolution - Use the Drop-Down Selection List to Choose the appropriate Reminder Resolution code that best represents the completion of this Task. |
| iv. | Click the Save button < on the Task Editor to properly save this completed Task record. |

