| □ | Completing a Service Request - When the Technician has completed the Work Order, enter the Labor, and any Inventory, Materials, or Miscellaneous charges for this Work Order. |
| 2. | A Manager completes or a Technician completes these Service Requests at a later time (or day) as time and access allows. |
| ► | Note: In the Time Sheet Options area on the Employee Form's Security tab, the Service Manager's Employee record must have a Check in the Manage Time Sheets? box. |
| □ | A little review - Creating the Service Request (a Work Order) is a multi-stage process: |
| • | A Technician is assigned to perform the required service work and it is Scheduled. |
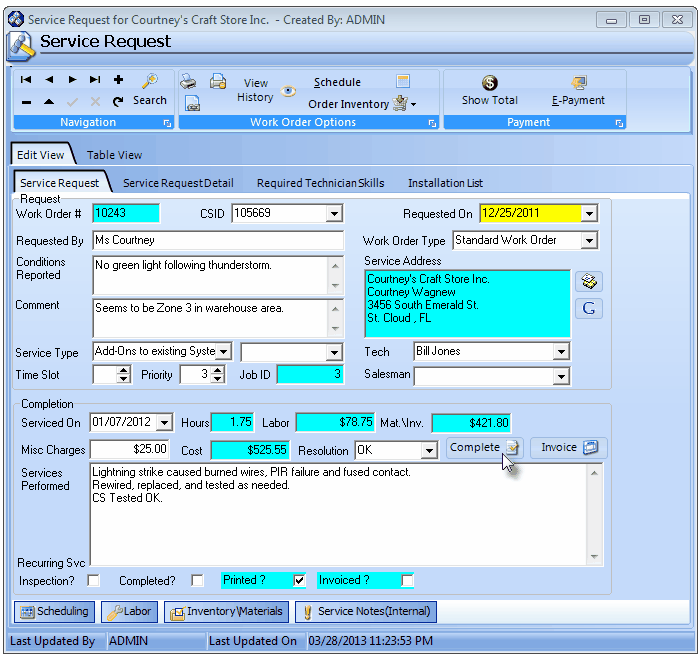
Service Request Form that is ready for Invoicing
| • | The outline of the basic process is as follows: |
| b. | Assign this Work Order to a Technician. |
| e. | Record the Labor used to complete the Work Order (see Labor tab below). |
| f. | Record the Inventory & Materials used to complete the Work Order (see Inventory\Materials tab below). |
| g. | Complete and Invoice the Work Order (see Finalizing the Service Request below). |
| □ | This chapter outlines the (e., f., & g.) final three steps required to Complete a Service Request. |
| 1. | Record the Labor used to complete the Work Order. |
| 3. | Finalize and Invoice the Work Order (see the "Finalizing the Service Request" section below). |
| • | When the Technician(s) complete the repair, installation, or inspection required by the Work Order, record by whom, and how many Labor Hours were required to accomplish this work. |
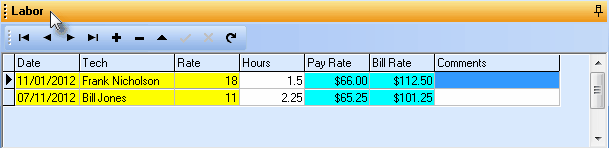
Labor tab on the Service Request Form
| ► | Note: Once this Work Order is Invoiced (see the "Using the Complete and Invoice buttons" section below), you can no longer modify these entries. |
| • | When the Technician(s) complete the repair, installation, or inspection required on the Work Order, record the Inventory Items and Material costs that were required to accomplish this work. |
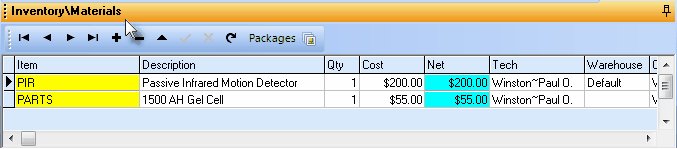
Service Request Form - Inventory\Materials tab
| • | Using the Packages Icon: |
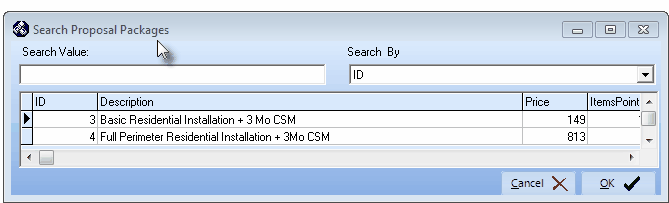
Select Proposal Package dialog
| ► | Note: Once this Work Order is Invoiced (see "Using the Complete and Invoice buttons" section below), you can no longer modify these entries. |
| □ | Finalizing the Service Request - Filling in the Completion area on the Service Request Form: |
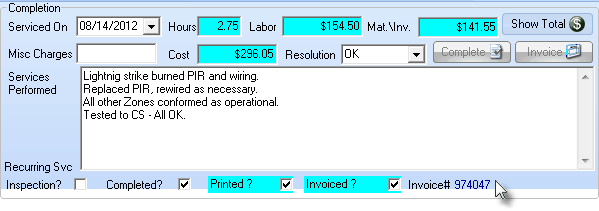
| • | Serviced On - Use the Drop-Down Date Selection Box to enter the date of service. |
| • | Hours - System maintained based on the Labor tab information entered (see above). |
| • | Labor - System maintained based on the Labor tab information entered (see above). |
| • | Mat./Inv. - System maintained based on the Materials costs and Inventory used information entered in the Inventory\Materials tab (see above). |
| • | Misc. Charges - Enter a dollar amount for any other miscellaneous costs chargeable to this Work Order. |
| • | Cost - Sum of the Billable Charges (Labor + Mat.\Inv. + Misc.) |
| • | Services Performed - Enter a detailed description of the work that was performed. |
| • | This information will be included on the Invoice generated using the Invoice button (see below). |
| • | Save ("ü") this additional Service Request information. |
| □ | Using the Complete, Invoice and Show Total buttons: |

Complete, Invoice & Show Total Buttons
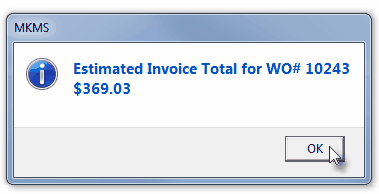
| • | Show Total - To see an estimate of what would be Invoiced to the Subscriber for this Completed Service Request, Click the Show Total Icon at the top of the Form to display the Estimated Invoice Total dialog which includes the Labor + Mat.\Inv. + Misc. Work Order charges plus any applicable Sales Tax. |
| • | This assumes that no additional Labor + Mat.\Inv. + Misc. costs will be added prior to Clicking the Invoice Button (see below). |
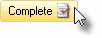
| • | Complete - Click the Complete button to indicate that this Work Order has been finished. |
| ► | Note: If you do not intend to Invoice this Work Order at this time (or perhaps it was a Warranty or Courtesy service call), you may manually Check the Completed? box. |
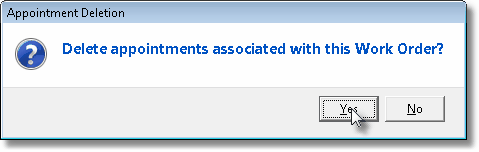
| • | You may be asked to delete the existing Appointment that was made for this Work Order. Answer as appropriate. |
| • | If you have not yet Invoiced this Work Order, you will be asked if you want to do so. Answer as appropriate. |
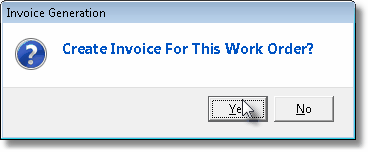
| ▪ | If you answer Yes, the Invoice for this Work Order will be created automatically (see the "Automatic Invoice Generation" section below). |
| • | To Skip the Invoicing step if you made this selection in error, or if more work and/or additional entries will be required later to actually complete this Service Request: |
| • | Answer No to the Create Invoice For This Work Order? question. |
| • | Click Save ("ü") and exit the Form. |
| ▪ | Answering No will require that you create an Invoice later, if this Work Order does ever need to be billed. |
| • | The instructions below may be used for any of these four cases: |
| 1) | You Clicked the Complete Button and answered Yes to create a bill for the Work Order. |
| 2) | You Checked the Completed? box manually, but now want to use the Invoice Button to create a bill for the Work Order |
| 3) | You did not create an Invoice when you Clicked the Complete button (see Complete above), but now want to use the Invoice Button to create a bill for the Work Order |
| 4) | You have returned after making additional entries and want to now use the Invoice Button to bill the Subscriber for the Work Order. |
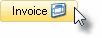
| • | Automatic Invoice Generation - Follow the instructions below to automatically create an Invoice for the Work Order using the Invoice Button. |
| • | Click the Invoice Button. |
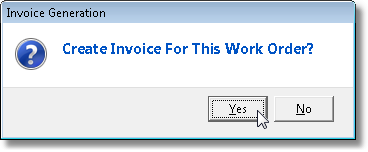
| • | Answer Yes for the Create Invoice For This Work Order? question if the required entries for this Service Request are Completed and you want to Invoice for the Work Order at this time (see "Invoicing for Inventory & Material entries" immediately below). |

Inventory\Material items to be itemized on the Invoice
| • | Invoicing for Inventory & Material entries: |
| ▪ | If Inventory\Material items were entered on the Inventory\Materials tab, |
| o | Invoice Now - Check all of the items that you want to be itemized as charges on the Invoice. |
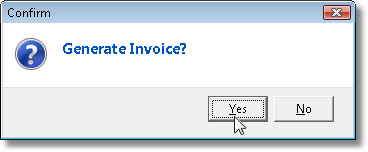
| ▪ | Click the Generate Invoice button (see mouse pointer in illustration above) on the Itemized WO Invoicing dialog. |
| o | Confirm that you do want to Generate the Invoice. |
| ▪ | An Invoice will be created automatically (see example below). |
| o | Labor charges entered in the Labor tab and any Miscellaneous charges will be included on the Invoice. |
| o | If selected, the Inventory\Material items will be itemized as indicated above. |
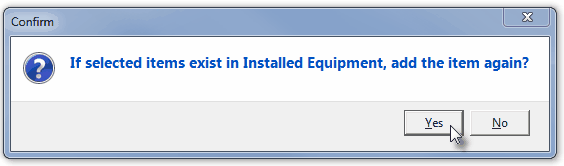
| ▪ | If there are Inventory Items that already exist in the Installed Equipment table for this Subscriber, you will be asked of these are to be added as additional items in that table. |
| o | Yes - Adds the Inventory Items to the Invoice and Creates additional Installed Equipment record(s) for these Items, as needed. |
| ▪ | Comments - Services Performed notes will be included in the Invoice's Comments section. |
| ► | Note: You may add to, or modify the Invoice as needed (see Sales for more detailed information). |
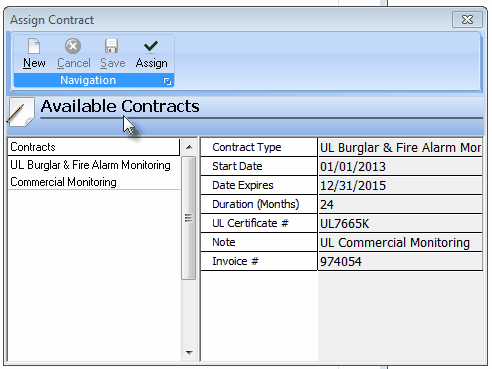
Assign Contract Form
| • | Print - You may print this Invoice when you are finished. |
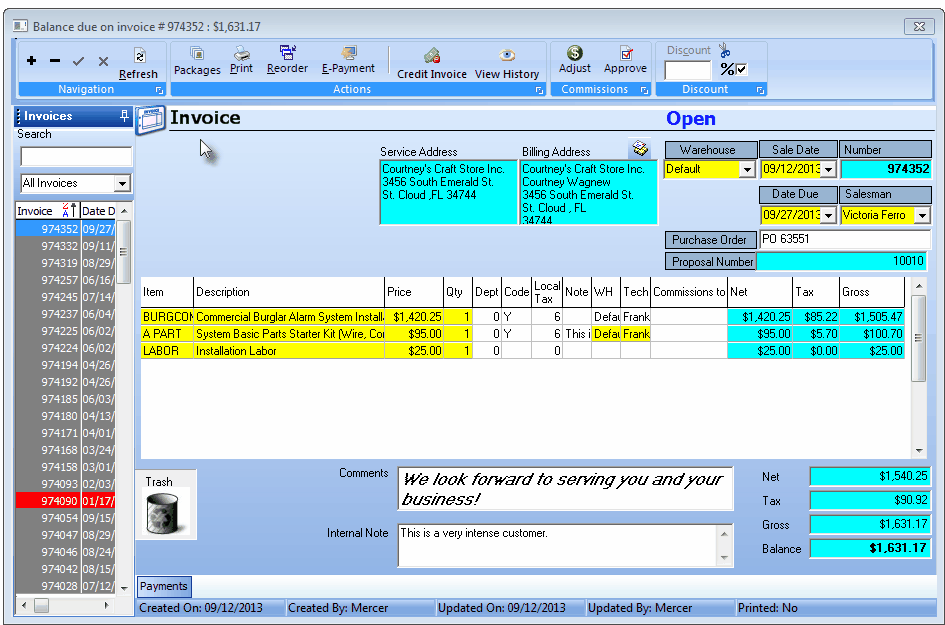
Automatically generated Invoice for a Work Order
| • | This Invoice may be accepted as is, modified, added to, or deleted and then created manually - based on the Users need(s). |
| • | Here are a few special considerations you may want to address: |
| ▪ | Department - If using the General Ledger System and need to assign a specific Department to this transaction, Click on the Dept field and use the Drop-Down Selection List to Choose the required Department number. |
| ▪ | Note - The Note field, available on each Detail Line Item, allows you to open a Text Editor (just Double-Click [Memo]) to enter a detailed description of exactly what this charge was for, and/or what was performed. |
| ▪ | Sales Tax: Based on the rules and requirements of your Sales Tax Authorities, established for this Subscriber, the charge for Sales Tax will be added to the Invoice. Therefore: |
| o | The original billing Amount you entered for this Work Order should not include the Sales Tax Amount as part of what you enter for the Costs or Labor Rates. |
| o | Verify that any item that should not be taxed, has not been taxed, and visa versa. |
| o | Sales Tax related corrections may be made as follows: |
| i. | Click that Drop-Down Selection List in the (Sale Tax) Code field. |
| ii. | Choose the % (Tax Rate Code) for that item (Y/N/1/2/3), as appropriate. |
| iii. | Repeat this process, as required, for each item that Sales Tax was incorrectly assessed. |
| ▪ | Click Save ("ü") Save to record any updates that were required. |
| • | The Completed? box at the bottom of Service Request Form will be Checked automatically.
|
| □ | Service Request Form's Completion area Check Boxes: |

| • | Recurring Svc Inspection? - When the services performed would qualify as the completion of a full Inspection procedure (based on the Work Order Type specified), Check the Inspection? box. |
| • | If the work performed, as a part of the overall services that were completed, has included what would be considered their normal inspection or service procedure: |
| ▪ | Select the appropriate Recurring Service record |
| ▪ | Click the Reset Service Month tab. |
| ▪ | Click Close to exit this form. |
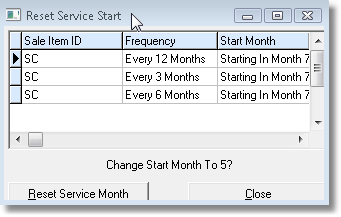
Reset Service Start if an out-of-cycle inspection is performed
| • | By resetting the cycle, the system will skip their next normal recurring service requirement (as the Automatic Generation of Recurring Services processes is executed), and re-set the cycle that would coincide with this just completed Work Order. |
| • | Completed? - This box will be Checked automatically when the Complete button is pressed (see above). |
| • | You may manually Check Completed? if you do not intend to actually create an Invoice for this Work Order (because was a Warranty or Courtesy call). |
Service Request Completion information
| • | Printed? - If you printed this Service Request's Work Order Form, this box will be Checked by the system. |
| • | Invoiced? - If you Invoiced the completed Work Order, this box will be Checked by the system. |
| • | Invoice # - If you Invoiced the completed Work Order, the Invoice number will be inserted here by the system. |
| • | Save ("ü") the Service Request information. |
| □ | See the chapter explaining the three sets of Special Icons on the top of the Service Request Form - along with the purpose for those Icons. |
Service Request Form - Special Icons and Options
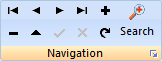
| • | Navigation related Icons: |
| 1. | Move from record to record manually (Beginning, Previous, Next, Last) |
| 3. | Search for a specific Work Order record |
| 4. | Refresh the currently displayed Work Order data. |
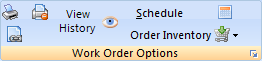
| 2. | Print a Service History |
| 3. | View History of any modifications to an Invoice created to charge a Subscriber for this Work Order. |
| 6. | Order Inventory for a new, or existing Work Order |
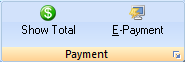
| 1. | Show Total displays the Total Balance Due for this Work Order |
| 2. | E-Payments provides an instant method to get Paid for the Total Balance Due by E-Payment. |


