| □ | As you enter the Subscriber's Installed Equipment information, for consistency and clarity, you'll use the predefined Installed Equipment Codes (and there associated Descriptions) to define the components of their system. |
| • | By doing so, everyone will be able to refer to the same part with the same word, code or description, as appropriate. |
| • | Not doing so - using a different word, code or description for the same thing - leads to ambiguous and confusing information when viewed by your Technicians (either on paper or on screen). |
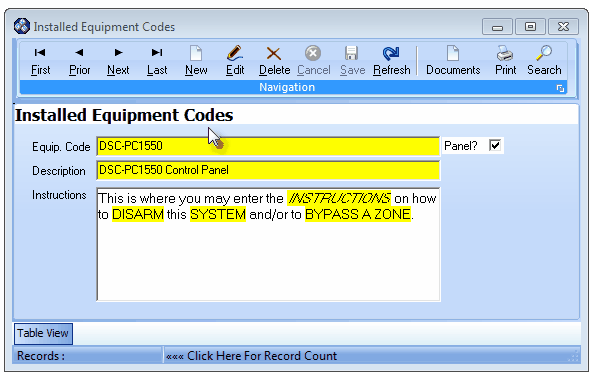
Installed Equipment Codes Form
| □ | Entering the Subscriber's Installed Equipment information - The Installed Equipment Form allows you to precisely define each of a Subscriber's system components and then print, at will, a complete list of that Subscriber's Installed Equipment. |
| • | To access a Subscriber's Installed Equipment information Form: |
| • | Click on that Subscribers Form's General Quick Access Menu |
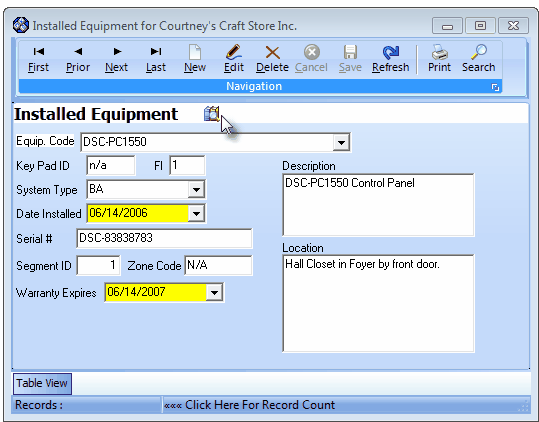
The Installed Equipment Form uses Installed Equipment Codes
| • | This Installed Equipment Form may be Re-sized by Dragging any side (Top, Bottom, Left or Right) in or out. |
| • | Navigation Menu - The Navigation Menu is located at the top of the Installed Equipment Form. |

| • | This Navigation Menu provides the normal Record Movement, New, Edit, Delete, Cancel, Save, and Refresh options; as well as a Print and Search function. |
| • | Record Editing section - The details of the currently selected record are displayed below the Navigation Menu at the center (Main Body) of the Installed Equipment Form. |
| • | Table View tab - A tabular (spreadsheet style) Table View of the currently defined Installed Equipment records is accessible by Clicking the Table View tab at the bottom of the Installed Equipment Form. |

| • | To display a specific Installed Equipment record in the Record Editing section, Click on that record within the Table View section, or use the Search Icon (see the "Using the Special Functions" section later in this chapter). |
| • | This Table View information may be Pinned in Place by Clicking the Pin Icon on the right. |

| ▪ | You may Un-Pin this Table View by Clicking the Pin Icon again. |
| ▪ | Click on any listed record to display that information in the center (Main Body) of the Form. |
| • | There are many columns of data in this Installed Equipment Record Listing: |
| • | Each column's Header Name describes the data contained in that column. |
| ▪ | Clicking on a Header Name will set the order in which the Installed Equipment will be listed. |
| ▪ | Clicking on the same Header Name will set the order in the opposite direction (ascending vs. descending). |
| ▪ | The Header Name that is determining the Order of the list will have an Icon indicating the Order displayed next to that Header Name. |
| • | To define the Installed Equipment: |
| • | Click the  Icon to start the Installed Equipment entry in the Record Editing section. Icon to start the Installed Equipment entry in the Record Editing section. |
| • | Equip. Code - Use the Drop-Down Selection List to Choose the appropriate Installed Equipment Code that best represents the installed system component that is being documented. |
 Equipment Code Documents Look-up Icon

Available Documents
| ▪ | If one of these is not available (no Instructions or no Documents), that menu option will be gray. |
| ▪ | If neither are available, the Equipment Code Icon on this Installed Equipment Form will not be displayed at all. |
| ▪ | You may enter a revised Description (up to 50 characters including upper & lower case letters, numbers, spaces and standard punctuation) of this system component. |
| • | Location - Enter a brief comment (up to 100 characters including upper & lower case letters, numbers, spaces and standard punctuation) specifying this system component's exact location. |
| • | Key Pad ID - If this installed device reports an Alarm or Fault Code to the system's Keypad, enter that Key Pad ID Code here. |
| • | Fl - Enter the Floor number where this system component is installed. |
| ► | Note: This is a two character field allowing for special entries such as B1 for first basement level, or Mz for the Mezzanine floor. |
| • | Serial # - Where appropriate, enter the product's Serial Number. |
| ▪ | This is particularly important for expensive components such as cameras, DVRs, control panels, etc. |
| ▪ | Accepts up to 15 characters including upper & lower case letters, numbers and standard punctuation. |
| • | System Type - Use the Drop-Down Selection List to Choose the appropriate Alarm Condition Code that best represents the type of system function or alert that this component represents and/or reports to your Central Station. |
| ▪ | Right-Click within the System Type field to select the Search By method (i.e., Alarm Code, or Description) |
| ▪ | The example Alarm Condition Codes Form below shows the Alarm Condition Code that was used to identify the Installed Equipment System Type shown in the illustration above. |
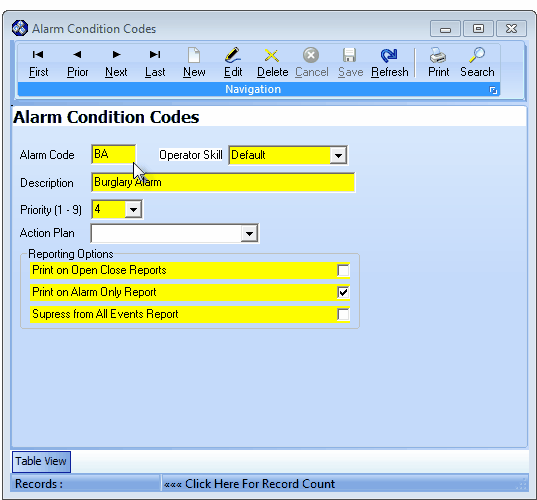
Alarm Condition Codes Form
| • | Segment ID - If this system consists of multiple segments, enter the appropriate Segment number for this system component. |
| • | Zone Code - If, upon alarm or fault, this device reports a Zone Code to the Central Station, enter that Zone Code here (the Zone Code is referred to as a Physical Zone in the CSID Zones and/or the Panel Zones Form). |
| • | Date Installed - By default, the Date Installed will be the date entered as the Sale Date in the Service Information tab on the Subscribers Form. You may modify this date using the Drop-Down Date Selection Box if this component has a different sale date than the master system. |
| • | Warranty Expires - By default, the Warranty Expires will be the date entered as the Warranty Ends Date in the Service Information tab on the Subscribers Form. You may modify this date using the Drop-Down Date Selection Box if this component has a different length Warranty than the master system. |
| • | Fire Inspection Type - If this component requires a Fire Alarm Test or a Fire Extinguisher Test, Click the appropriate button. |
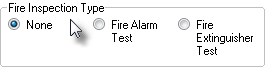
| ▪ | None - By default, None is selected. |
| ▪ | Fire Alarm Test - The Work Order Form - when it is created for a Fire Alarm Test - will list each of the Equipment Code items that have this button Clicked |
| ▪ | This will help to make that Fire Inspection easier to perform and more accurately completed. |
| ▪ | Fire Extinguisher Test - The Work Order Form - when it is created for a Fire Extinguisher Inspection - will list each of the Equipment Code items that have this button Selected |
| o | This will help to make that Fire Extinguisher Test easier to perform and more accurately completed. |
| • | Click the  Icon to record this entry. Icon to record this entry. |
| • | Any number of additional Installed Equipment records may be defined. |
| □ | Using the Print and Search on Navigation Menu of the Installed Equipment Form. |
| • | Search - Click the Search to retrieve an existing Installed Equipment record to review or modify it, as needed. |
| • | Print - Click Print to View and/or Print the Installed Equipment report information defined for the current Subscriber. |
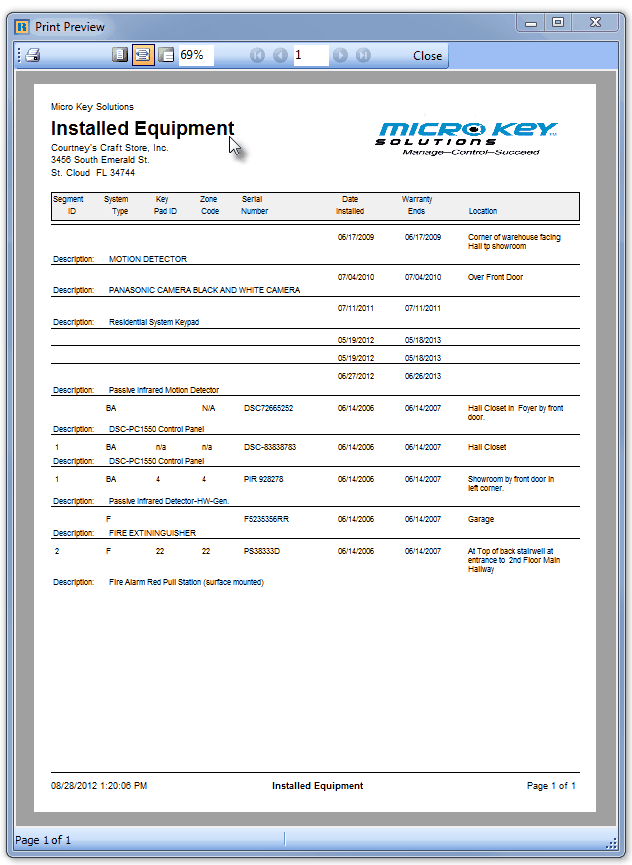
Installed Equipment report

