| □ | The Inventory List sub-tab on the Inventory tab of the Job Costing Form allows you to Order Inventory, Reserve Inventory, to Use Inventory and to Print a Parts List. |
| • | The Inventory List is exactly that - a list of the anticipated Inventory Items that will be needed to complete this Job. |
| • | This Inventory List may be entered manually (see #1 below), or generated automatically (see #2 below) when a Proposal is Converted into a Job. |
| • | To access the Inventory List sub-tab, open the Job Costing Form and, using the Search dialog, locate the Job to be updated. |
| • | Click the Inventory List sub-tab to see the Form illustrated below: |
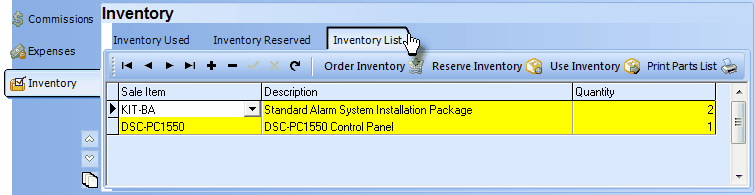
Job Costing Form - Inventory tab - Inventory List sub-tab
| □ | Creating a potential Inventory List for a Job: |
| • | There are two ways that the Inventory List may be populated: |
| 1. | Manually - Enter the Inventory Item(s) manually based on anticipated need: |
| o | Sale Item - Use the Drop-Down Selection List to Choose the appropriate Inventory Item. |
> Only Inventory Items will be listed for possible selection.
| o | Description - The default description of the selected Inventory Item will be displayed automatically. |
> The default Description may be modified, if required.
| o | Quantity - Enter the number of the selected Inventory Item to be Ordered, Reserved, and/or Used. |
> The default is none, so you must enter a value.
| ▪ | Click Save ("ü") to insert the entry into the Inventory List. |
| ▪ | Repeat this process until all of the required Inventory Items have been defined. |
| 2. | Automatically - Using an existing Proposal containing (most or all of) the anticipated Inventory Item(s) that will be required for the Job: |
| ▪ | Convert the Proposal into a Job, rather than an Invoice, following the instructions in that chapter. |
| ▪ | When the Inventory Item(s) are actually identified, using one or more of the three buttons (see "There are three Buttons on the Inventory List tab" below) within the Inventory List tab: |
| 2. | Reserved using existing Inventory On Hand |
| □ | In addition to the standard Navigations buttons and the Refresh button, there are four specilized Buttons on the Inventory List tab: |

| 1. | Order Inventory - Click this button to open the Order Inventory dialog. |
| ▪ | Vendor - Using the Drop-Down Selection List , Choose the Vendor from whom these Inventory Item(s) are to be ordered. |
| ▪ | Warehouse - Using the Drop-Down Selection List , Choose the Warehouse location from which these Inventory Item(s) are to be taken. |
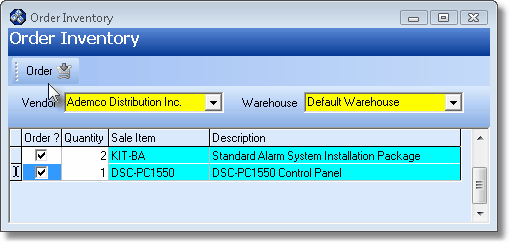
Order Inventory dialog with Inventory Items to be ordered Checked
| ▪ | Click the Order button (see the mouse pointer in the illustration above) to execute this Purchase Order request. |
| • | A Purchase Order is created for the selected Inventory Item(s) and a Success! message is displayed. |
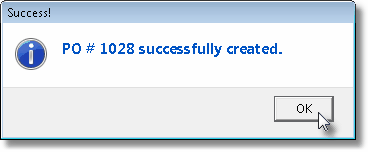
Purchase Order successfully created
| ▪ | Make a note of the PO# and then Click OK to acknowledge the successful creation of that Purchase Order. |

Purchase Order tab on Job Costing Form listing new Purchase Order created in Order Inventory
| ▪ | Clicking on that Purchase Order Number will open that Purchase Order. |

Purchase Order that was created using the Order Inventory dialog accessed within the Inventory List
| ▪ | This will allow the User to update the Ship When, Ship Via and FOB information, if appropriate. |
| ▪ | The Warehouse, PO Number, Order Date, Job Number, Inventory Item(s), Price and Purchase Order's Total are entered automatically. |
| 2. | Reserve Inventory - This button is used to insert a Selected Quantity of an Inventory Item into the Inventory Reserved tab following the directions outlined below: |
| • | This option is used when a sufficient quantity of the Inventory Item is Available On Hand to fulfill the requirements for this Job without the need to issue a Purchase Order, as was done in step #1., above. |
| ▪ | Click the Reserve Inventory button to open the Job Inventory Reservation dialog. |
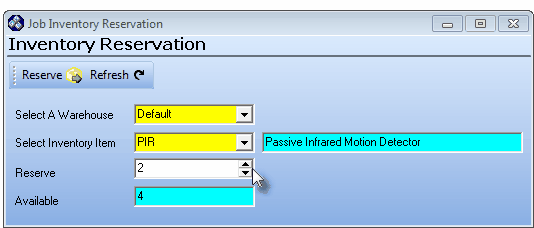
Job Inventory Reservation dialog
| ▪ | Select A Warehouse - Using the Drop-Down Selection List , Choose the Warehouse location from which the needed quantity of Inventory Item(s) will be reserved. |
| ▪ | Select Inventory Item - This will be the Inventory Item selected above and may not be changed. |
| ▪ | Reserve - Enter the quantity to be reserved. |
| ▪ | Available - For information purposes only, this is the number of the selected Inventory Item that is Available On Hand (currently in stock). |
| ▪ | Reserve - Click the Reserve button to execute the insertion. |
| • | The Inventory Item remains in the Inventory List so that it is available when its Usage needs to be recorded (see below). |
| 3. | Use Inventory (also see the Important Note below) - This button allows the User to record the usage of a specified quantity of a selected Inventory Item and Transfer that information to the Inventory Used tab following the directions outlined below: |
| • | Click the Use Inventory button to open the Job Inventory Usage dialog. |
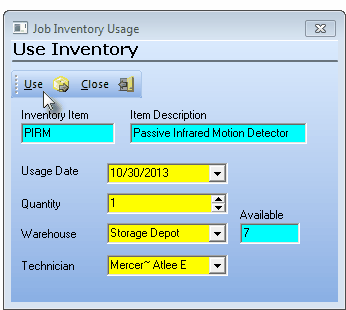
Job Inventory Usage dialog accessed in the Use Inventory tab
| ▪ | Item Description - The default description of the selected Inventory Item. |
| ▪ | Available - The quantity Available On Hand of the selected Inventory Item. |
| ▪ | Usage Date - By default, this will be Today. |
| o | Use the Drop-Down Date Selection Box to Change the Date, if required. |
| ▪ | Quantity - Enter the quantity of the selected Inventory Item that was used. |
| ▪ | Technician - Use the Drop-Down Selection List to Choose the Technician that has used the Inventory Item(s). |
| ▪ | Use - Click the Use button to execute the usage update. |
| o | If this Inventory Use entry creates a Negative On Hand Quantity for the selected Inventory Item, a Negative Inventory Warning message will be displayed. |
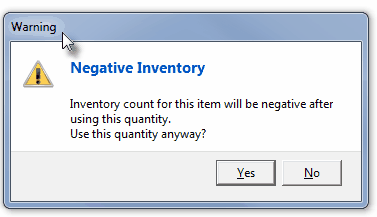
Warning - Negative Inventory
| o | Click the Yes or No button, as appropriate. |
| ▪ | Close - Click the Close button to return to the Inventory List tab. |
| 4. | Print Parts List: Click the Print Parts List button to Preview and optionally Print (to a File or a Printer) this Parts List report. |
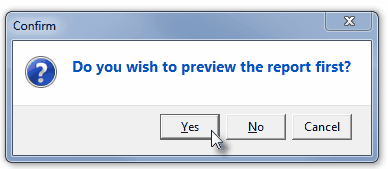
Do you wish to preview the report first?
| • | Click the Yes button to view a preview of the Parts List. |
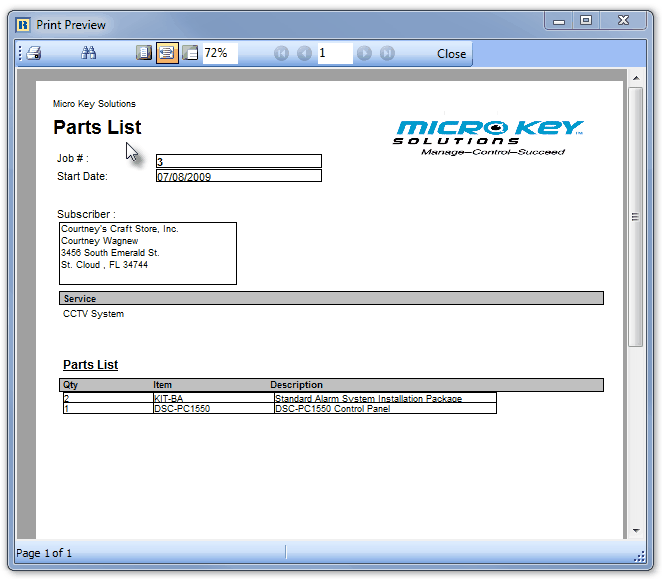
Pasts List - Preview
| 2. | Inventory used, and identified as such within this Inventory List sub-tab by using the Use Inventory option on this Inventory List sub-tab. |
| 3. | Inventory used may be recorded by specifically adding it to the list on this Inventory Used sub-tab. |
| o | Because of the many ways that the Inventory Used on a Job may be entered, there may be items remaining on this Inventory List sub-tab when the Job has been completed. |
| o | These "left-over" items will have no effect on the Inventory Counts or on the Job Costing results and so may be deleted at that time. |

