|
Transaction File Form This Help File Page was last Modified on 12/31/2013 |

|

|
|
|
Transaction File Form This Help File Page was last Modified on 12/31/2013 |
|
|
Transaction File Form
This Help File Page was last Modified on 12/31/2013
|
Transaction File Form This Help File Page was last Modified on 12/31/2013 |
|
|
|
|
Transaction File Form This Help File Page was last Modified on 12/31/2013 |
|
|
| □ | Viewing the contents of the Transaction File Form is like looking under the hood of your favorite race car to see it's magnificent engine. |
| • | The General Ledger Systems stores its inner workings, the detail of every Financial Transaction that occurred anywhere within MKMS, in the Transaction File Form. |
| • | This detail includes such information as the Date it was posted, the Financial function which required it, the Amount that was posted - the how and why all of this information was recorded within the General Ledger. |
| • | The Transaction File Form is designed to provide easy access to all of this complicated, detailed information - but in a way that makes these General Ledger Transactions understandable, searchable and selectable. |
| • | Multiple instances of this Transaction File Form may be opened, each with different Filters. |
| □ | The Transaction File Form provides a Detail View and a Summary View of every Debit and Credit Financial Transaction that was posted to in the General Ledger System - based on a specified Date Range, various User definable Filters, and/or Search By criteria. |
| • | There is a lot of information in this Transaction File Form, but this information shows exactly how each Financial Transaction was recorded. |
| • | To access the Transaction File Form, on the Main Menu Select File, Choose the General Ledger sub-menu, then Click Transaction File. |
Transaction File Form
| □ | Understanding & Using the Transaction File Form: |
| • | The Transaction File Form contains five main sections: |
| 1. | Search By option - Provides a streamlined Search function to locate a specific set of (one or more) Financial Transactions. |
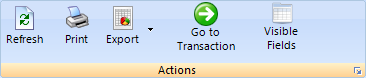
| 2. | Action Icons - These are used for making Searches, Refreshing, Printing, and Exporting the displayed data, for accessing the originating Form (the Document Type) that initiated the currently selected Financial Transaction and Choosing which Visible Fields (columns of data) will be displayed. |
| 3. | Filters tab - This is used for identifying a Date Range, defining various settings for specifying Document Types, Accounts, Departments, etc - to establish a Filter Criteria that specifies which Financial Transactions will be listed. |
| 4. | Detail View of Financial Transactions - A very detailed listing (based on the specified Date Range and defined Filter Criteria) of the Financial Transactions. |
| ▪ | Column Header Names and the associated data may be relocated using the standard Windows® Drag & Drop method. |
| o | Once relocated by a User, the Column Header's new location is saved as the default location. |
| ▪ | Which Column Header Names are displayed may be determined by the User using the Visible Fields Icon (see the "Other Action Icons - Visible Fields" section below). |
| ▪ | The Internal Note column is "read only" |
| o | An Internal Note may be entered when a Sales Invoice is created, a Receipt is posted, or a Purchase is recorded. |
| o | If the Internal Note is too long to easily view, Double-Click the Internal Note field and a Windows® Note Pad dialog will display the full text. |
| 5. | Summary View of Financial Transactions - A summarized view of each General Ledger Account which had a Financial Transaction posted to it (based on the specified Date Range and defined Filter Criteria). |
| • | Each of these Transaction File Form sections are explained in detail below. |
| □ | Using the Action Icons - These Action Icons are used to Search, Refresh, Print, and Export the displayed data, and to access the Form that initiated the currently selected Financial Transaction. |
| • | Search By Option - A Search may be performed (at any time) within list of Financial Transactions to locate a specific General Ledger Transaction. |
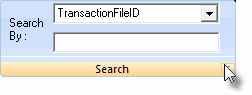
| • | Search By - If a specific Financial Transaction, the beginning of a set of Financial Transactions, a certain Amount for a Transaction, etc., needs to be examined, Choose the Column Name (data type) on which that Search will be performed using the Drop-Down Selection List provided. |
| • | Perform the Search with these characters - Based on the Column Name (data type) selected above, enter the Number(s) and/or Character(s) which will identify the specific Financial Transaction that needs to be located. |
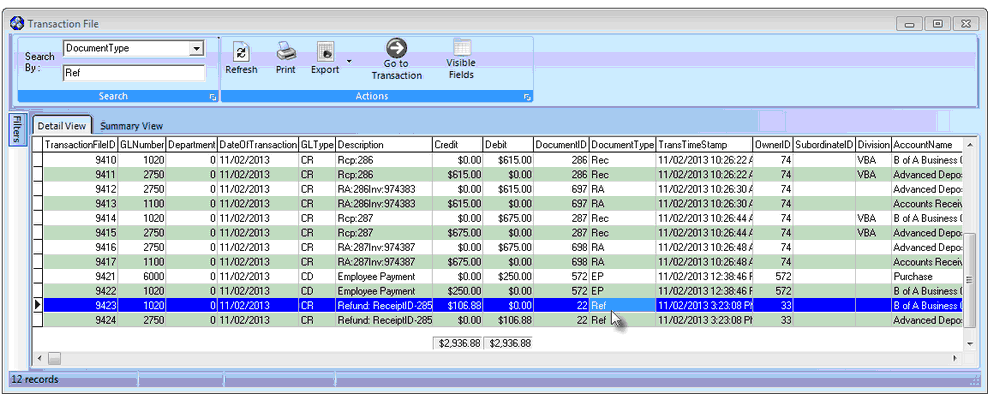
Transaction File dialog - Search results from a Search By for the Document type of Ref
| ▪ | In most cases, character based Search entries will be performed as an incremental search - locating the first record which matches that entry. |
| o | But with a Search containing numbers, the entry must be a perfect match (exclusive of any numbers after a decimal place). |
| ▪ | When a Financial Transaction record is identified as a match, the Record Pointer4will be relocated to that record. |
| o | If multiple records would match the search entry, the first example of that match is identified by the Record Pointer. |
| • | Other Action Icons |
| • | Refresh - Once the Date Range and Filter Criteria options have been chosen, Click the Refresh Icon to update the list of Financial Transactions to match those selected options. |
| • | Print - Click the Print Icon to create a printed list of the selected Financial Transactions. |
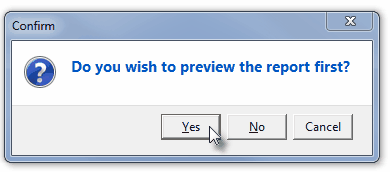
Do you wish to preview the report first?
| ▪ | Choose whether to Preview the report first, or just immediately Print it. |
| ▪ | Click the Yes button to view the Preview of the Transaction File Listing. |
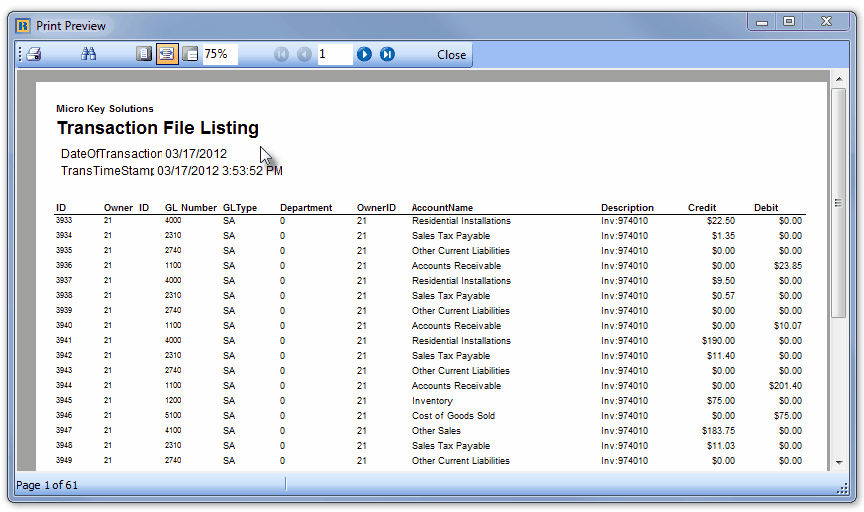
Transaction File Listing - Print Preview
| ▪ | Click the Print Icon on the Preview tab to display a standard Windows® style Print dialog. |
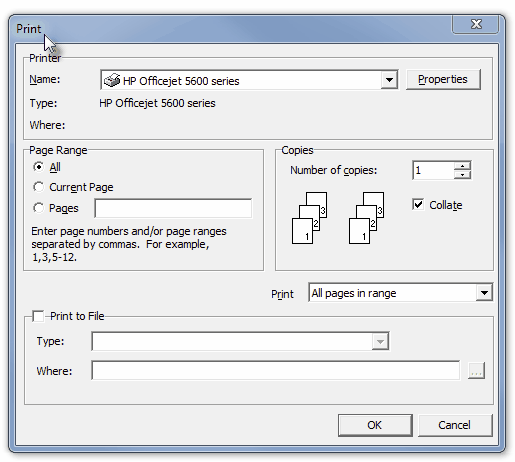
Windows® Print dialog
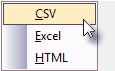
| • | Export - Click the Down-Arrow ‚ on the Export Icon to select the file type to be used to create an export file (or f the selected format) at the Folder location of your choice. |

| ▪ | Select the file type to be used to create an export file. |
| • | Go to Owner - Select the appropriate Financial Transaction line item, then Click this Go to Owner Icon to open the Form from which the Selected Financial Transaction was created. |

| ▪ | The Form associated with the Selected Financial Transaction will be opened in a Read Only state. |
| ▪ | This "Go To" action may also be executed by Double-Clicking a specific Transaction File's Line Item. |
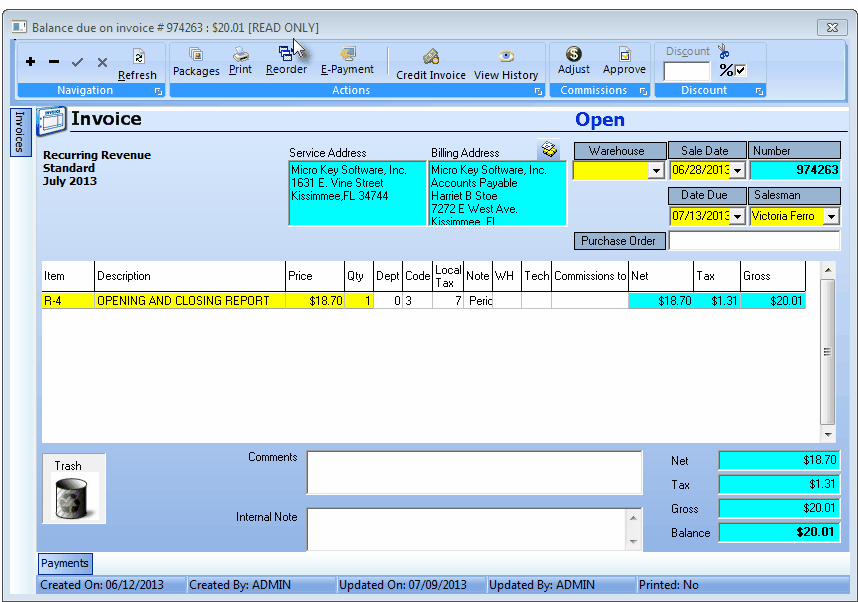
| ▪ | Alternately, you may simply Double-Click on the Transaction ID field to open the Form associated with the Selected Financial Transaction. |
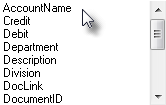
| • | Visible Fields - Click this Icon to display the Select Fields Drop-Down Check Boxes Listing Of Fields |
| ▪ | Check which Fields should be Visible (columns of data that will be displayed). |
| ▪ | By default, all Field Names will be Checked. |
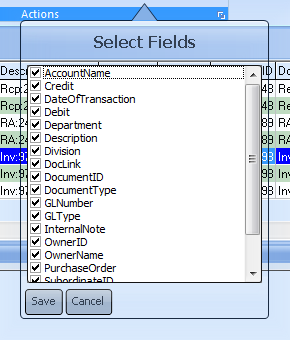
Select Fields - Check Box Listing
| ▪ | Un-Check any Field Name(s) which are not required. |
| ▪ | Click the Save button to finish the selection. |
| o | This will become the new default set of Fields that will be displayed. |
| o | This set of Fields may be redefined at any time, as needed. |
| □ | Using the Filtering Options: |
![]()
| • | The Filters tab is on the left side of the Transaction File Form. |
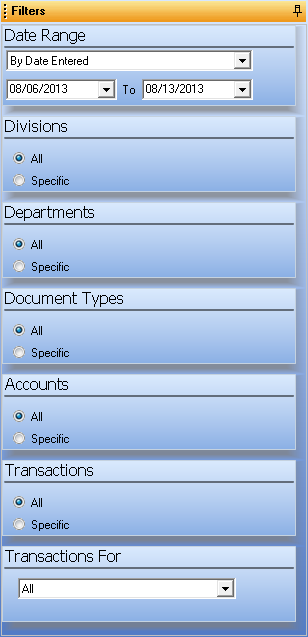
Transaction Form - Filters
| • | Click the Filters tab to view the available Filtering Options |
| • | This Filters tab may be Pinned in Place by Clicking the Pin Icon on the right. |
| • | You may Un-Pin this Table View by Clicking the Pin Icon again. |
| • | Specifying the Date Range - The system records two Dates for each Financial Transaction - the actual Date they were posted, and the Date entered in the Form in which they were posted. |
| • | By default, the Financial Transactions for the most recent Week (including Today) will be displayed. |
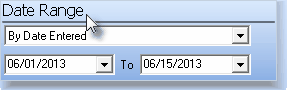
Date Range
| • | Which "Date" should be used? |
| ▪ | Using the Drop-Down Selection List provided, the "By Date Entered" option may be changed to the "By Date of Transaction" option, instead. |
| ▪ | This By Date of Transaction option is available because the Transaction Date (the Date that was selected when posting the transaction (i.e., Payments, Receipts, Sales, Bills) may be set by the User to a Date other than the actual Day on which the entry was made. |
| • | Date Range - The default Date Range is based on the actual Day (determined by the computer's Date) that these Financial Transactions were entered but because that case may be changed, the User may also specify a different Date Range, if appropriate. |
| ▪ | Starting: Using the Drop-Down Date Selection Box provided, a different starting Date may be Chosen. |
| ▪ | Ending: Using the Drop-Down Date Selection Box provided, a different ending Date (other than Today) may be Chosen. |
| • | Other Filter Options - By default, All Financial Transactions that were posted within the specified Date Range will be displayed, but this list of Financial Transactions may be filtered (limited) by certain selectable Filter Criteria: |
| • | Divisions - By default, the Financial Transactions that were recorded within the Date Range specified above will be included for All Divisions. |
| ▪ | Specific - Click the Specific button to limit the list of transactions to those Financial Transactions posted to Subscribers who are members of the Selected Division(s). |
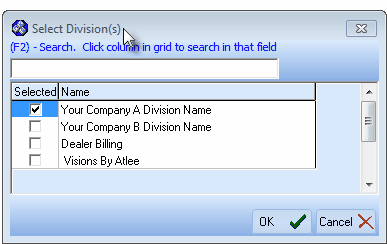
Select Divisions dialog
| ▪ | Select Division - Using the Select Division dialog, Check the Selected box for each Division for which Financial Transactions are to be listed and Click the OK ü button when finished. |
| ▪ | The Selected Division(s) Code(s) will be inserted into the Specific field. |
| • | Departments - By default, the Financial Transactions that were recorded within the Date Range specified above will be included for All Departments. |
| ▪ | Specific - Click the Specific button to limit the list of transactions to those that had one or more Financial Transactions posted to the Selected Department(s). |
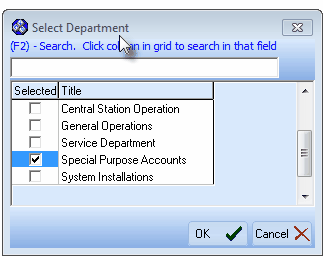
Select Department dialog
| ▪ | Select Department - Using the Select Department dialog, Check the Selected box for each Department for which Financial Transactions are to be listed and Click the OK ü button when finished. |
| ▪ | The Selected Department(s) Number(s) will be inserted into the Specific field. |
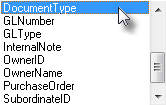
| • | Document Types - By default, the Financial Transactions that were recorded within the Date Range specified above will be included for All Types of Transactions (i.e., Payments, Receipts, Sales, Bills, Allocations). |
| ▪ | Specific - Click the Specific button to limit the list of transactions to Financial Transactions created using the Selected Document Types (Forms) by using the Drop-Down Selection List provided. |
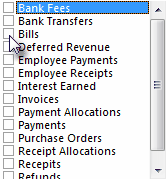
List of Document Types
| ▪ | Check the Document Type Boxes to indicate that only those Financial Transactions created using the selected Document Type(s) will be included. |
| ▪ | Click the Escape (Esc) key to complete the selection process. |
| ▪ | The selected Document Types will be inserted into the Specific field. |
| • | Accounts - By default, the Financial Transactions will be listed for All General Ledger Accounts created within the Date Range specified above. |
| ▪ | Specific - Click the Specific button to limit the list of transactions to only those that had Financial Transactions posted to Selected General Ledger Accounts. |
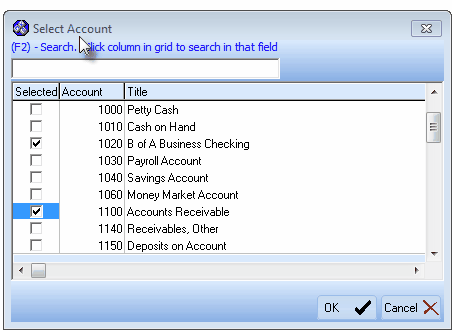
Select Account dialog
| ▪ | Select Account - Using the Select Account dialog, Check the Selected box for each General Ledger Account for which Financial Transactions are to be listed and Click the OK ü button when finished. |
| ▪ | The Selected General Ledger Account Number(s) will be inserted into the Specific field. |
| • | Transactions - By default, the Financial Transactions that were recorded within the Date Range specified above will be included for All Financial Transactions. |
| ▪ | There are specific types of Financial Transactions that are more frequently reviewed, and this option allows those to be specifically and/or individually selected for review. |
| ▪ | Specific - To Choose which of these Financial Transactions are to be listed, Click the Specific button and use the Drop-Down Selection List provided. |
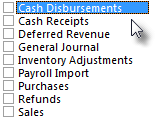
List of Transactions
| ▪ | Check the Box of each type of Transaction that is to be included. |
| ▪ | Click the Escape (Esc) key to complete the selection process. |
| ▪ | The selected Transactions will be inserted into the Specific field. |
| • | Transactions For - By default, all of the the Financial Transactions that were recorded within the Date Range specified above will be included, regardless of whether they involved a Subscriber or Vendor. |
| ▪ | To Limit the Financial Transactions that were recorded within the Date Range specified above to those posted exclusively for one or more selected Subscribers, or one or more exclusively selected for Vendors, use the Drop-Down Selection List provided to make that choice. |
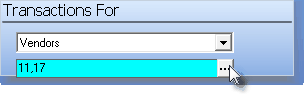
| ▪ | If the Subscriber or Vendor option is selected, Click the Ellipse in the Selection field and identify the desired Subscriber(s) or Vendor(s) whose Financial Transactions are to be listed using the Select Subscriber or Select Vendor dialog that is provided. |
| • | Carefully review the chosen Filter Criteria - keeping in mind that these choices are cumulative in nature. |
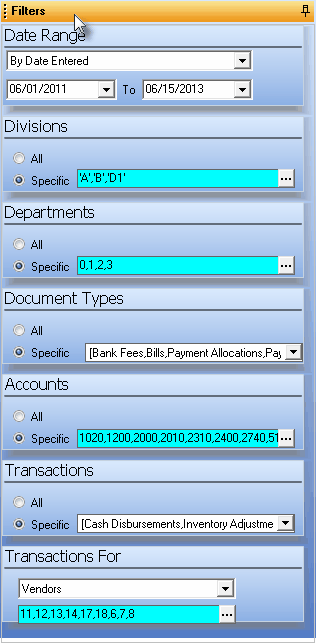
Sample Filtering options
| • | Once the Date Range and the Filter Criteria (if any) have been chosen, Click the Refresh Icon (see "Other Action Icons" above) to update the content of the Financial Transactions list. |
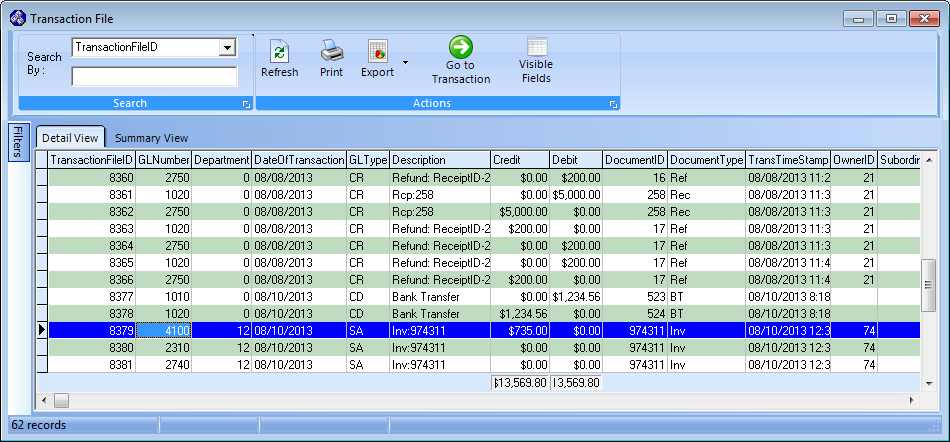
| □ | Detail View of Financial Transactions - A detailed listing of the Financial Transactions based on the specified Filter Criteria. |
| ◆ | See the "Using the Filtering Options" and "Using the Action Icons" sections above for detailed instructions on how to customize the Financial Transactions list. |
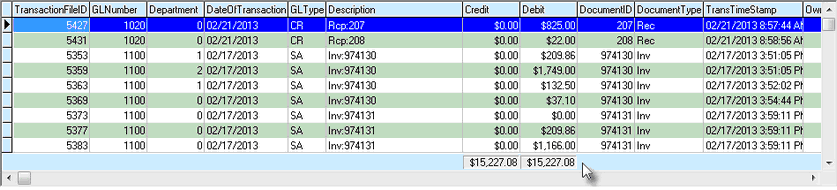
Transaction File Form - Financial Transactions list
| • | To view all of the columns of data, Drag the right border of the Transaction File Form to the Right, or use the Slide Bar at the bottom of the list. |
| • | Click on any Transaction line item and then Click the Go to Transaction Icon (at the top of the Form) to open the specific Form and the Record which created the Financial Transaction. |
| • | The Total Credits and Total Debits fields - located at the bottom of those columns, respectively - are always displayed at the bottom of the list, even if the list exceeds the viewing area and the Right Side Slide Bar was used to view various parts of the list. |
| □ | Summary View of Financial Transactions - A summarized list of the Financial Transactions based on the specified Filter Criteria. |
| ◆ | See the "Using the Filtering Options" and "Using the Action Icons" sections above for detailed instructions on how to customize the contents of this list of Financial Transactions. |
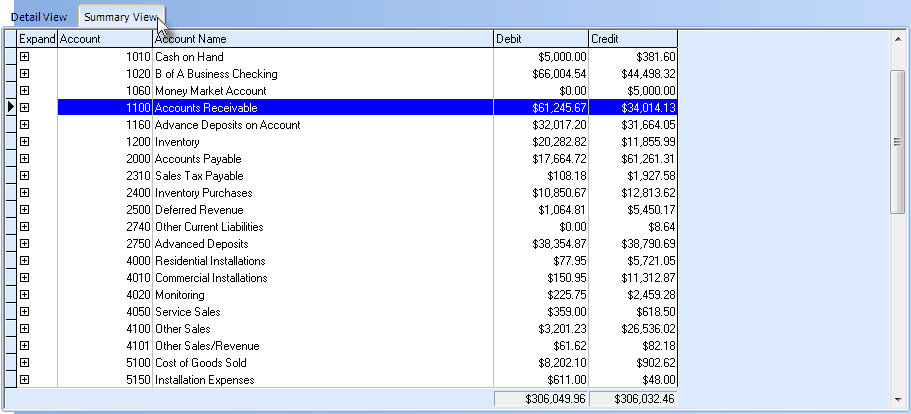
Summary View of the Transaction File
| • | The Transaction File Summary View tab contains a list of each General Ledger Account that appears in the Detail View listing, but without including the detail of every Financial Transaction. |
| • | To view the details of the Financial Transactions posted to one of these General Ledger Accounts, Click the Plus Box for that Account (located in the Expand column) and those Financial Transaction Details will be displayed in a pop-up window. |
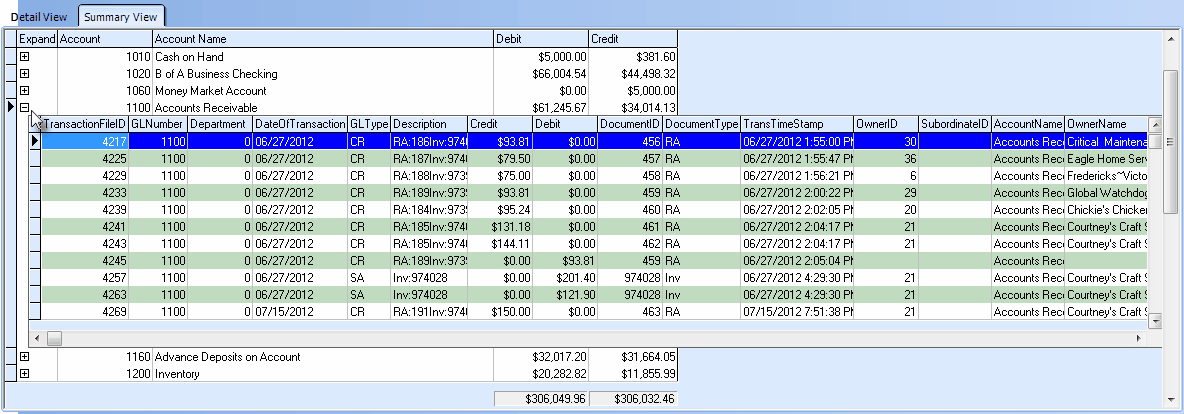
Summary View of the Transaction File - Pop-up window
| • | To Close that Account Details pop-up window, Click the Minus Box (which replaced the Plus Box when the pop-up Window was opened). |