| □ | Remotely managing, reporting, and supervising non-employee personnel Access (such as People To Call or individuals not recorded at all within MKMS) to an office complex, restricted area, or industrial facility can be difficult, expensive, employee intensive, and time consuming. |
| • | Access Control Systems effectively manage access and egress by the Subscriber's staff, but do not easily track and manage non-employee Access Requests. |
| • | After completing some special data entry within MKMS, using the Communication Module, in conjunction with SPA and this Manual Signal application - the Subscriber's non-employee Access Supervision Process may be greatly simplified. |
| • | Generally, this non-employee Access Supervision Process entails: |
| • | Knowing who - in addition to a Company's staff - came and went from the Subscriber's premises. |
| • | Notification of the appropriate staff member that the non-employee person has arrived, as required. |
| • | Logging all non-employee Access to the premises (or designated areas within the premises). |
| • | Maintaining detailed, permanent records of each of these non-employee Access Requests. |
| • | The Manual Signal application linked with SPA (Version 5.0.28.341 or greater) and the Communication Module will allow an Operator - or any other trained staff person - to answer telephone calls (the person requesting access is usually calling from a special exterior phone provided for this purpose) from individuals requesting access to a Subscriber's premises, and then to: |
| • | Quickly look-up which Subscriber's premises the caller is attempting to enter. |
| • | Create a Passive Manual Signal (which is internally processed by SPA) containing that person's name (and the Company they represent, if appropriate), as a permanent record of these Access Requests. |
| • | Automatically save the Date and Time (and the information noted above) of these Access Requests. |
| • | Automatically Email (using the Communication Module) the appropriate person within that Subscriber's premises notifying them that this person has requested access. |
| • | Telephone, if appropriate, this person, and/or another appropriate person within that Subscriber's premises, that the individual requesting access has arrived. |
| • | Automatically insert the Access Request information related to each of the steps listed above, into the Alarm History for that Subscriber. |
| □ | Installing and Accessing the Manual Signal Application. |
| • | The Manual Signal application is a stand-alone executable that should be installed (copied) into the C:\Program Files\MKS\MKMS folder with the other Micro Key Millennium Series applications. |
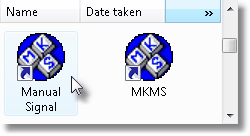
| • | As recommended in Getting Started, create a Shortcut for this Manual Signal application and place it in the MKMS folder on your Windows® Desktop. |
| • | Immediate access to the Manual Signal application may be implemented by modifying the Windows® Properties of the Manual Signal Application Shortcut by predefining the required Username and the Password as part of the application's Target command. |
| • | Using the available logon parameters /User= and /Pwd=, the Username and Password may be added to the Target command within the Properties of the Manual Signal application Shortcut. |
| ▪ | By doing so, the application will select the MKMSDefault.db and transmit the predefined Username and Password to that database for permission to access its information. |
| ▪ | You may not use the /User= parameter without the /Pwd= parameter. |
| • | An example of the Shortcut Properties Target command with a predefined Username and Password appears below: |
"C:\Program Files\MKS\MKMS\ManualSignal.exe" /User="YourUserName" /Pwd="YourPassword"
| • | To run the MKS Manual Signal application: |
| • | Double-Click the Manual Signal to open the Manual Signal (Log In) dialog. |
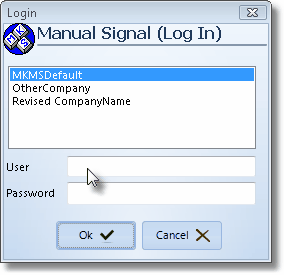
Manual Signal (Log In) dialog
| • | If there is a predefined Username and Password in the Target command of the Shortcut's Properties dialog, this Manual Signal (Log In) dialog will not appear. |
| • | Instead, the Generate Signal dialog will be displayed. |
| • | See "Using the Manual Signal application" below for more information. |
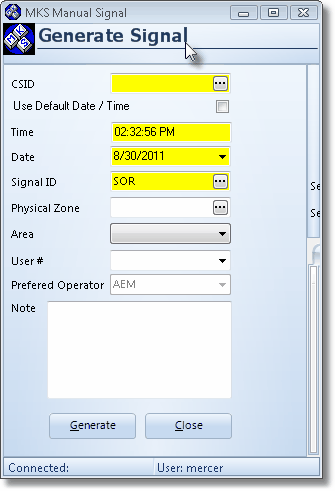
Generate Signal dialog for the Manual Signal application
| □ | Making the Required Data Entry for the Manual Signal application - Each of the Data Entry Forms listed below must have additional records entered to support this Access Supervision Process. The purpose and requirement for each is defined below: |
| ◆ | Alarm Condition Code(s) - One or more special Condition Codes must be created for the Manual Signal application: |

Example of an Alarm Condition Code for Manual Signal application
| • | Because each non-employee Access Request will be saved as a Passive Alarm Signal, and because an Alarm Signal must include an Alarm Condition Code, define as many of these Access Request Descriptions that will be processed using this Manual Signal application as needed, as Condition Codes. |
| • | On the MKMS application's Main Menu, Choose Maintenance and Select Central Station, then Click the Conditions Codes option. |
| • | When the Alarm Condition Codes dialog is displayed (see example illustration above), Click Add ("+") to start a new entry. |
| ▪ | Alarm Code - Create an appropriate Alarm Condition Code. |
| o | You may enter up to three characters - Capital letters, spaces, numbers and basic punctuation marks are accepted - to identify a "code" for this Access Request Event. |
| ▪ | Operator Skill - Use the Drop-Down Selection List to Choose the Operator Skill defined for those Operators that have been trained to use the Manual Signal application. |
| ▪ | Description - Enter a concise description of this Access Request Event. |
| o | The description may be up to 30 characters in length - consisting of letters, numbers, spaces and punctuation marks. |
| ▪ | Priority - Enter the appropriate Priority Level for this Access Request Event. |
| o | Because this will be a Passive Signal, Priority Level 9 should be all that is needed. |
| ▪ | Action Plan - No entry is required in this field. |
| ▪ | Print on Open Close Reports - To include the Access Request Event on the Open Close Reports, Check this box. |
| ▪ | Print on Alarm Only Report - To include the Access Request Event on the Alarm Activity Reports when the Alarms Only option is selected, Check this box. |
| ▪ | Suppress from All Events Reports - To exclude the Access Request Event on the All Events Report, Check this box. |
| • | Click Save ("ü") to record your entry. |
| • | Repeat this process as often as needed. |
| ◆ | Predefined Message(s) - One or more special Predefined Messages must be created to construct the appropriate Email Message initiated in the Manual Signal application and sent via the Communications Module: |
| • | On the MKMS application's Main Menu Select Maintenance, Choose the Communication Items sub-menu. |
| • | Then Click on the Predefined Messages option and Click Add (+) to start a new entry. |
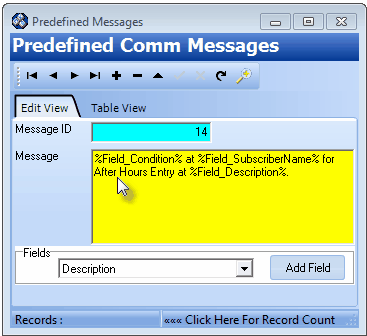
Predefined message Access Request
| • | Message ID - This record number is assigned when the entry is initially saved. |
| • | Message - Enter the Access Request Event message using any words or numbers, and adding Macro Substitution Entries ( %Field_ ), as appropriate. |
| • | Click Save ("ü") to record your entry. |
| • | Repeat these steps as needed to define all of the Predefined Messages you will be using. |
| ◆ | CSID Zone(s) - One or more special Access Request Signals must be defined as CSID Zones for the Manual Signal application: |
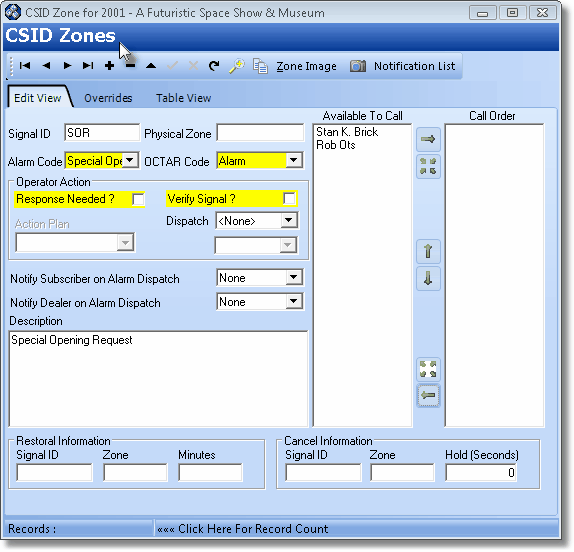
CSID Zones form with an Access Request Signal defined to be used by the Manual Signal application
| • | Signal ID - Enter the specific Signal Identifier for this Access Request Signal. |
| • | Physical Zone - Enter the Zone Code for this Access Request Signal, if appropriate. |
| • | Alarm Code - Use the Drop-Down Selection List provided to Choose the appropriate Access Request Event Alarm Condition Code. |
| • | OCTAR Code - Use the Drop-Down Selection List provided and Choose Alarm. |
| • | Operator Action - If this is a Passive Signal (one that needs no Operator Response): |
| ▪ | Response Needed? - Do Not Check this box. |
| o | Because the Response Needed? box is not Checked, it will be considered a Passive Signal and so will be processed by SPA as required by the Manual Signal application. |
| ▪ | Verify Signal? - Do Not Check this box. |
| ▪ | Action Plan - No entry is required in this field. |
| ▪ | Notify Subscriber on Alarm Dispatch - No entry is required in this field. |
| ▪ | Notify Dealer on Alarm Dispatch - No entry is required in this field. |
| • | Description - Provide a clear, concise description of this Access Request Signal. |
| • | Available To Call - All of the People To Call that have been defined for this Subscriber and who have Telephone Numbers entered, will be listed. |
| ▪ | See "Using the Contacts tab in the Subscriber Information section" below for more information. |
| • | Click Save ("ü") to record your Access Request related CSID Zone entry. |
| □ | Using the Manual Signal application. |
| • | To run the MKS Manual Signal application: |
| • | Double-Click the Manual Signal to open the Manual Signal (Log In) dialog. |
Manual Signal (Log In) dialog
| • | All of the MKMS related databases will be listed. |
| • | Click on the appropriate database name (almost always MKMSDefault). |
| • | Click in the User field and enter your User Name. |
| • | Click in the Password field and enter your Password for the selected database. |
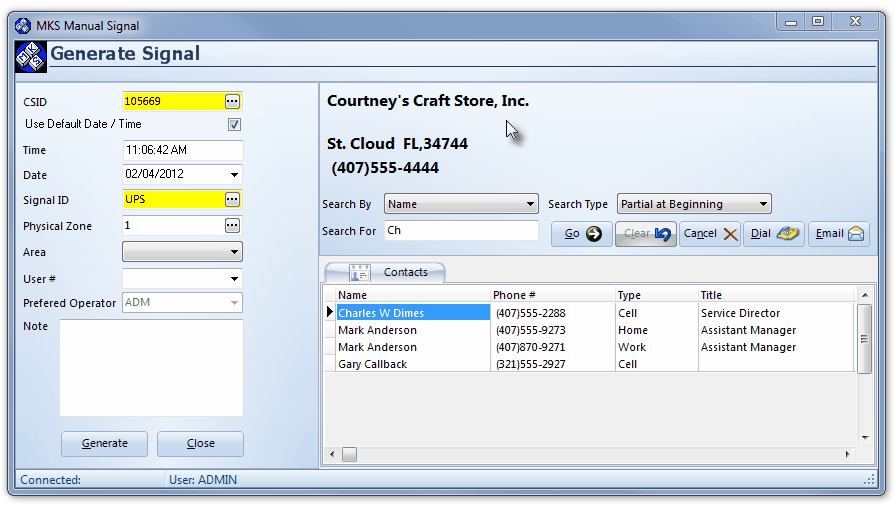
| • | The Manual Signal - Generate Signal dialog will be displayed. |
Generate Signal dialog for the Manual Signal application
| • | CSID - Enter the CSID if you know it. Otherwise: |
| ▪ | Click the Ellipse to Search for the desired CSID. |
| ▪ | The Search dialog will be displayed. |
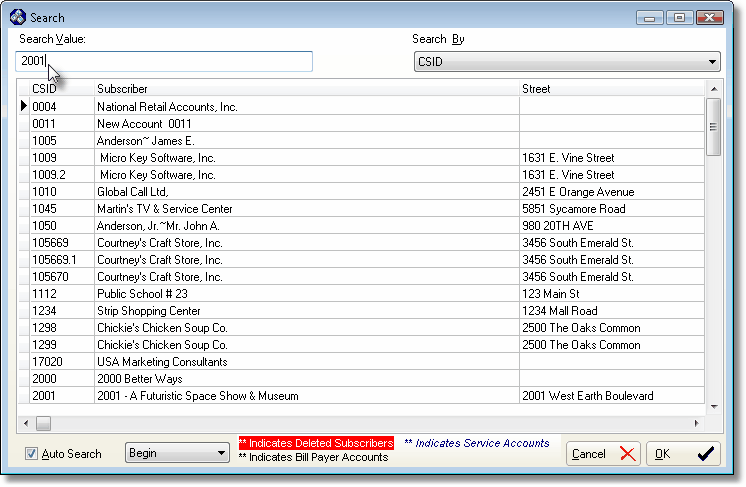
Search dialog to lookup Manual Signal CSID
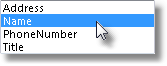
| ▪ | Search By - CSID is the default Search By method. |
| o | Using the Drop-Down Selection List provided, Choose the Search By method you want to use. |
| o | On a User by User basis, the selected Search By method will now become the new default Search By method for that User. |
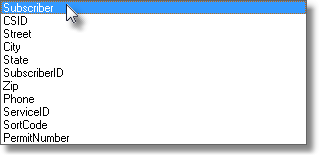
Search By selection list for the Search dialog
| ▪ | Search Value - Based on the Search By method you selected, type your Search Value. |
| o | As you enter characters, the record closest to what you've typed will be displayed. |
| o | Unlike the People To Call listed on the CSID Zones Form, all entries in the Subscriber's People To Call list, including those without a Telephone Number defined, will be available for this Search. |
| o | Click on the desired record. |
| ▪ | Click OK to execute that selection and Close the Search dialog. |
| • | The Generate Signal dialog with the Selected Subscriber Information will be displayed. |
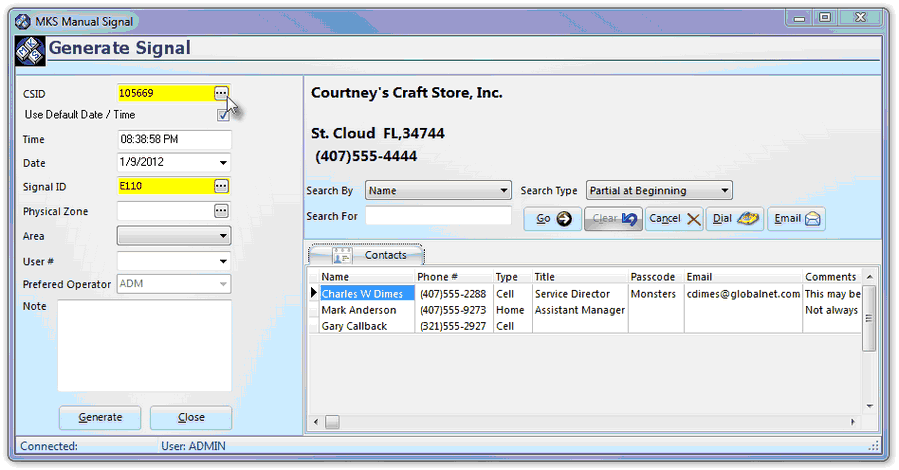
| • | CSID - The Selected CSID will be inserted into the CSID field on the Generate Signal dialog. |
| ▪ | The related Subscriber Information will be displayed to the right of the Generate Signal dialog (see illustration above). |
| ▪ | See "Using the Contacts tab in the Subscriber Information section" below for specific information about this area of the form. |
| • | Use Default Date / Time - This box is Checked by default, so the current date and time is inserted automatically when this form is opened. |
| ▪ | Time - By default, the current time is entered by the system. |
| ▪ | Date - By default, the current date is entered by the system. |
| o | However, to facilitate those Operators who must enter an Access Request Event after the fact, the mandatory use of the current Time and Date may be made optional. |
| o | To do so, Uncheck the Use Default Date / Time box to be able to set the Time and Date manually. |
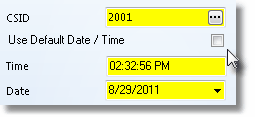
Uncheck to enter Date & Time manually
| o | When the Use Default Date / Time box is Unchecked, although the current Time and Date will be inserted automatically, that Time and Date may be edited as necessary using Drop-Down Date Selection Box provided. |
| o | Once this Use Default Date / Time box is Unchecked, unless Checked again in the future, Unchecked becomes the default, so the Time and Date may be adjusted manually (or the current Time and Date accepted), as each Access Request Event is entered. |
| • | Signal ID - Click the Ellipse to Search for the needed Signal ID, or enter it manually, if known. |
| ▪ | The Search dialog is displayed. |
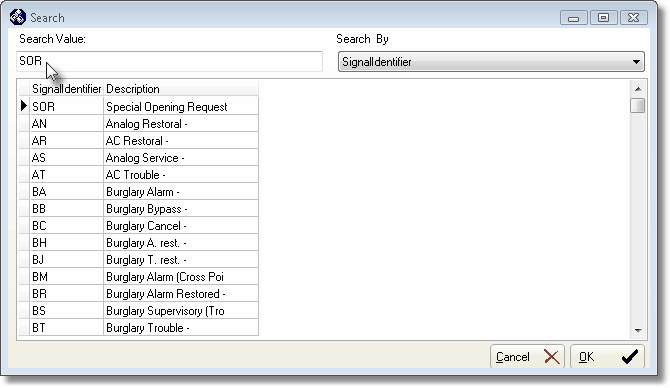
Signal Identifier Search dialog opened when Ellipse is selected
| ▪ | Search By - Signal Identifier is the default Search By method. You may also choose to Search By the Description. |
| ▪ | Search Value - Based on the Search By method you selected, type your Search Value. |
| o | As you enter characters, the record closest to what you've typed will be displayed. |
| o | Click on the desired record. |
| ▪ | Click OK to execute that selection and Close the Search dialog. |
| ▪ | The selected Signal ID will be inserted into that field on the Manual Signal Form. |
| ▪ | Once a Signal ID is entered in this field, it will be "remembered" thereafter. |
| ▪ | This is because most of these Access Requests will be recorded using this same Signal ID. |
| • | Physical Zone - Optionally, Click the Ellipse to Search for the needed Physical Zone, or enter it manually, if known. |
| • | Area - Optionally, enter the Area, if applicable, using the Drop-Down Selection List provided, or enter it manually. |
| • | User # - Optionally, use the Drop-Down Selection List to enter the User ID Number, if applicable, using the Drop-Down Selection List provided, or enter it manually. |
| • | Preferred Operator - By default and with no change permitted, the Employee Code of the current User of the Manual Signal application is inserted. |
| • | Note - Enter a Note or Comment, as appropriate, if needed. |
| • | Generate - Click the Generate button to transmit this Access Request Signal to SPA for processing. |
| • | Close - Click the Close button to exit the Manual Signal application. |
| • | Also see "Using the Contacts tab in the Subscriber Information section" below. |
| □ | Using the Contacts tab in the Subscriber Information section: |
| • | Before the Generate button is Clicked: |
| • | The Operator will almost always need to make Contact with (to get approval from) an Authorized Person for the Access Request |
| • | They will use the Dial function in conjunction with the information within the Contacts tab |
| • | Reference the illustration below while reading about the Search and Automatic Dialing functions outlined below: |

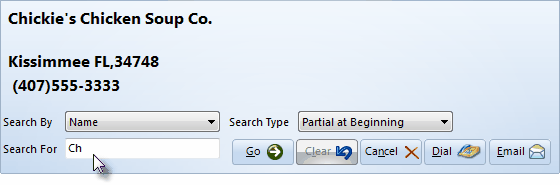
Subscriber Information section of the Generate Signal dialog showing the Dial button
| a. | Use the Search functions to locate the required Contact. |
| i. | Search By - Using the Drop-Down Selection List provided, Choose the information type on which the Search will be performed. |
| ii. | Search Type - Using the Drop-Down Selection List provided, Choose the type of search - the area within the selected Search By information - that will be matched to your Search For entry. |

| iii. | Search For - Enter the characters (numbers, letters, punctuation marks and/or spaces) that are to match the Search Type selected above. |

| iv. | GO - Click the Go button to execute the Search. |
| v. | Contacts tab - The Contacts tab will now be limited to the specific Contact(s) matching the Search that was executed. |

| vi. | Clear - Click the Clear button to remove the Search filter, and therefore view all Contacts defined in this Subscriber's People To Call list. |

| b. | Using the Automatic Dialing function, call the selected Contact. |
| i. | Automatic Dialing is accomplished through the use of one or more of the workstation's internal or external modem(s) that are connected to telephone lines as explained in the Configuration chapter. |

| ii. | Dial - Once the desired Contact is located, Click the Dial button to Telephone that person. |

| iii. | Email - Once the desired Contact is located, Click the Email button to create a Manual Email message to that person. |
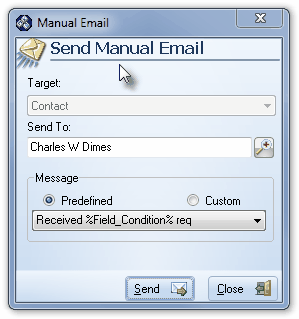
Email (using the Communication Module) a Custom or predefined Message the appropriate person within that Subscriber's premises notifying them that this person has requested access.
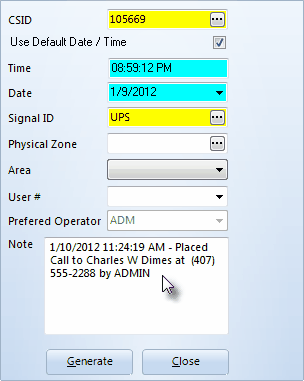
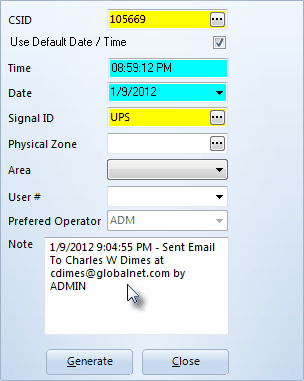
| iv. | Note - The Note section within the Generate Signal dialog will be automatically populated with the details of that Contact (Date, Time, Person and Telephone Number dialed or Email address set to). |
| v. | Hang up - When the conversation with the Contact is completed: |

| ▪ | Click the Hang up button (which replaces the Dial button if a Call is made) to disconnect the Modem from the Telephone Line. |
| vi. | Clear - To make another Contact, if necessary, Click the Clear button to restore the entire, unfiltered list of Contacts available in the Contacts tab. |
| vii. | Repeat the steps outlined above to Search for and, using the Automatic Dialing or Email function, to Contact additional persons, as needed. |
| viii. | Make any additional manual entries in the Note field, if appropriate. |
| ix. | Generate - Click the Generate button to transmit this Access Request data to SPA for processing. |

| x. | Close - Click the Close button to exit the Manual Signal application. |
| • | After the Generate option is chosen, the following tasks are completed automatically: |
| a. | An Access Request Signal with the Signal ID (and optional Physical Zone) and related information is added to the Alarm History for this Subscriber. |
| b. | The Contact Note created automatically for the Operator (and added to, if required) will also be recorded in the Alarm History for this Subscriber. |
Manual Signal application with Generate Signal data entered, Subscriber information displayed with an unfiltered Contacts list

