| □ | The All Events Report can list every Signal received by the Central Station - within the specified Date Range - and accommodates special formatting options. |
| • | On the Main Menu Select Reports and Choose the Central Station sub-menu. |
| • | Click the All Events option. |
| □ | All Events Report tabs - There are two tabs on the All Events Report dialog. |
| • | Options - Initially only the Options tab is shown (until you make your Options selections and Select Print). |
| ► | Note: Once a set of Options are Chosen for the All Events Report, they become the new default Options. |
These default Options may be reset at any time by simply making a different set of Choices.
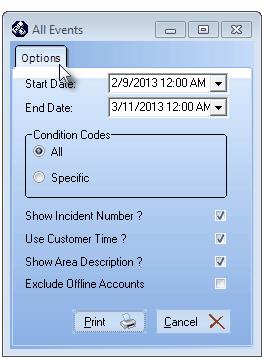
All Events Report Options tab
| • | Start Date - By default, the Date representing 30 Days prior to Today will be shown. |
| ▪ | Use the Drop-Down Date Selection Box to re-set the Starting Date, if desired. |
| ▪ | By default, the Time that is displayed will be 12:00AM, which may be modified, as required. |
| o | If no Time is showing, Click on the Year and then Press the Right Arrow ’ to set a specific Starting Time. |
| ▪ | Right-Click anywhere within the Start Date field to display and set the Time's Format. |
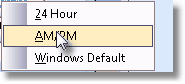
Formatting Options for the Time
| • | End Date - By default, Today will be shown. Use the Drop-Down Date Selection Box to re-set the Ending Date, if desired. |
| ▪ | Use the Drop-Down Date Selection Box to re-set the Ending Date, if desired. |
| ▪ | By default, the Time that is displayed will be 12:00AM, which may be modified, as required. |
| o | If no Time is showing, Click on the Year and then Press the Right Arrow ’ to set a specific Ending Time. |
| ▪ | Right-Click anywhere within the End Date field to display and set the Time's Format. |
Formatting Options for the Time
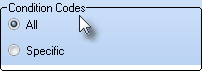
All Events - All Condition Codes
| ▪ | Specific - To limit this report to a specified group of (one or more) Condition Codes, Click this button. |
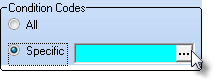
| o | Click the Ellipse on the right of the Specific field to open the Select Condition Codes dialog. |
| ▪ | Select Condition Codes - To Choose the Condition Codes required for this report; |
| o | Check the Selected box for one or more Condition Codes on this Select Condition Codes dialog. |
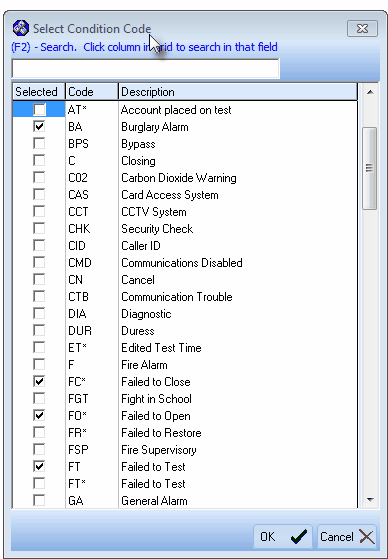
| o | Click the OK übutton to Close the Select Condition Codes dialog. |
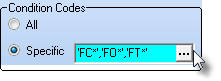
All Events - Specific Condition Codes
| • | Show Incident Number? - If the incident number is to be included in the report, Check this box. |
| • | Use Customer Time? - If you want the Subscriber's (local) Time (instead of your Central Station's Time - if it is different) to be what the Date Range time period selection is based on, Check this box. |
| • | Show Area Description? - If you use Areas within Alarm Systems, and want the Description of those Areas included, Check this box. |
| • | Exclude Offline Accounts? - To skip those Accounts that are off line, Check this Box. |
| • | Print - Click the Print button  to Preview and optionally Print (to a File or a Printer) this All Events Report. to Preview and optionally Print (to a File or a Printer) this All Events Report. |
| • | Preview - The Preview tab presents the report which resulted from the Options you've selected. |
| • | Up Arrow/Down Arrow - hi - Moves the report one line up, or one line line down, respectively. |
| • | Page Up/Page Down - Moves the report to the previous or next page, respectively. |

Preview Tab's options - All Events Report dialog
| • | Home -  - Using either the screen or your Keyboard's Home key, moves the report to the top of the first page. - Using either the screen or your Keyboard's Home key, moves the report to the top of the first page. |
| • | End -  - Using either the screen or your Keyboard's End key, moves the report to the bottom of the last page. - Using either the screen or your Keyboard's End key, moves the report to the bottom of the last page. |
| • | Arrows - The arrows allow you to move back and forth, from page to page. |
| • | Number - Indicates the page number you are viewing. |
| ▪ | You may also type in a specific page number, Press 8 Enter and that page will be displayed immediately. |
| ▪ | If you enter an invalid page number, it will be ignored. |
| • | Fit To Page - Click the first button after the arrows to size a full page of the report to fit the screen. |
| • | Zoom To 100% - Click the second button after the arrows to display the page at 100% (of the printed view). |
| • | Fit To Page Width - Click the third button after the arrows to size the page of the report to fit the full width of the screen. |
| • | Zoom To Percentage - Click the fourth button after the arrows to re-size the page of the report by percentage. |

| ▪ | When you Click the Zoom To Percentage button, the Percentage selector will be displayed. |
| ▪ | You may then Click the Up or Down ‚ arrows to set the exact amount of Zoom you want. |
| • | Print - Click the Print button to Print (to a File or a Printer)  the displayed All Events Report. the displayed All Events Report. |
| • | Email - Click the Email  button to send this report to an Email address of your choosing. button to send this report to an Email address of your choosing. |
| • | Exit the form by Clicking the Close button x on the right at the top of the form. |

