| • | Your Subscriber's Payment will arrive on time - avoiding a processing expense for them and assuring a timely payment to you. |
| • | The implementation of these Payment Methods requires the entry of set up information for each Auto Draft. |
| • | The Post Auto Drafts Form is used to Automatically Draft those Pre-Approved Payments. |
| • | To implement this automatic collection feature, follow the steps outlined below: |
| • | The Auto Draft information must be entered in advance. |
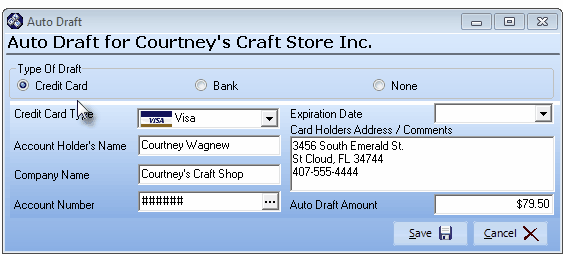
Auto Draft Form's Credit Card information
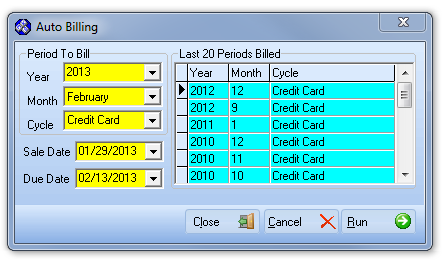
Auto Billing dialog
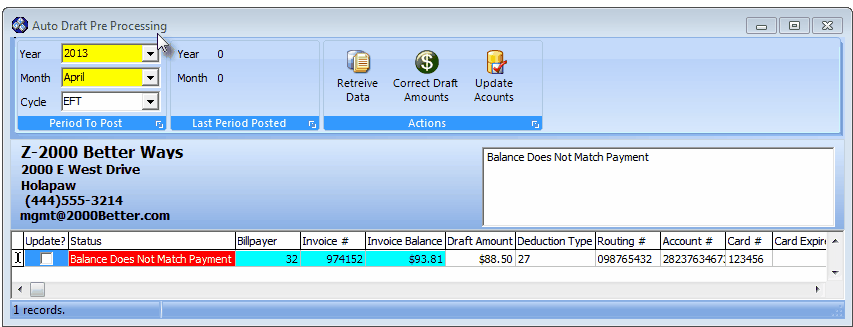
Auto Draft Pre Processing Form - Validate predefined Auto Draft rules
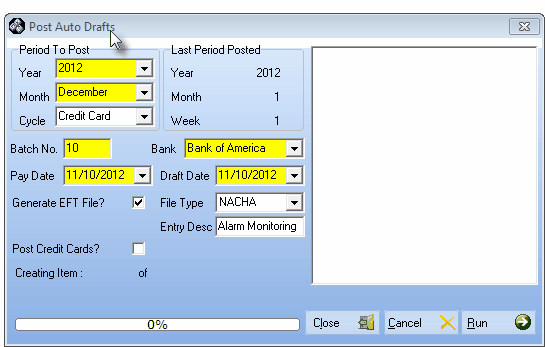
Post Auto Drafts for Electronic Funds Transfer
| □ | A step by step Overview of the Auto Draft Setup and the actual Auto Draft procedure: |
| 3. | Choose the Type of Draft (Credit Card payment or an Electronic Funds Transfer from a Bank). |
| 4. | Enter the appropriate information as required (based on whether it will be an Bank (EFT), or Credit Card payment). |
| 6. | Run the Pre-Approved Credit Card Payments Procedure |
| ► | Note #1: If certain critical information is missing for the Bank selected to received these Auto Draft funds and the designated EFT File Type, an Invalid Criteria Message will be displayed. |
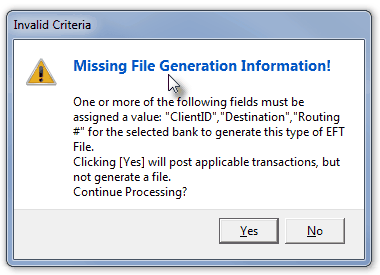
Missing File Generation Information! - Invalid Criteria Warning
| ◆ | Unless you want to the Post Auto Drafts Transactions without creating the corresponding EFT file, Click No. |
| ◆ | Also,when there are Open Invoices which do not match the Auto Draft Setup information, a Warning Message will be displayed with the option to view theses Invoices. |
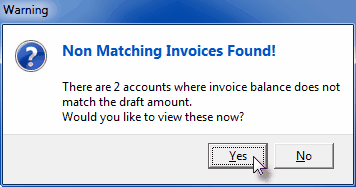
Non Matching Invoices Found! message
| ◆ | In either case, if appropriate, go to the Bank Maintenance Form for the Bank selected above and make the appropriate corrections on that Form's EFT Info tab and/or correct the Auto Draft Setup information. |
| ◆ | Then return to this Post Auto Draft Form and proceed as normal. |
| □ | Understanding the Post Auto Drafts Options: |
| • | From the Main Menu Choose File and Select Accounts Receivable, then Choose the Post Auto Draft option to display the Post Auto Draft Form illustrated below. |
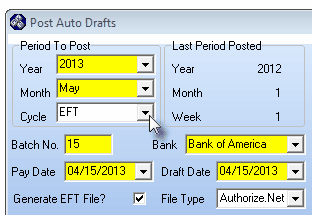
Post Auto Drafts Form
| • | Period To Post - Define what Recurring Billing Period is being processed for Pre-Authorized Auto Drafts. |
| • | Year - Use the Drop-Down Selection List to Choose the Year that is being processed for Pre-Authorized Auto Drafts. |
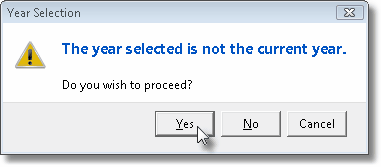
| ▪ | A Year Selection message will be displayed if you Choose a Year that is not within the current Year. |
| ▪ | Answer Yes to Confirm that this is what you wanted to do, or No to be able to reset the Year correctly. |
| • | Month - Use the Drop-Down Selection List to Choose the Month that is being processed for Pre-Authorized Auto Drafts. |
| • | Cycle - Use the Drop-Down Selection List to Choose the Recurring Billing Cycle that is being processed for Pre-Authorized Auto Drafts. |
| • | Batch No. - By default, it will be the calendar number of Today. Change this Batch Number, as needed. |
| • | Batch Numbers may be assigned from 1 to 32637 (this limitation is a function of the field type into which you are entering this Batch Number). |
| ▪ | You may start a new numbering sequence each month (using the current Date's Day number), so the same Batch Number will be used in multiple Months but the date will be different. |
| ▪ | In some cases, you may use the same Batch Number for more than one day to group certain of these types of payments together. |
| ▪ | You may use multiple Batch Numbers within the same day to separate Credit Card transactions from Cash Receipts, and to separate those Receipts from EFT funds. |
| ▪ | You may start from 1 and increment the Batch Number perpetually (if you used 2 batch numbers for two deposits every day, 5 days a week, it would take over 60 years to use all of the numbers). |
| ▪ | The down side of the second method is that you must keep track of the next number to be used. |
| • | MKMS automatically records Receipts in an individual Month & Year group to keep them differentiated. |
| • | Pay Date - Use the Drop-Down Date Selection Box to Choose the Date these Invoices will be marked as Paid within the Accounts Receivable System. |
| • | This Pay Date should be on or after the Draft Date entered next. |
| • | Draft Date - Use the Drop-Down Date Selection Box to Choose the Date that these Amounts will be Withdrawn (Drafted) from the Subscriber's Bank account, or Charged to their Credit Card. |
| • | Generate EFT File - If you will need an EFT file generated, Click this box. |
| • | File Type - If the Generate EFT File option was Checked, use the Drop-Down Selection List with the list Slide Bar to locate, and then Choose, the appropriate File Format for the EFT system you are using. |
| ◆ | This list of EFT File options is updated periodically to accommodate additional processors. |
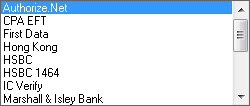
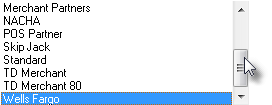
EFT File Types
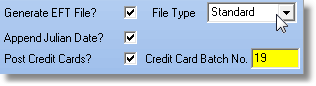
| • | Based on the EFT File option that is selected, some additional (but usually not all of these) options may (or may not) be presented. |
| ▪ | Entry Desc - For Wells Fargo (this option requires the use of the Slide Bar - see mouse pointer in EFT File Types illustration above - it is located just below Standard) or NACHA, enter a brief Description of the purpose for these Charges. |
| ▪ | Append Julian Date? - This option is only available if the Standard EFT format is selected. |
| ▪ | Post Credit Cards? - Except for CPA EFT (Canada), if this Auto Draft process posts both EFT Cash Deductions and Credit Card Charges, Check this box. |
| ▪ | Credit Card Batch No. - If required, this field will be activated and will become a mandatory entry. |
| • | Use separate batch number for Credit Cards? - Click Yes and enter the desired Batch Number below. |
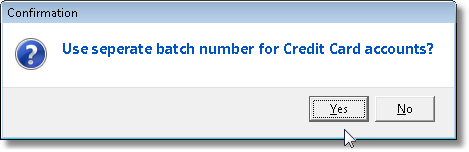
| • | Credit Card Batch No. - By default it will also be the calendar number of Today. Enter the desired Batch Number as needed. |
| • | Last Period Posted - The Year, Month and Billing Cycle for the most recent Auto Draft is displayed here. |
| • | Click Run Ü to start the process. |
| □ | Pre-Approved Electronic Funds Transfer Procedure |
| • | Period To Post - Define what Recurring Billing Period is being processed for Pre-Authorized Auto Drafts. |
| • | Year - Use the Drop-Down Selection List to Choose the Year that is being processed for Pre-Authorized Auto Drafts. |
| ▪ | A Year Selection message will be displayed if you Choose a Year that is not within the current Year. |
| ▪ | Answer Yes to Confirm that this is what you wanted to do, or No to be able to reset the Year correctly. |
| • | Month - Use the Drop-Down Selection List to Choose the Month that is being processed for Pre-Authorized Auto Drafts. |
| • | Batch No. - By default, it will be the calendar number of Today. Change this Batch Number, as needed. |
| • | Bank - The correct Bank name (which has the EFT information you should have defined) should be inserted automatically. |
| • | Pay Date - Use the Drop-Down Date Selection Box to Choose the Date these Invoices will be marked as Paid within the Accounts Receivable System. |
| • | This Pay Date should be on or after the Draft Date entered next. |
| • | Draft Date - Use the Drop-Down Date Selection Box to Choose the Date that these Amounts will be Withdrawn (Drafted) from the Subscriber's Bank. |
| • | Generate EFT File - If you will need an EFT file generated (and you do), Check Generate EFT File? box. |
| • | File Type - If the Generate EFT File option was Checked, use the Drop-Down Selection List with the list Slide Bar to locate, and then Choose, the appropriate File Format for the EFT system you are using. |
| • | Based on the selected File Type, additional options may be presented. |
| ▪ | Check any of the other formatting boxes as may be required by your EFT Processor. |
| ▪ | For Customers using the Canadian Payments Associations (CPA) option, be sure to select CPA EFT. |
EFT File Types
| • | Click Run Ü to start the process. |
Post Auto Drafts for Electronic Funds Transfers
| • | The EFT file to be transmitted is created automatically using the name you will be asked to specify. |
| • | You must send the file to the Bank (or their third party payments processor) using the format and transmittal method they require. |
| □ | Pre-Approved Credit Card Payments Procedure |
| • | Period To Post - Define what Recurring Billing Period is being processed for Pre-Authorized Auto Drafts. |
| • | Year - Use the Drop-Down Selection List to Choose the Year that is being processed for Pre-Authorized Auto Drafts. |
| ▪ | A Year Selection message will be displayed if you Choose a Year that is not within the current Year. |
| ▪ | Answer Yes to Confirm that this is what you wanted to do, or No to be able to reset the Year correctly. |
| • | Month - Use the Drop-Down Selection List to Choose the Month that is being processed for Pre-Authorized Auto Drafts. |
| • | Batch No. - By default, it will be the calendar number of Today. Change this Batch Number, as needed. |
| • | Bank - The correct Bank name (which has the EFT information you should have defined) should be inserted automatically. |
| • | Pay Date - Use the Drop-Down Date Selection Box to Choose the Date these Invoices will be marked as Paid within the Accounts Receivable System. |
| • | This Pay Date should be on or after the Draft Date entered next. |
| • | Draft Date - Use the Drop-Down Date Selection Box to Choose the Date that these Amounts will be charged to the Credit Card. |
| • | Generate EFT File - Check Generate EFT File? box. |
| • | File Type - Select the Standard File Type. |
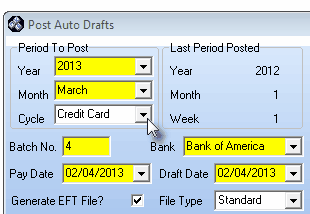
Post Auto Drafts for Credit Cards
| • | Click Run Ü to start the process. |
| • | The file to be transmitted is created automatically using the name you will be asked to specify.. |
| • | You must send the file to the Bank (or their third party payments processor) using the transmittal method they require. |
| □ | Pre-Approved Multi-Processor Payment Procedure |
| • | Period To Post - Define what Recurring Billing Period is being processed for Pre-Authorized Auto Drafts. |
| • | Year - Use the Drop-Down Selection List to Choose the Year that is being processed for Pre-Authorized Auto Drafts. |
| ▪ | A Year Selection message will be displayed if you Choose a Year that is not within the current Year. |
| ▪ | Answer Yes to Confirm that this is what you wanted to do, or No to be able to reset the Year correctly. |
| • | Month - Use the Drop-Down Selection List to Choose the Month that is being processed for Pre-Authorized Auto Drafts. |
| • | Batch No. - By default, it will be the calendar number of Today. Change this Batch Number, as needed. |
| • | Bank - The correct Bank name (which has the EFT information you should have defined) should be inserted automatically. |
| • | Pay Date - Use the Drop-Down Date Selection Box to Choose the Date these Invoices will be marked as Paid within the Accounts Receivable System. |
| • | This Pay Date should be on or after the Draft Date entered next. |
| • | Draft Date - Use the Drop-Down Date Selection Box to Choose the Date these Invoices will be Paid and the Date these Amounts will be charged to the Credit Card. |
| • | Generate EFT File - Check the Generate EFT File? box. |
| • | Post Credit Cards? - Check the Post Credit Cards? box |
| • | File Type - Select the Appropriate File Type, as specified by your provider. |
| • | Set the Credit Card Batch Number |
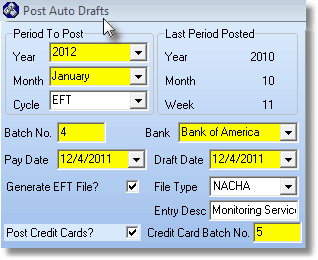
Post Auto Drafts for Both EFT & Credit Cards
| • | Click Run Ü to start the process. |
| • | The file to be transmitted is created automatically using the name you will be asked to specify. |
| • | You must send the file to the third party payments processor in the format and transmittal method they require. |

