| □ | Creating an Account Template: |

| • | Click the Templates button at the top of the Mass Account Creation Form to open this Account Templates Form. |
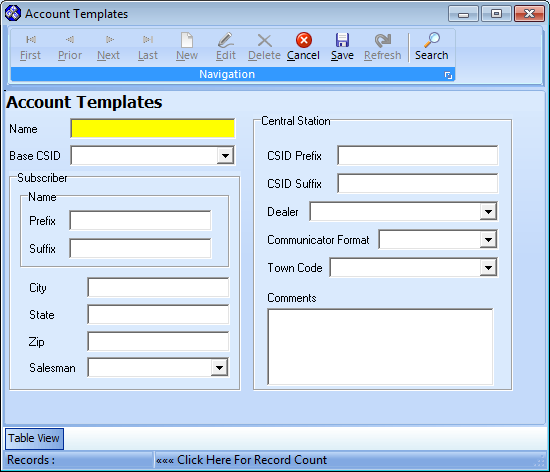
Account Templates Form - Accessed from within the Mass Accounts Creation Form
| • | This Account Templates Form may be Re-sized by Dragging the Top and/or Bottom up or down, and/or the Right side in or out. |
| • | Navigation Menu - The Navigation Menu is located at the top of the Account Templates Form. |

| • | This Navigation Menu provides the normal Record Movement, New, Edit, Delete, Cancel, Save, and Refresh options; as well as the Search function. |
| • | Record Editing section - The details of the currently selected record are displayed below the Navigation Menu at the center (Main Body) of the Account Templates Form. |
| • | Table View tab - A tabular (spreadsheet style) Table View of the currently defined Account Templates is accessible by Clicking the Table View tab at the bottom of the Account Templates Form. |

| • | To display a specific Account Template record in the Record Editing section, Click on that record within the Table View section, or use the Search Icon (see the "Using the Special Functions" section later in this chapter). |
| • | This Table View information may be Pinned in Place by Clicking the Pin Icon on the right. |
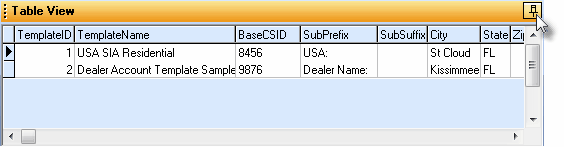
Account Templates Form - with Table View tab Pinned Open
| ▪ | You may Un-Pin this Table View by Clicking the Pin Icon again. |
| ▪ | Click on any listed record to display that information in the center (Main Body) of the Form. |
| • | There are many columns of data in this Account Templates Record Listing. |
| • | Each column's Header Name describes the data contained in that column. |
| ▪ | Clicking on a Header Name will set the order in which the Account Templates will be listed. |
| ▪ | Clicking on the same Header Name will set the order in the opposite direction (ascending vs. descending). |

| ▪ | The Header Name that is determining the Order of the list will have an Icon indicating the Order displayed next to that Header Name. |
| □ | Defining an Account Template: |
| • | Click the  Icon to start the Account Template entry in the Record Editing section. Icon to start the Account Template entry in the Record Editing section. |
| • | Name - Identify this Account Template with a name that indicates how, why and when this Account Template might best be used. |
| ► | Note: This Base CSID is not the same as the Base CSID defined within the CSID Generator Form which in that case is defining the starting point for an automatically maintained numbering sequence. |
| • | These specialize sets of CSID Zones, People To Call and Events requires that a Dealer have multiple Subscriber records entered if they want to have different sets of People, Zones and Events to copy into different blocks of Accounts created for different specific usages (Commercial, Residential, Industrial, Fire, Supervised, Non-Supervised, etc.). |
| • | If appropriate for this Account Template, Click the Base CSID field's Search icon to Choose a Subscriber from within the Base CSID Search list presented. |
| • | Subscriber - You may predefine default (temporary) Subscriber information. |
| • | Name - By default, the CSID created for each Account becomes the Subscriber's temporary name. You may enter a prefix and suffix for the Subscriber's temporary name. The prefix and/or suffix entries are added before/after the CSID information. |
| ▪ | Prefix - Enter any appropriate expression. This could be the Dealer Code, City name, Salesman name, etc., based on that Dealer's need. |
| ▪ | Suffix - Enter any appropriate expression. |
| • | City - Optionally, enter a default City. |
| • | State - Optionally, enter a default State. |
| • | Zip - Optionally, enter a default Zip Code. |
| • | Salesman - Optionally, use the Drop-Down Selection List to Choose the Dealer's anticipated Salesman. |
| ▪ | This Salesperson must be predefined as an Employee and may actually be the Dealer themselves, if appropriate. |
| • | Central Station - You may - or your Dealers may - want to have a specific Receiver and Line Card combination assigned to all of the Accounts, or for their Accounts within a specific city, or of a specific type. Regardless of the reason for doing so, if this is the case, enter this number as their CSID Prefix. These entries become the defaults when you use this Account Template to Create Mass Accounts. |
| • | CSID Prefix - Enter any desired prefix, if needed. |
| ▪ | The result is that the numbering sequence entered in the Starting at field in the Create Mass Accounts form follows the numbers entered as the CSID Prefix |
| ▪ | Example: CSID Prefix = 45 and the Starting at number is 8511 the result for adding 5 Accounts will be CSIDs numbered 458511 to 458515. |
| • | CSID Suffix - You may also enter a CSID Suffix to be appended to the end of each CSID. |
| • | Dealer - Use the Drop-Down Selection List to Choose the Dealer. |
| • | Town Code - Use the Drop-Down Selection List to Choose the Town Code. |
| • | Comments - Enter any comment that's appropriate. This entry is included in the Comments field on the Subscriber's Central Station Data Form. |
| • | Click the  Icon to record this Account Template entry. Icon to record this Account Template entry. |
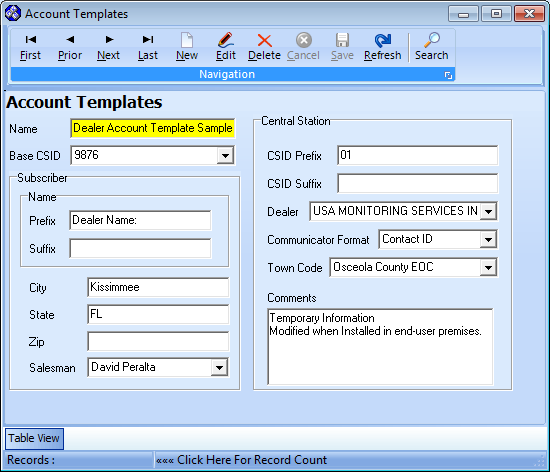
Account Template Form - Sample information
| • | Repeat this process as often as needed to create additional Account Templates for your Dealers. |
| □ | Using the Special Function on the Navigation Menu at the top of the Account Templates Form: |
| • | Search - Click the Search Icon to open the Search Account Templates dialog. |
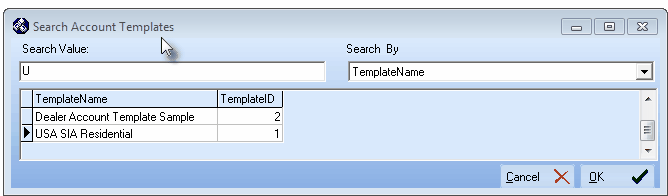
Search Account Templates dialog
| • | See the "Using the Generic Search dialog" section in the Advanced Search Dialog chapter for more information about this Search dialog. |

