| □ | Which Sales for which Salesperson have been Paid, when were these Invoices Paid, and what exactly did they Pay for? |
| • | The Sales and Payment process: |
| c. | An Employee Code representing the Salesman of Record is also assigned in that Invoice. |
| d. | Later, a Receipt is Posted to the Subscriber's Account (including Amount, Date, Bank, Payment Method information) |
| • | To view the Cash Receipts by Salesman Report, on the Main Menu Select the Reports Menu and Choose the Accounts Receivable sub-menu. |
| • | Select the Cash Receipt Reports option and Click Cash Receipts By Salesman. |
| □ | Cash Receipts by Salesman Report tabs - There are two tabs on the Cash Receipts By Salesman report dialog. |
| • | Options - Initially only the Options tab is shown (until you make your Options selections and Select Print). |
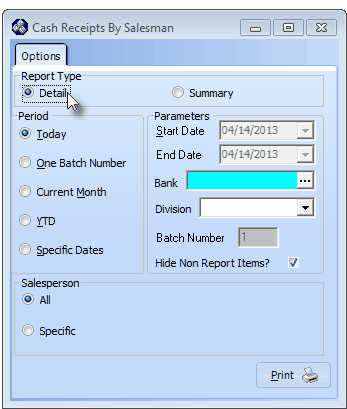
Cash Receipts By Salesman - Options tab
| • | Report Type - Choose the desired report format: |
| ▪ | Detail - Include each Sale-Purchase Item and the the Quantity and Value of each Invoice Line Item for which a Receipt was Posted for each Subscriber within the Date Range specified. |
| ▪ | Summary - Include the Quantity and Value of each Sale-Purchase Item for which a Receipt was Posted within the Date Range specified. |
| • | Period - Choose which Receipts will be listed based on when they were Dated as they were recorded. |
| ▪ | Today - List Receipts Allocated in the current day. |
| o | That date will be inserted in the Start Date and End Date fields and cannot be changed. |
| ▪ | One Batch Number - Because you may have used multiple Batch Numbers in the same day, or the same Batch Number on multiple Days, you may list Allocated Receipts based on a specific Batch Number. |
| o | Start Date - By default this will be the First Day of the Current Month but the Start Date may be changed using the Drop-Down Date Selection Box provided. |
| o | End Date - By default this will be the Last Day of the Current Month but the End Date may be changed using the Drop-Down Date Selection Box provided. |
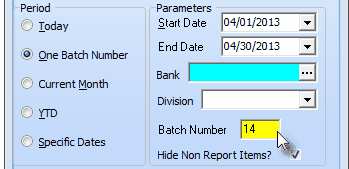
Cash Receipts By Salesman - Period - One Batch
| o | Batch Number - Enter the Batch Number to be reported. |
| ▪ | Current Month - Lists all Allocated Receipts for the current Month (or selected month using the Specific Dates selection explained below). |
| o | MKMS automatically records Receipts in an individual Month & Year group to keep them differentiated from Receipts in other Months that will have used the same Batch Number. |
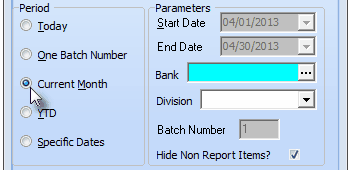
Cash Receipts By Salesman - Period - Current Month
| o | In the illustration above, the Month of April and the Year of 2013 represent the Current Month and so are automatically assigned. |
| ▪ | YTD - (Year to Date) - Lists all Allocated Receipts for the current Year. |
| ▪ | Specific Dates - List Receipts Allocated within a User defined Date Range by using the Specific Dates selection. |
| o | By default, the Start and End Dates will be Today. |
| o | Re-enter the Start Date and End Date in the Parameters section, as needed using the Drop-Down Date Selection Box es provided. |
| o | Any Date Range may be used including a period covering multiple years. |
| • | Other Parameters are available regardless of the selections made above: |
| ▪ | Batch Number - Unless highlighted in Yellow (for the One Batch Number option), this field will be Gray and no value can be entered. |
| ▪ | Bank - By default, [All] the Receipts posted to All Banks using the selected Batch Number will be included. |
| i. | You may limit Receipts to those posted to a specific set of (one or more) Bank(s). |
| ii. | Click the Ellipse in the Bank field to open the Select Bank ID dialog. |
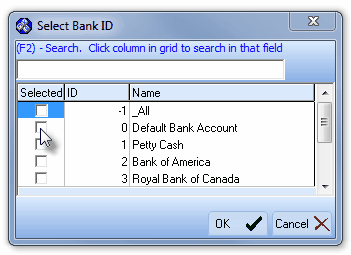
Select Bank ID dialog
| iii. | Check the Selected box for each Bank that is to be reported. |
| iv. | Click the OK ü button to Close the Select Bank ID dialog. |
| v. | This will insert the Selected Bank IDs into the Bank field. |
| • | Salesman - You may create this report for All Salesmen (the default), or identify a specific Salesman whose individual Receipts are to be reported. |
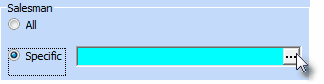
| ▪ | Specific - Click the Specific button to activate the Specific field. |
| o | Click the Ellipse on the right of this field. |
| o | The Select Salesmen dialog will be displayed. |
| o | The list is sorted by Employee Name. |
| o | Check the Selected box to the left of each Salesperson who is to be included in the report. |
| o | Click the OK ü button when all required Salesperson(s) are selected. |
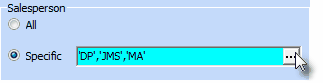
| o | The Specific field will be populated with the Employee Code(s) of those that were Checked. |
| • | Print - Click the Print button  to Preview and optionally Print this Cash Receipts by Salesman Report. to Preview and optionally Print this Cash Receipts by Salesman Report. |
| • | Preview - The Preview tab presents the report which resulted from the Options you've selected. |
| • | Up Arrow/Down Arrow - hi - Moves the report one line up, or one line line down, respectively. |
| • | Page Up/Page Down - Moves the report to the previous or next page, respectively. |

Cash Receipts By Salesman - Preview tab with Detail
| • | Home -  - Using either the screen or your Keyboard's Home key, moves the report to the top of the first page. - Using either the screen or your Keyboard's Home key, moves the report to the top of the first page. |
| • | End -  - Using either the screen or your Keyboard's End key, moves the report to the bottom of the last page. - Using either the screen or your Keyboard's End key, moves the report to the bottom of the last page. |
| • | Arrows - The arrows allow you to move back and forth, from page to page. |
| • | Number - Indicates the page number you are viewing. |
| ▪ | You may also type in a specific page number, Press 8 Enter and that page will be displayed immediately. |
| ▪ | If you enter an invalid page number, it will be ignored. |
| • | Fit To Page - Click the first button after the arrows to size a full page of the report to fit the screen. |
| • | Zoom To 100% - Click the second button after the arrows to display the page at 100% (of the printed view). |
| • | Fit To Page Width - Click the third button after the arrows to size the page of the report to fit the full width of the screen. |
| • | Zoom To Percentage - Click the fourth button after the arrows to re-size the page of the report by percentage. |

| ▪ | When you Click the Zoom To Percentage button, the Percentage selector will be displayed. |
| ▪ | You may then Click the Up or Down ‚ arrow to set the exact amount of Zoom you want. |
| • | Print - Click the Print button to Print (to a File or a Printer)  the displayed Cash Receipts by Salesman Report. the displayed Cash Receipts by Salesman Report. |
| • | Email - Click the Email button  to send the Report to an Email Address of your choosing. to send the Report to an Email Address of your choosing. |
| • | To Exit the Preview tab and Close this Report dialog Form, Click the Close button x on the right at the top of the Preview tab. |

