|
Employee Teams This Help File Page was last Modified on 05/29/2013 |

|

|
|
|
Employee Teams This Help File Page was last Modified on 05/29/2013 |
|
|
Employee Teams
This Help File Page was last Modified on 05/29/2013
|
Employee Teams This Help File Page was last Modified on 05/29/2013 |
|
|
|
|
Employee Teams This Help File Page was last Modified on 05/29/2013 |
|
|
| □ | The Employee Team Form is used to identify the "Sales Teams" that may exist within your Company. |
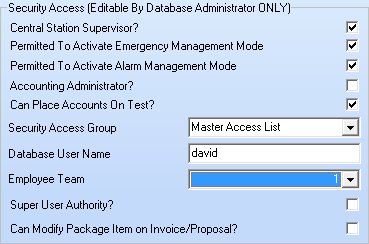
| • | If this Team concept is used within your Company, each Commission Eligible Salesperson or Technician should be assigned to a Sales Team (Employee Team) using the Drop-Down Selection List provided on the Security tab of the Employee Form. |
| • | To define these Employee Teams, from the Main Menu Choose the Maintenance Menu, Select the Accounts Receivable sub-menu, then Click on the Employee Teams option. |
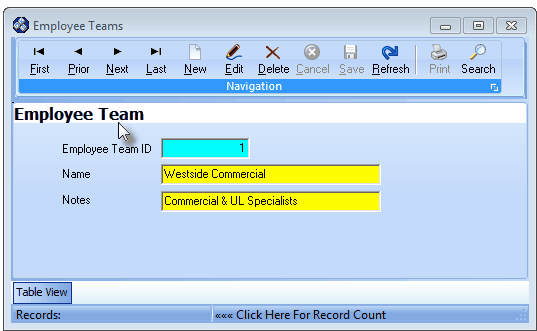
Employee Teams Form
| • | This Employee Team Form may be Re-sized by Dragging the Top and/or Bottom up or down, and/or the Right side in or out. |
| • | Navigation Menu - The Navigation Menu is located at the top of the Employee Team Form. |

| • | This Navigation Menu provides the normal Record Movement, New, Edit, Delete, Cancel, Save, and Refresh options; as well as a Print and Search function. |
| • | Record Editing section - The details of the currently selected record are displayed below the Navigation Menu at the center (Main Body) of the Employee Team Form. |
| • | Table View tab - A tabular (spreadsheet style) Table View of the currently defined Employee Team records is accessible by Clicking the Table View tab at the bottom of the Employee Team Form. |
![]()
| • | To display a specific Employee Team record in the Record Editing section, Click on that record within the Table View section, or use the Search Icon (see the "Using the Special Functions" section later in this chapter). |
| • | This Table View information may be Pinned in Place by Clicking the Pin Icon on the right. |

Employee Team Form - with Table View tab Pinned Open
| ▪ | You may Un-Pin this Table View by Clicking the Pin Icon again. |
| ▪ | Click on any listed record to display that information in the center (Main Body) of the Form. |
| • | There are three columns of data in this Employee Team Record Listing. |
| 1. | Id - The system record number which is assigned as the Employee Team record is initially saved. |
| 2. | Name - The Name of the Employee Team. |
| 3. | Notes - Additional information clarifying the purpose, territory, make-up, etc., of the Employee Team. |
| • | Each column's Header Name describes the data contained in that column. |
| ▪ | Clicking on a Header Name will set the order in which the Employee Team will be listed. |
| ▪ | Clicking on the same Header Name will set the order in the opposite direction (ascending vs. descending). |
![]()
| ▪ | The Header Name that is determining the Order of the list will have an Icon indicating the Order displayed next to that Header Name. |
| • | To define an Employee Team which will be used as part of the Commission tracking system: |
| • | Click the |
| ▪ | Employee Team ID - This is the system record number which will be assigned as the Employee Team record is initially saved. |
| ▪ | Name - Enter the Name of this Employee Team. |
| o | The Name may up to 60 characters in length and include upper and/or lower case letters, numbers, spaces and normally used punctuation marks. |
| ▪ | Notes - Provided any additional information to further identify the purpose, territory, make-up, etc., of the Employee Team. |
| o | The Note may up to 80 characters in length and include upper and/or lower case letters, numbers, spaces and normally used punctuation marks. |
| • | Click the |
| • | Any number of additional Employee Teams may be created, as needed. |
| □ | Using the Special Functions on the Navigation Menu at the top of the Employee Team Form: |
| • | Print - Click the Print Icon to View and/or Print a list of the Employee Team. |
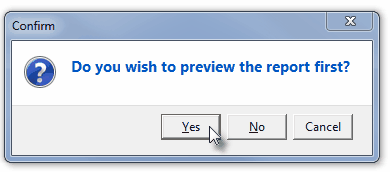
| • | Yes - Click the Yes button to View a copy of the report. |
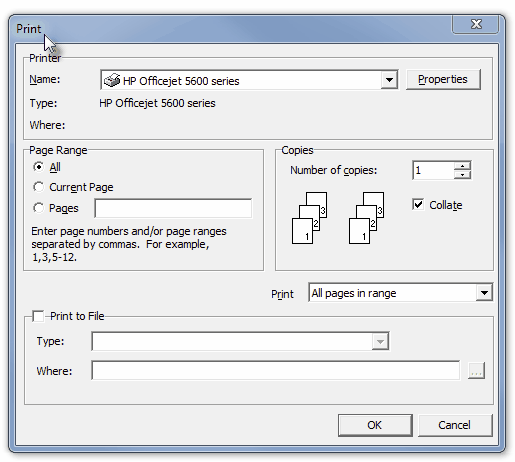
| • | No - Click the No button to open the Windows® Print dialog where a copy of the report may be sent to a selected Printer, or Printed to a File. |
| • | Cancel - Click the Cancel button to close this Print question and return to the Form. |
| • | Search - Click the Search Icon to open the Search Employee Teams dialog. |
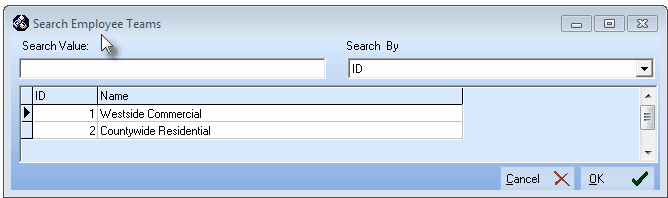
Search Employee Teams dialog
| • | See the "Using the Generic Search dialog" section in the Advanced Search Dialog chapter for more information about this Search dialog. |