| □ | Many of the Companies using this MKMS application and that have implemented the Inventory Tracking and Job Costing System, also purchase most, if not all of their Inventory from ADEMCO®Distribution Inc. (ADI). |
| • | ADI is a wholesale provider to more than 80,000 installer contractors in North America - many of whom are Security System installers. |
| • | To download a copy of this ADI Parts/Price Excel® spreadsheet (and import it into MKMS): |
| • | You may need a Technical Support representative to activate the ADI Inventory Import Procedure option if the menu option is not available (see - Important Note: If this menu option does not appear - below). |
| • | Once the ADI Inventory Import Procedure option is activated, you must log into the ADI website and obtain their Electronic Price Guide. |
| • | The Electronic Price Guide file should be downloaded into the C:\Program Files\MKS\MKMS folder on the computer where you will be loading that data into the MKMS application. |
| ► | Note: If you do not have Login access to the ADI website, or cannot find the Electronic Price Guide link to download that file, contact your ADEMCO® Representative for the necessary instructions. |
| □ | To import this ADI Parts/Price Excel® spreadsheet into MKMS, on the Main Menu Select Maintenance, Choose Inventory Tracking then Click ADI Parts Import. |
| ► | Important Note: If this menu option does not appear follow the three steps listed below: |
| 1. | On the Main Menu, Select Maintenance and Choose Update Forms Table. |
| ▪ | This process will proceed automatically and display a message indicating whether any Forms were available to be updated. |
| 2. | On the Main Menu, Select Maintenance and Choose User Options |
| ▪ | Enter a T in the Setting Value field in the column next to the ADIImport column. |
| 3. | On the Main Menu, Select Maintenance and Choose Inventory Tracking then Click ADI Parts Import. |
| ▪ | If this menu option is still not available, contact a Technical Support representative. |
| • | Purging - If a previous import procedure was executed but canceled before completion, the "old" data will be purged. |
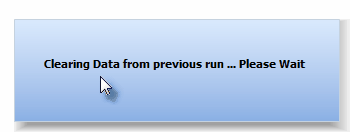
| • | This purging process may take several minutes. |
| • | Until this purging process is completed, this Clearing Data from Previous run... Please wait message will be displayed. |
| • | Open - To start the Inventory Import Procedure, Click the Open button on the Excel File Options box. |
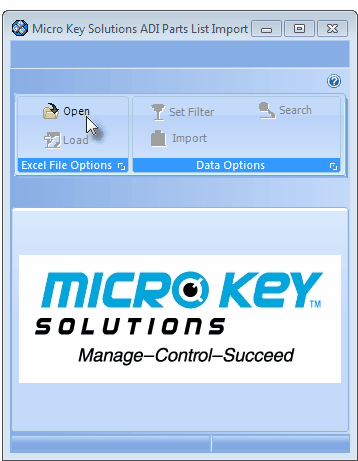
ADI Excel File Options
| • | The ADI inventory spreadsheet should be located in the C:\Program Files\MKS\MKMS folder. |
| • | The standard Windows® Open dialog will be displayed with the normal file folder location inserted automatically. |
| • | Navigate to this, or the appropriate location if you saved the file in a different folder/location. |
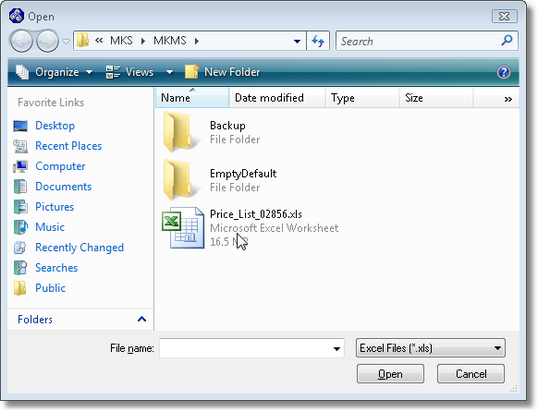
Windows Open dialog for locating the Excel ADI Import file
| • | Select the appropriate file. |
| • | Loading File... Please Wait - message will appear until the file is opened and made ready to be loaded in the ADI Parts List Import Form. |
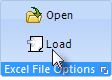
| • | Load - Click the Load button on the Excel Files Options box. |
| • | Reading Excel File... Please wait - message will appear until the file is imported into a temporary table for further processing. |
| • | This will take several minutes. |
| • | Quitting? - If at any time, before the import process is completed, you Close T this ADI Parts List Import form, a Confirmation message will be displayed indicating the temporary table holding the spreadsheet data will be deleted. |
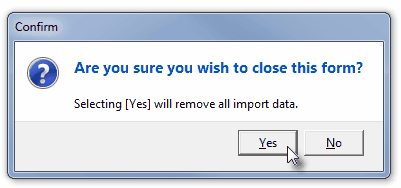
Confirm Exit without Completing Import
| □ | Choosing the specific ADI Inventory Items to be Imported: |
| • | When the Excel file data is loaded, the ADI Parts List Import dialog will be displayed. |
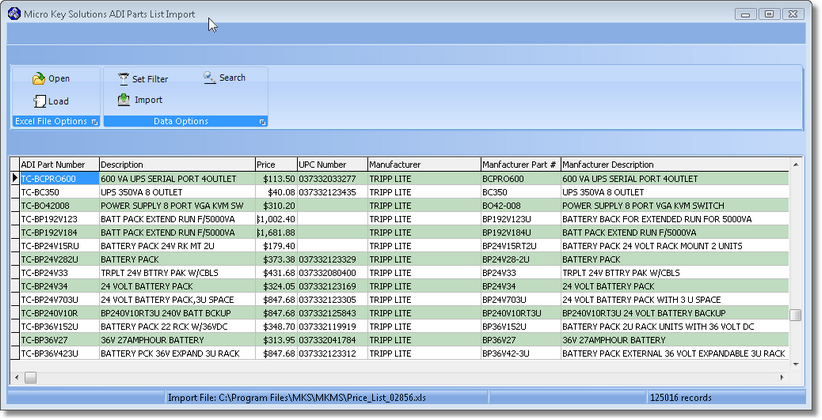
ADI Parts List Import
| • | Using the Data Options to specify which records will be imported: |
| • | Prior to importing the entire ADI Inventory, it is recommended that you perform a selective filtering of specific portions of this list, based on your Company's normal purchases. |
| • | The full ADI Inventory list contains well over 125,000 items and so it would impose some bloating of your database, if you imported the entire list. |
| • | Normally, you might purchase/sell less than 10% of these items - even if you are a very large, and well diversified, alarm dealer. |
| • | The goal is to selectively import only those items that you might actually install - and track as actual Inventory Items. |
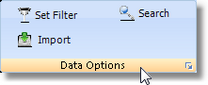
ADI Import Data Options
| • | Set Filter - This option allows you to limit the items that are listed on this Form. |
| ▪ | Only the items that are listed ADI Inventory will be imported when the Import function is selected. |
| ▪ | By filtering this list, you can review which items will be imported, when you execute the Import option (described below). |
| ▪ | You may set a Filter, then Import the data shown as a result of that Filter, then repeat the process with a new Filter until you have Imported all of the ADI Inventory items you need. |
| ▪ | If at any time you want to clear the existing filter(s) and start again, Click the Set Filter and then Select Clear Filter. |
| ▪ | See Filter Options below for a complete explanation of how to set a Filter and how to use the results. |
| • | Search - You may also Search the entire ADI Inventory list to identify the specific group of items. |
| ▪ | However, you may want to set a Filter to limit the list before you perform a Search. (Remember there are over 125,000 ADI Inventory items in the list.) |
| ▪ | Search lets you browse portions of the list to help you determine what to Filter, review portions of the list to identify groups of Inventory Items you want to import, and so determine how many items would actually be selected for import. |
| ▪ | See Using the Search Function below. |
| • | Import - Once you have made your final Filter selection for the first phase of your list import process, Click the Import button to execute the Importation of the selected Inventory Items. |
| ▪ | Once the Import option is selected, you will be able to further customize the data that is actually inserted into your Inventory table. |
| ▪ | See Executing the Import Procedure below. |
| □ | Filter Options - This option allows you to limit what is shown in the ADI Parts List Import list. |
| • | Click the Set Filter button on the Data Options box. |
ADI Import Data Options
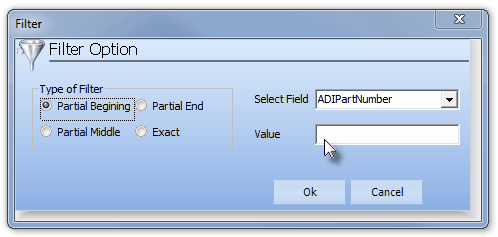
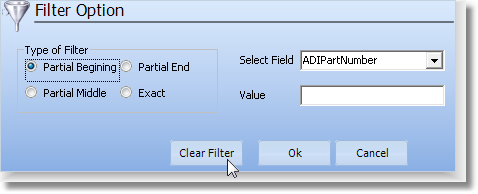
| • | The Filter Option dialog will be displayed. |
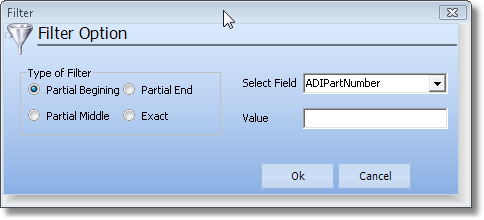
ADI Import Filter Option dialog
| • | Type of Filter - Choose the type of filter expression match you want to use. |
| ▪ | Partial Beginning - Compare the Filter expression entered in the Value field to the data in the Selected Field starting at the beginning of that field. |
| o | Value = ABC Selected Field = ABC-12234XYX |
| o | A Match occurs because the ABC matches the beginning of the data in the Selected Field. |
| ▪ | Partial End - Compare the Filter expression entered in the Value field to the data in the Selected Field starting at the end of that field. |
| o | Value = 4XYZ Selected Field = ABC-12234XYX |
| o | A Match occurs because the 4XYZ matches the end of the data in the Selected Field. |
| ▪ | Partial Middle - Compare the Filter expression entered in the Value field to the data in the Selected Field anywhere in that field. |
| o | Value = 4X Selected Field = ABC-12234XYX |
| o | A Match occurs because the 4X matches the data somewhere within the Selected Field. |
| o | Be careful with this method because short values may match with records you did not intend to select. |
| o | Use this match method with longer Values. |
| ▪ | Exact - Compare the Filter expression entered in the Value field to the data in the Selected Field - exactly. |
| o | Value = ABC Selected Field = ABC-12234XYX |
| o | Value = 4XYZ Selected Field = ABC-12234XYX |
| o | Value = 4X Selected Field = ABC-12234XYX |
| o | A Match does not occur because none of these Values are an exact match to the data within the Selected Field. |
| • | Select Field - Use the Drop-Down Selection List to Choose the Field in the ADI Inventory list containing the data which you want the filter to match. |
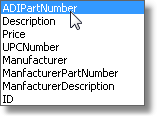
ADI Import Filter Fields
| • | Value - Enter the filter expression that must match the Selected Field based on the Type of Filter you specified above. |
| ▪ | Numbers, letters, punctuation and spaces are permitted in the Value field. |
| ▪ | Letters are automatically converted to Upper Case when the filter is applied to the Selected Field. |
| • | Click the OK button to Set the Filter. |
| • | Filters - Once you have set a Filter, that filter expression will be stored for future reference (until you Close this session). |
| • | Filters are not cumulative. |
| • | Each time you execute a Filter, that Filter is applied to the entire ADI Inventory list. |
| • | However, you may create a Filter, Import the results of that Filter, then repeat that process until you have imported all of the ADI Inventory required. |

| • | Click the Filters button on the bottom of the ADI Parts Import Form to view all of the individual Filters you applied during this session. |
| • | The Filters list will be displayed below the ADI Inventory list. |
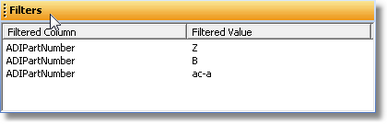
Filters list
| • | Clear Filter - If at any time you want to clear the existing filter(s) and start again, Click the Set Filter and then Select Clear Filter. |
| □ | Using the Search Function: |
| • | You may Search the entire ADI Inventory list, or a Filtered portion of the ADI Inventory list (see Filter Options above), to identify and view a specific item, or to locate the first record of a group of items within the list.. |
| • | Click the Search button on the Data Options box. |
ADI Import Data Options
| • | The Search dialog will be displayed. |
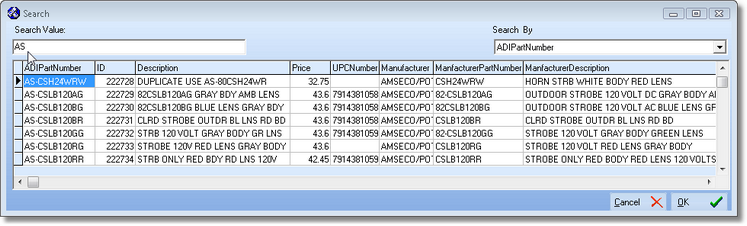
ADI Inventory Import Search dialog
| • | Search By - Use the Drop-Down Selection List to Choose the appropriate field to Search By. |
ADI Import Search Fields
| • | Search Value - Enter the search expression that should match the beginning of the data in the field selected in Search By. |
| • | Numbers, letters, punctuation and spaces are permitted in the Search Value field. |
| • | Letters are automatically converted to Upper Case when the Search Value is compared to the selected Search By field. |
| • | This is an incremental search. |
| ▪ | As you type your Search Value, the first record in the (Filtered) list that matches your entry will be highlighted with a record pointer |

| ▪ | Each additional character will move the record pointer to the closest match. |
| ▪ | When you see the record that you are specifically searching for, Click that record. |
| • | The Search dialog will Close. |
| • | The record pointer in the ADI Inventory list will be pointing to the record that was Selected in the Search dialog. |
| □ | Executing the Import Procedure: |
| • | Establish the ADI Inventory list (using the Search and Filter options explained above). |
| • | This will identify what ADI Inventory Items which are to be imported into your MKMS Inventory table. |
| • | Click the Import button on the Data Options box to start the import procedure. |

| • | The Import Options dialog will be displayed. |
| • | Select ADI Vendor - Using the Drop-Down Selection List provided, Choose the Vendor record which will be assigned to each imported ADI Inventory Item on the Sale-Purchase Items Form |
| • | Import Actions - Choose one of these import/update options: |
| • | New Import - This option is for adding new ADI Inventory Items to the Sale-Purchase Items Form |
| • | Update Price List - This option for updating existing ADI Inventory Items on the Sale-Purchase Items Form for the (Wholesale) Price In amount, and/or the Retail Price amount, as appropriate. |
| • | Map Sale Items To - Choose how the Sale-Purchase Item ID will be populated. |
| • | Vendor Part Number - If you want to insert the Vendor's Part Number as the Sale-Purchase Item ID, Select this button.. |
| • | Manufacturer Part Number - If you want to insert the Manufacturer's Part Number as the Sale-Purchase Item ID, Select this button.. |
| □ | New Import - Click this button to add additional items to your MKMS Inventory table. |
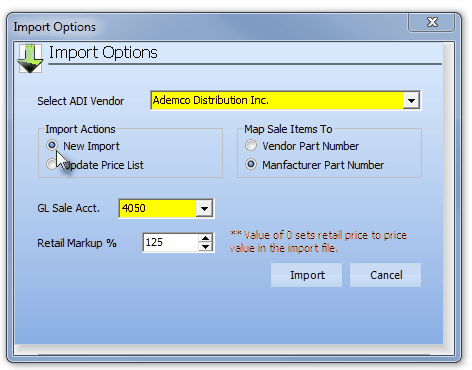
ADI Parts List Import - New Import
| • | GL Sale Acct. - Use the Drop-Down Selection List to Choose the appropriate General Ledger Account. |
| • | Retail Markup % - When importing new ADI Inventory Items, you may set the Retail Price - as a percentage increase of the Price In. |
| • | A Zero value indicates that you want the Retail Price set to the Wholesale Price (the Price column in the ADI Inventory list). |
| • | Enter the percentage markup of the Price column shown in the ADI Inventory list for calculating the Retail Price of this item. |
| • | Click the Import button. |
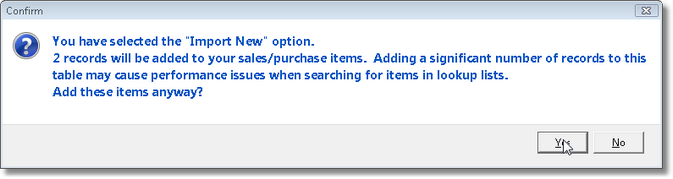
Regardless of the number of records selected to be imported, you must Confirm that you want to execute the Import
| • | Confirm that you want to proceed. |
| • | Information will be presented as to what was, and was not, imported. |
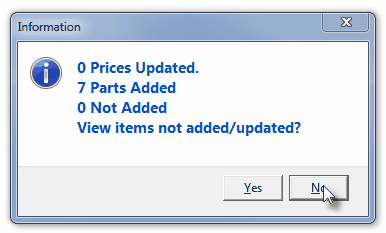
| • | You may request to view any ADI Inventory items that were not added by Clicking Yes. |
| • | Close T the Import Options dialog. |
| □ | Update Price List - If the purpose of this session is to update the Price In and/or the Retail Price values in your existing MKMS Inventory table, Select this option. |
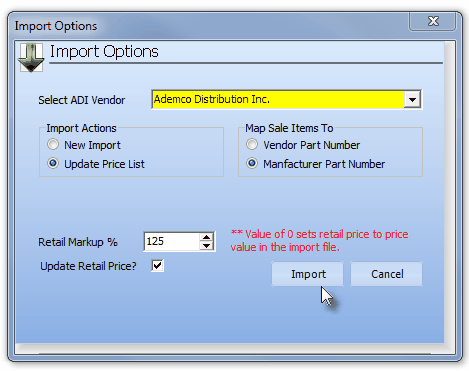
ADI Parts List Import - Update Price List
| • | Retail Markup % - When importing new ADI Inventory Items, you may set the Retail Price - as a percentage increase of the Price In. |
| • | A Zero value indicates that you want the Retail Price set to the Wholesale Price (the Price column in the ADI Inventory list). |
| • | The percentage markup of the Price column shown in the ADI Inventory list is used to calculate the Retail Price of this item. |
| • | The Retail Price of these ADI Inventory Items are not changed unless you Check the Update Price List box (see above). |
| • | Update Retail Price - Check the Update Price List box to change the Retail Markup % Value in the Retail Price field on the Sale-Purchase Items Form |
| • | Click the Import button. |
| • | Information will be presented as to what was, and was not, updated. |
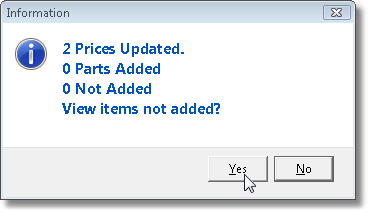
| • | You may request to view any ADI Inventory items that were not added by Clicking Yes. |
| • | Close T the Import Options dialog. |
| □ | After an Import/Update Procedure has been executed: |
| • | The ADI Parts Import Form will be displayed. |
| • | You may Close this Form if you have completed the needed Inventory Import Procedure, or |
| • | Click the Set Filter button on the Data Options box to open the Filter Options dialog. |
ADI Import Filter Option Clear Filter button
| • | Click the Clear Filter button to display the unfiltered ADI Inventory list. |
| • | Close T the Import Options dialog. |
| • | You may continue or exit this Form at this time. |
| • | Use the Filter Options and Search Function to identify additional items to be imported. |
| • | Execute the Import function to insert additional ADI Inventory items into the Sale-Purchase Items table. |
| • | Close T the ADI Parts Import if you are finished. |
Confirm Exit without Completing Import
| • | A Confirmation message will be displayed indicating the temporary table holding the spreadsheet data (but not the spreadsheet itself) will be deleted. |

