|
Quick Dial Buttons This Help File Page was last Modified on 03/12/2014 |

|

|
|
|
Quick Dial Buttons This Help File Page was last Modified on 03/12/2014 |
|
|
Quick Dial Buttons
This Help File Page was last Modified on 03/12/2014
|
Quick Dial Buttons This Help File Page was last Modified on 03/12/2014 |
|
|
|
|
Quick Dial Buttons This Help File Page was last Modified on 03/12/2014 |
|
|
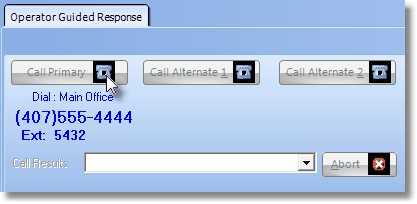
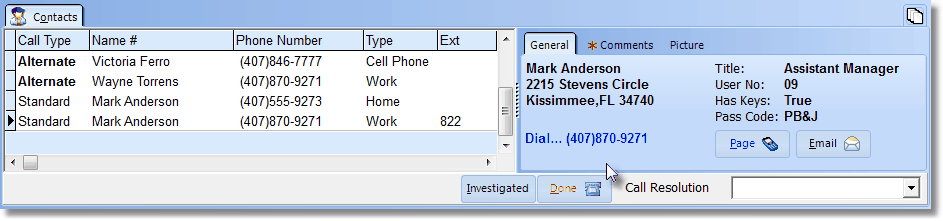
| □ | Using the eight (8) Quick Dial Buttons and a Call Resolution Drop-Down Selection Box on the Contacts tab: |
![]()
| • | These buttons are provided so an Operator may easily re-execute any one of these calling or response procedures. |
| • | The Call Resolution Drop-Down Selection Box is used to identify the Verification Response. |
| □ | There are eight Quick Dial & Action Buttons on the Contacts tab, located below the Available Call List (see Available Call List section in the Contacts chapter), that provide special functionality. |
| 1. | Verify - (Re-)Contact a person on the Subscriber's Premises. |
| • | Click the Verify button to perform the Verification process. |
Verification dialog
| 2. | Police - (Re-)Contact the Police Department assigned as the PD responder for this Subscriber. |
| • | Click the Police button to perform the Dispatch process requiring a Police Department response. |
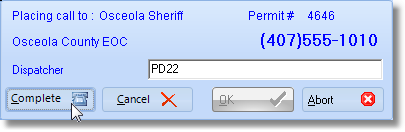
Complete button on the Dispatch Information Form
| 3. | Fire - (Re-)Contact the Fire Department assigned as the FD responder for this Subscriber. |
| • | Click the Fire button to perform the Dispatch process requiring a Fire Department response. |
| • | This functions exactly as the Police Dispatch dialog. |
| 4. | Medical - (Re-)Contact the Medical/Emergency Response Service assigned as the MD responder for this Subscriber. |
| • | Click the Medical button to perform the Dispatch process requiring a Medical or Ambulance related response. |
| • | This functions exactly as the Police Dispatch dialog. |
| 5. | Other - (Re-)Contact a person/company by manually entering a telephone number which the system can then dial automatically. |
| • | Click the Other button and enter the desired Telephone Number to be dialed. |
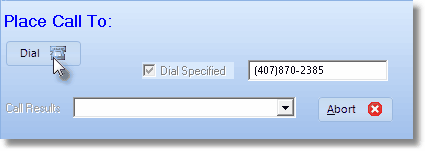
Quick Dial Button - Other dialog
| • | The Telephone Number will be automatically formatted. |
| • | Click the Call button to have the system dial the number. |
| • | Click Complete (the Call button changes to a Complete button when the Call button is Clicked). |
| • | Use the Drop-Down Selection List to Choose the appropriate Verification Code, when finished. |
| 6. | Security - (Re-)Contact the Security Company assigned for this Subscriber. |
| • | Click the Security button to perform the Dispatch process requiring a Security Company response. |
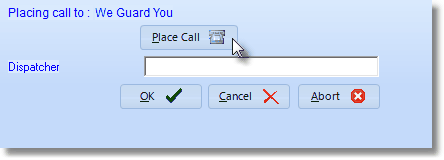
Quick Dial button - Security dialog
| • | This functions exactly as the Police Dispatch dialog. |
| 7. | Investigated - This option opens an Investigator Arrived dialog into which the Operator enters the required/appropriate information. |
| ◆ | If you are using the UL® Version of MKMSCS, and the Operator is processing an Alarm Signal for a UL® account, and she/he had to perform a Dispatch: |
| a. | An Internal Timer will be started automatically as soon as that Dispatch is recorded. |
| b. | An Investigated button will then become available next to the other Dispatch Contact buttons. |
| c. | When the Investigator arrives at the premises of that UL® account, the Operator will Click the Investigated button and briefly record the results in the Investigator Arrival dialog. |
| d. | When the Investigator Arrival dialog OK button is Clicked, the Internal Timer will be stopped, the elapsed time calculated, and the results noted in the Alarm History Detail. |
| 8. | Dial - This option will (re-) Dial the currently selected Telephone Number in the Available Call List. |
| a. | In the Available Call List, Select the individual to be dialed. |
| b. | Click the Dial button. |
| c. | When the contact is completed, Click the Done button. |
| d. | Using the Drop-Down Selection Box provided, Choose the appropriate Call Resolution code. |