| □ | There are two Appointment Entry Systems within MKMS: |
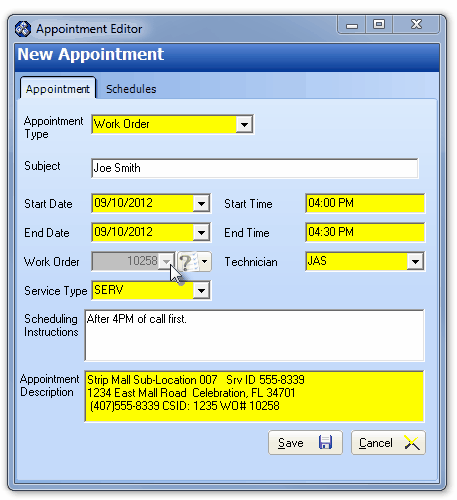
Technicians Scheduling - New Appointment Form
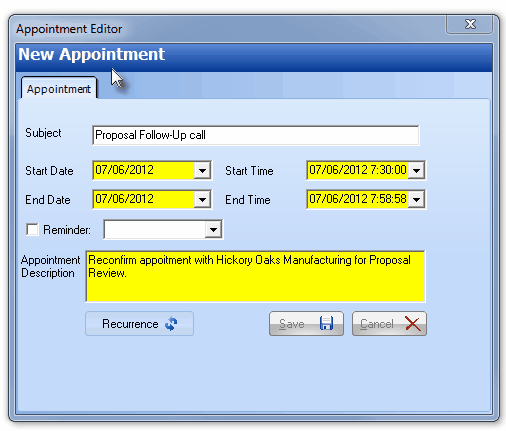
Employee Calendar - New Appointment Form
| □ | From time to time it is prudent to Purge the Appointment History - either selectively or globally - after a month or so (or any selected period of time) has passed. |
| • | Use this feature carefully! |
| • | Therefore, this Purge Appointments function should only be used (based on your Company's Appointment Deletion Policy) if it is certain that reference to those Appointment records will no longer be needed. |
| □ | To Purge Appointments, on the Main Menu, Select Maintenance and Choose the Service Tracking Items sub-menu, then Click Purge Appointments. |
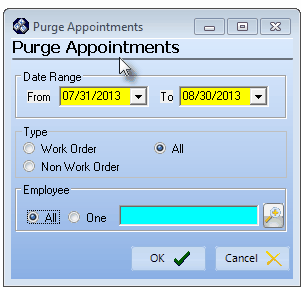
Purge Appointments Dialog
| • | Date Range - By default, the last 30 days will be offered. |
| ► | Note: In most cases, the Date Range will need to be changed to accommodate your Company's Appointment Deletion Policy. |
| • | From - Use the Drop-Down Date Selection Box to Choose the appropriate Purge Starting From Date. |
| • | To - Use the Drop-Down Date Selection Box to Choose the appropriate Purge up To and including Date. |
| ► | Note: It is important to understand what will occur here: |
| b) | "Technician" - by definition - means any Employee whose assigned Employee Type is either Technician or All. |
| • | Work Order - Click to have only Work Order related Technician Appointments Purged within the specified Date Range. |
| • | Non Work Order - Click to have only Non Work Order related Appointments - including the Employee Calendar records - that were not Work Order related - Purged within the specified Date Range. |
| • | All - Click to have All Appointments (for any Type of Employee) Purged within the specified Date Range. |
| • | All - The default is that All Employee's Appointments will be Purged based on the Type selection made above, and the specified Date Range. |
| • | One - However, to Purge Appointments for a specific Employee (perhaps because of a termination or re-assignment to a different position): |
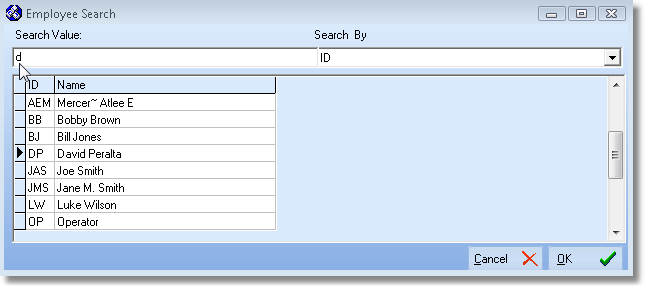
Employee Search dialog
| ▪ | Click the One button to activate the Employee Search dialog. |
| o | Using the Drop-Down Selection List provided, Choose the Search By method (Employee Code or Name). |
| o | Enter a few characters in the Search Value field to locate the desired Employee (as characters are typed, an incremental search is performed). |
| o | Click the OK button to Close the Employee Search dialog and return to the Purge Appointments Form. |
| ▪ | The Selected Employee is inserted into the Employee field. |
| • | Carefully examine each of your choices. |
| • | Click OK üto complete the Purge or Cancel to exit without executing a Purge request. |
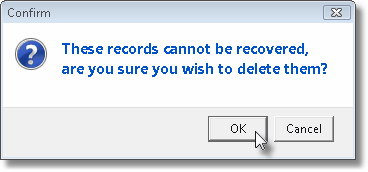
| • | Confirm that you do want to Purge the selected Appointments by Clicking the OK button. |
| • | The process executes and displays a message indicating how many Appointment records were deleted. |

