| • | The Virtual Phone Lines Form will allow you to define where incoming signals - which are designated as Listen In Accounts - are actually being received. |
| • | They may also be combined with other Physical Lines into a Virtual Line (to facilitate the use of "Roll-Over" lines that are used for Listen In). |
| • | On the Main Menu Select Maintenance and Choose the Central Station Items sub-menu, then Click Virtual Phone Lines to view this Form. |
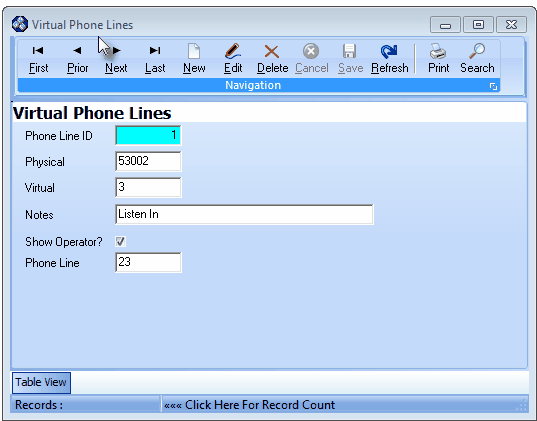
Virtual Phone Lines Form
| • | This Virtual Phone Lines Form may be Re-sized by Dragging the Top and/or Bottom up or down, and/or the Right side in or out. |
| • | Navigation Menu - The Navigation Menu is located at the top of the Virtual Phone Lines Form. |

| • | This Navigation Menu provides the normal Record Movement, New, Edit, Delete, Cancel, Save, and Refresh options; as well as special Print and Search functions. |
| • | Record Editing section - The details of the currently selected record are displayed below the Navigation Menu at the center (Main Body) of the Virtual Phone Lines Form. |
| • | Table View tab - A tabular (spreadsheet style) Table View of the currently defined Virtual Phone Lines is accessible by Clicking the Table View tab at the bottom of the Virtual Phone Lines Form. |

| • | To display a specific Virtual Phone Line record in the Record Editing section, Click on that record within the Table View section, or use the Search Icon (see the "Using the Special Functions" section later in this chapter). |
| • | This Table View information may be Pinned in Place by Clicking the Pin Icon on the right. |
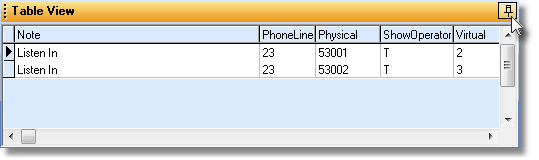
Virtual Phone Lines Form - Table View tab Pinned Open
| ▪ | You may Un-Pin this Table View by Clicking the Pin Icon again. |
| ▪ | Click on any listed record to display that information in the center (Main Body) of the Form. |
| • | There are six columns of data in this Virtual Phone Lines Record Listing: |
| 1) | Note - The Description indicating the purpose for this Listen In transmission. |
| 2) | Phone Line - The extension number required to access this Signal's Listen In connection |
| 3) | Physical - The last five (5) digits of the Telephone Number, dialed by the Control Panel's Communicator, to transmit Two Way Voice Signals to the Receiver. |
| 4) | Show Operator - Listed as True ("T") if the Show Operator? field is Checked, and False ("F") if it is not. |
| 5) | Virtual - The internal phone system line number to which the Two Way Voice Signals is translated, or that is not needed, the Line Card number in the Receiver to which the Two Way Voice Signals are sent. |
| 6) | Virtual Phone Line ID - The record number assigned when the Virtual Phone Line entry was initially saved. |
| • | Each column's Header Name describes the data contained in that column. |
| ▪ | Clicking on a Header Name will set the order in which the Virtual Phone Lines will be listed. |
| ▪ | Clicking on the same Header Name will set the order in the opposite direction (ascending vs. descending). |

| ▪ | The Header Name that is determining the Order of the list will have an Icon indicating the Order displayed next to that Header Name. |
| • | To define the various Virtual Phone Lines: |
| • | Click the  Icon to start the Virtual Phone Line entry in the Record Editing section. Icon to start the Virtual Phone Line entry in the Record Editing section. |
| • | Phone Line ID - This is the internal record number supplied by the system when the record is initially saved. |
| • | Physical - Enter the last five (5) digits of the Telephone Number, dialed by the Control Panel's Communicator, to transmit Two Way Voice Signals to the Receiver. |
| • | Virtual - Enter the internal phone system line number to which the Two Way Voice Signals should be translated. |
| ▪ | This is a ten (10) character field which would normally be used to enter numbers, but may contain upper and lower case letters, and normal punctuation marks. |
| ▪ | If this is not needed, enter the Line Card number in the Receiver to which Two Way Voice Signals are sent. |
| ▪ | Optionally, this field may be used for whatever else may be needed at your Central Station. |
| • | Notes - Enter a brief description indicating the purpose for this Listen In transmission, and/or any special instructions the Operator may need. |
| ▪ | This is a forty (40) character field and accepts numbers, upper and lower case letters, and normal punctuation marks. |
| • | Show Operator? - Check this box if a specific Phone Line (extension number) will be needed to access this designated Physical Line Card - when used exclusively for Listen In. |
| • | Phone Line - If Show Operator was Checked, enter the Phone Line (extension number) required to access this Signal's Listen In connection. |
| ▪ | This is a three (3) character field which would normally be used to enter numbers (i.e., 1-999), but may contain upper and lower case letters, and normal punctuation marks. |
| • | Click the  Icon to record this Virtual Phone Line entry. Icon to record this Virtual Phone Line entry. |
| • | Repeat this process, as needed, to define each Virtual Phone Line in use. |
| 1. | Never - You are not required to use this capability. |
| 2. | To have the Two Way Voice tab include a Special Description: |
| ▪ | Physical Zone Code - Enter a Physical Zone Code that will be sent from the Receiver |
| ▪ | Notes - Enter the appropriate Special Description in the Notes field. |
| 3. | To have the Pop Up message, shown to the Operator, that displays a Special Description: |
| ▪ | Physical Zone Code - Enter a Physical Zone Code that will be sent from the Receiver |
| ▪ | Notes - Enter the appropriate Special Description in the Notes field. |
| □ | Using the Special Functions on the Navigation Menu at the top of the Virtual Phone Lines Form: |
| • | Print - Click the Print Icon to View and/or Print a list of the Virtual Phone Lines. |
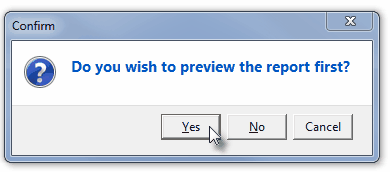
| • | Yes - Click the Yes button to View a copy of the report. |

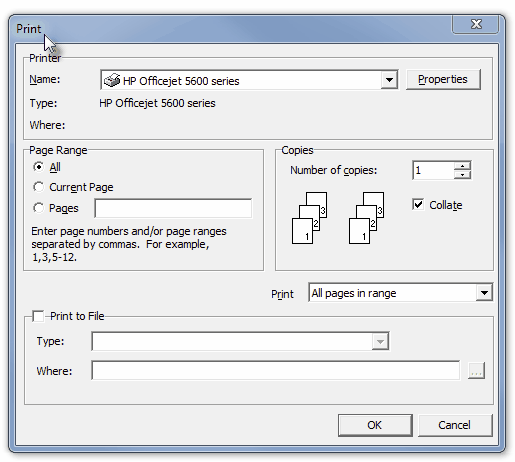
| • | No - Click the No button to open the Windows® Print dialog where a copy of the report may be sent to a selected Printer, or Printed to a File. |
| • | Cancel - Click the Cancel button to close this Print question and return to the Form. |
| • | Search - Click the Search Icon to open the Search Virtual Phone Lines dialog. |
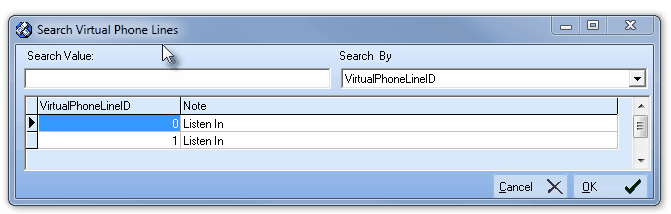
Search dialog
| • | See the "Using the Generic Search dialog" section in the Advanced Search Dialog chapter for more information about this Search dialog. |

