| □ | MKMS does not provide a Payroll module |
| • | Many use either QuickPay®, QuickBooks®, or an outside Payroll Service (such as ADP®) to process their payroll. |
| • | To save time, the transactions required to post your Payroll expenditures in the General Ledger System, may be imported as a batch(set) of Financial Transactions contained in a specially formatted text file. |
| • | QuickBooks® can provide this specially formatted Transaction File Format described below: |
| ► | Note: As this is a somewhat "standard" methodology, other Payroll Services should be able to create a file that matches this QuickBooks® format. |
| □ | Transaction File Format: This is a tab delimited file with each line containing a transaction, followed by a carriage return and a line feed, and containing the following information: |
| • | Transaction Number - This information will be inserted into the General Ledger's Transaction File as the transaction's Description. |
| • | Transaction Type - This information will be inserted into the General Ledger's Transaction File as the transaction's Type. |
| • | Date - This information will be inserted into the General Ledger's Transaction File for the Date of the transaction . |
| • | Debit - If this is the Debit side of the entry, this is the Debit amount to be posted. |
| • | Credit - If this is the Credit side of the entry, this is the Credit amount to be posted. |
| ► | Note#1: Each line in the Transaction File will have either a Debit or a Credit entry, not both. |
| ► | Note#2: When these Import Payroll transactions appear on the Bank Reconciliation Form, the word "DEBIT" will appear in lieu of a Check Number. |
| □ | Creating this Transaction File format within QuickBooks®: |
| • | Select Reports/Payroll/Payroll Transaction File and a Report will be displayed |
| • | You will Select the Customize (in some versions it may say Modify) option from the Report Toolbar. |
| • | A list of field names will be presented - many of them will have a Check next to them. |
| • | Those with a Check are automatically included, those without, are not. |
| • | You may Double-Click any field name to turn on (or off) the Check. |
| • | Add and/or Remove field names until the 7 items listed below are the Only Items that are Checked. |
| • | Once you have made these selections, Click OK, which will return you to the Report screen. |
| • | Ensure that the General Ledger Account Numbers (Num) are listed before the actual Account Name (Account). |
| • | If not, set your QuickBooks® options to turn on (display) Account Numbers. |
| • | On the Report Toolbar, turn off Report Headers - it is just a button you Click to turn Report Headers off or on. |
| • | On the Report Toolbar, Click Memorize to have QuickBooks® memorize this report format |
| • | Name the memorized report: PayrollExport |
| □ | Making an actual Transaction File for MKMS: |
| • | Open QuickBooks (it is assumed that you have processed Payroll for the week to be imported). |
| • | Select Reports/Memorized Reports.and Choose the PayrollExport report. |
| • | Select the data for the payroll period you wish to export from QuickBooks® into the MKMS General Ledger. |
| • | Click the Print button and within the Print dialog, Choose Print to File. |
| • | Use the Drop-Down Selection List provided to Format the report as Tab Delimited giving it a unique name like: PAY09-25-2010. |
| □ | Importing the Payroll Transaction File: |
| • | On the Main Menu Select File, Choose the General Ledger sub-menu, and then Click Import Payroll. |
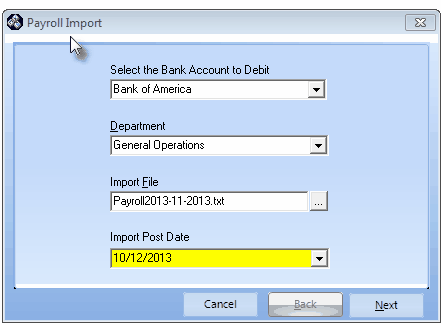
Payroll Import dialog
| ◆ | It is important to know that, until you Click Finish (see the Final Instructions Steps below), no Payroll Transactions will actually be posted to the General Ledger System. |
| • | Select the Bank Account to Debit - Using the Drop-Down Selection List provided, Choose the Bank from which these Payroll funds will be withdrawn. |
| • | This is actually going to be a Credit transaction because we will be subtracting these Payroll funds from the selected Debit (Asset) Bank account. |
| • | Department - If multi-departmental accounting procedures have been implemented, using the Drop-Down Selection List provided, Choose the Department that will be charged with this Payroll. |
| • | Import File - Click the Ellipse button to browse for the appropriate Payroll Transaction File name. |
| • | Import Post Date - Using the Drop-Down Date Selection Box provided, Choose the Posting Date to indicate when the selected Bank's General Ledger Account will be affected. |
| • | Click Next to continue to Import Payroll. |
| • | If the transaction file you've identified contains any General Ledger Accounts that do not exist within MKMS General Ledger, a dialog will be displayed with that information. |
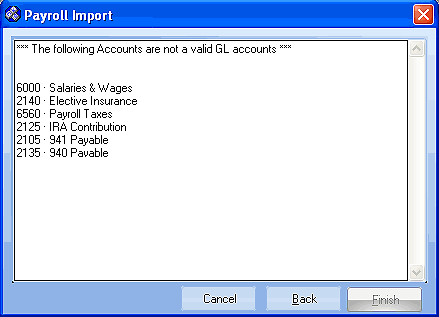
Payroll Import - Missing GL Accounts warning
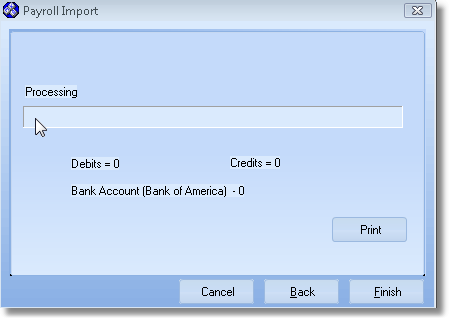
| • | If all accounts are correct, the Import Payroll process will start. |
| • | A running total of Debits, Credits and funds withdrawn from your Bank will be displayed. |
Payroll Import calculations
| • | You will be notified when the Payroll data has successfully been imported. |
| • | Print - Click the Print button to Preview or Print (to a File or a Printer) this report. |
| • | Examine the Payroll Import Data report for accuracy. |
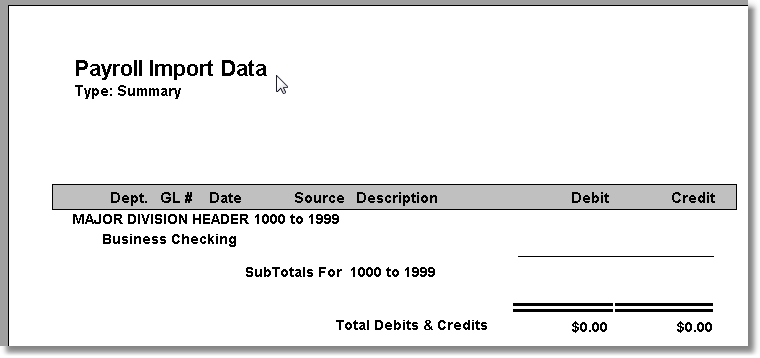
Payroll Import Data report sample
| • | Finish - Once you have determined the Payroll Import Data report is OK, Click Finish to actually Post these transactions to the General Ledger. |
| • | Back - If you need to select a different file or make any other entry adjustments, Click Back. |
| • | Cancel - To abort the entire Import Payroll process, Click Cancel. |

