|
Assign Receipts This Help File Page was last Modified on 09/24/2013 |

|

|
|
|
Assign Receipts This Help File Page was last Modified on 09/24/2013 |
|
|
Assign Receipts
This Help File Page was last Modified on 09/24/2013
|
Assign Receipts This Help File Page was last Modified on 09/24/2013 |
|
|
|
|
Assign Receipts This Help File Page was last Modified on 09/24/2013 |
|
|
| □ | If you provide monitoring services for other Alarm Dealers and offer Recurring Billing and remote "Lock Box" services: |
| • | You may use the Import Payments feature to capture the Receipts in a batch from the "Lock Box" service. |
| • | The functionality is similar to Post Auto Draft - (1) in the case of the Auto Drafts the payments or charge Credit Cards are drafted on a preset basis, (2) in the case of Import Payments process, those Receipts are posted based on monies received and processed by a third party. |
| • | In both cases, the functions automatically Post and Allocate the Receipts to the oldest outstanding Invoices owed by those Subscribers. |
| ◆ | If a different import file format must be used (i.e., one not using the Regulus standard), it may be custom designed using the Design Import File Formats process. |
| □ | For a number of reasons - almost all of which relate to bad data - some Receipts may not be properly linked to a Subscriber during an Import Payments procedure. |
| • | These orphan Receipts will be posted to a Holding Account - a Subscriber record specifically entered for that purpose. |
| • | From this Holding Account, you will Transfer these Unassigned Receipts to the appropriate Subscriber(s) using the Assign Receipts function. |
| • | To access the Receipt Transfer dialog, from the Main Menu, Select Maintenance and Choose the Accounts Receivable sub-menu, then Click the Pay Import menu and Choose Regulus Import. |
| • | Finally Click the Assign Receipts option to open the Receipt Transfer Form shown below. |
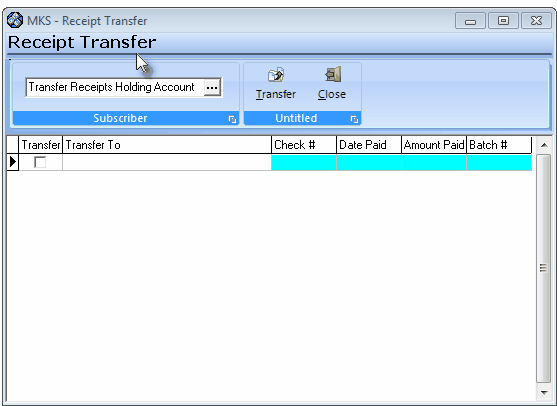
Receipts Transfer Form
| • | Subscriber - The Subscriber record "holding" the orphan Receipts (specifically identified for that purpose during the Import Payments process) is inserted automatically. |
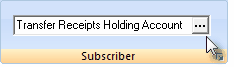
| ▪ | You may Click the Ellipse to access the Search Subscriber dialog to Choose a different Subscriber record, if appropriate. |
| • | Transfer - Check the Transfer boxes for each Receipt that is to be transferred. |
| • | Transfer To - Click on the Transfer To field, and an Ellipse will appear. |
| ▪ |
| • | Check # - The Check Number imported for this Receipt. |
| • | Date Paid - The Date that this Receipt was imported. |
| • | Amount Paid - The amount of the payment that was received. |
| • | Batch # - The Batch Number assigned to this Receipt. |
| • | Transfer - Click the Transfer button to execute the Checked Receipt Transfer request(s). |
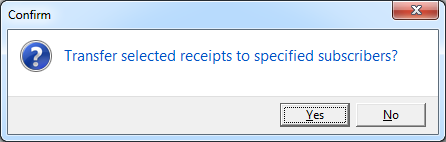
| • | Confirm - Click Yes to execute the Transfer. |
| • | Close - Click the Close button to exit the Receipt Transfer Form. |