| □ | The Auto Pay function will automatically Post (create the necessary Invoices in the Bills Form), and optionally, Pay (make entries in the Payments Form for) previously the defined Recurring Purchases. |
| • | To run the Post & Pay Recurring Revenues procedure, on the Main Menu Choose File and Select the Accounts Payable sub-menu, then Click Run Automatic Payments. |
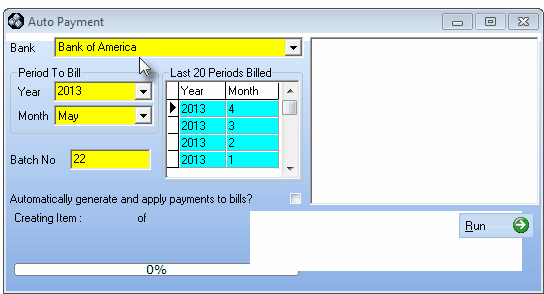
Auto Payment dialog
| • | Auto Payment Form - This is the Form you will used to create the actual Bills for the previously defined Recurring Purchases - what actually gets billed is determined by the Period to Bill that is Selected (see below) - and optionally, to create the Payments and Allocate those Payments to the appropriate Invoices for those Recurring Purchases. |
| • | Bank - Use the Drop-Down Selection List to Choose the Bank name from which the Payments will be drawn. |
| • | Period To Bill: Set the month and year to be processed. |
| ▪ | Year - By default, this will be the current Year. |
| o | Modify this as needed using the Drop-Down Year Selection List provided. |
| ▪ | Month - By default, this will be the next Month following the current month. |
| o | Modify this as needed using the Drop-Down Month Selection List provided. |
| • | Batch No - By default, this will be the day number of Today's date. |
| ▪ | Modify this Batch Number, if appropriate. |
| • | Last 20 Periods Billed: Displays the previous 20 cycles that were automatically billed. |
| ▪ | Year - The previous years that were processed. |
| ▪ | Month - The previous months that were processed. |
| • | Automatically generate and apply payments to bills - Check this box to have the Bills (the Invoices) that will be created by this process automatically Paid (entries will be made in the Payments Form and Allocated to the appropriate Invoices), so all that remains to be done is to Print the Checks. |
| ▪ | If you do not Check this box, you must: |
| o | Manually create Payments for the Invoices that will be created here. |
| • | Run - Click the Run Æ to process this Auto Payment request. |
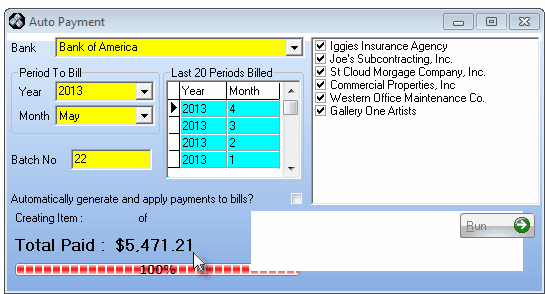
Auto Payment Form shown after completion of the procedure
| • | Click the Close box (T) at the top right of the Form when the process is completed. |

