| □ | Installing the MKMS application software on Windows® 7 (64) |
| • | This chapter will describe a Windows® 7 (64 bit) Network Server installation - an installation intended to provide access to the MKMS application for those in a group of Users who will be using one or more of the modules in the Micro Key Millennium Series on a PC connected to a Windows Server® based network system. |
| • | Additional information relating to a stand-alone User, and certain information for a Windows® 7 (32 bit) system will also be included. |
| • | The procedures explained here may seem tedious and for advanced users, may even seem too detailed at times. |
| • | However, the goal is to provide you with all of the information required to correctly complete this installation - the first time you do it. |
| • | When installing application software on a 64bit Windows® based Server, intended for simultaneous use on many work stations, it really must be done properly. |
| • | Those installation steps are provided here. |
| □ | Installing the Sybase® Adaptive Server Anywhere database engine: |
| • | Select the person who will perform this installation. |
| • | The User who will be installing the MKMS application software must be logged in as Local Admin on the PC which will be the Network Server. |
| • | It should be a person who is very familiar with Windows®, Networking, and has been assigned the correct User Name and Password combination which gives that individual System Administrator access to the Windows Server®. |
| • | Close all applications on this machine. |
| • | With no other applications running on the Server, that Local Admin person should insert the MKMS Installation CD into the Network Server's CD drive. |
| • | The MKMS Installation CD has an installation process which will start automatically. |
| ► | Note: If the installation does not start automatically: |
| ▪ | Navigate to the CD/DVR Drive MKMS Installation CD. |
| ▪ | Double-Click the  Intro application. Intro application. |

Micro Key Solutions Setup Launcher
| • | This MKMS Installation process cannot be used for this type of Windows® 7 (64) Network Installation. |
| • | Close this Micro Key Solutions Setup Launcher dialog. |
| • | Follow the manual procedure outlined below to ensure the proper installation of the Micro Key Millennium Series application. |
| • | With the MKMS Installation CD still in the Drive, Click the Windows Start icon on the bottom left of the screen. |
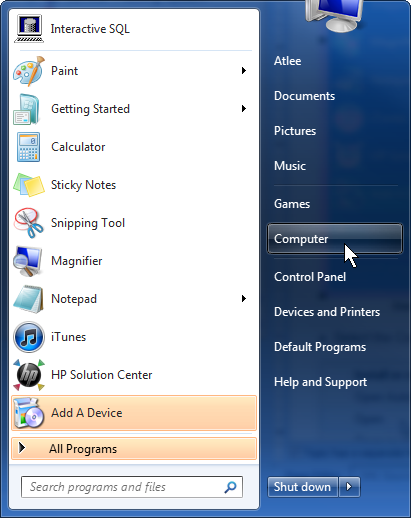
Start Menu with Computer option selected
| • | Select the Computer option, located on the right side of the Start Menu |
| • | This will display the available Hard Drives and Devices with Removable Storage installed on this machine. |
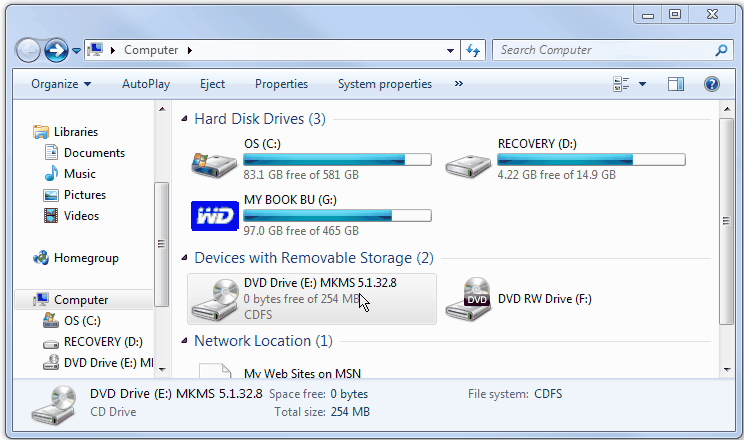
Computer dialog with Hard Drives and Devices displayed
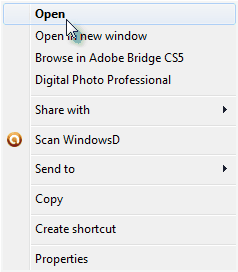
| • | Right Click on the DVD or CD Drive containing the MKMS Application CD. |
| • | Choose Open to view the contents of this CD. |
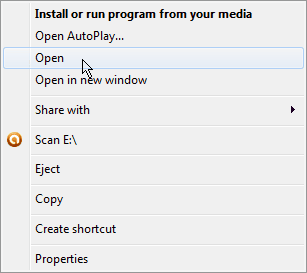
Choose Open to view files on the MKMS Application CD
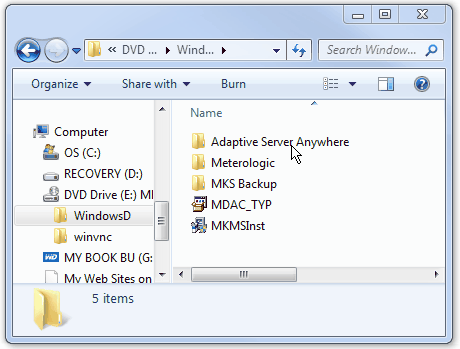
| • | The contents of the MKMS Application CD will be displayed. |
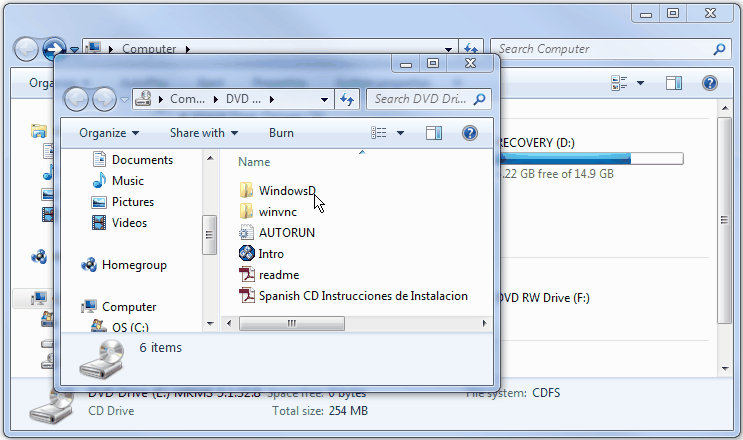
Computer dialog with contents of the MKMS CD shown
| • | Right Click the WindowsD folder. |
| • | Choose Open on the menu provided to view the files and folders contained within the WindowsD folder. |
Select Open to view WindowsD files
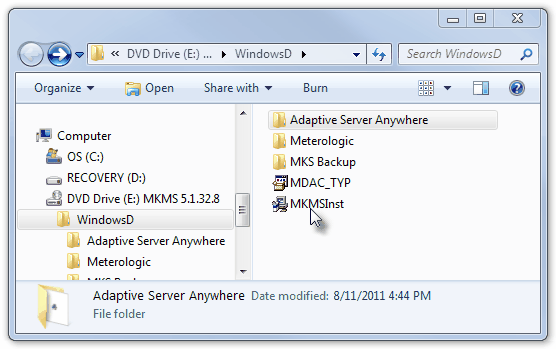
| • | Double Click on the Adaptive Server Anywhere folder |
Double Click the Adaptive Server Anywhere folder within the WindowsD folder
| • | The Adaptive Server Anywhere folder contains one file: ASA902 |
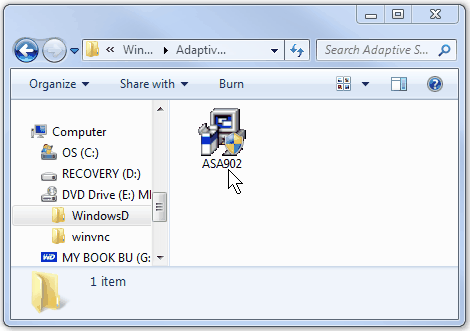
Adaptive Server Anywhere folder contains the Sybase ASA902 installation program
| • | This is the Sybase® Adaptive Server Anywhere database engine installation program which will install the MKMS Sybase SQL Server database engine. |
| ▪ | The three numbers following ASA identify the Version Number of this database server application. |
| • | Note the Shield on the ASA902 icon. |
| ▪ | This shield indicates that Local Admin rights are required to be able to run this installation program. |
| ► | Note: Following the next step, a System Reboot will be required which will temporarily turn off network access. |
Close any other programs which may be running on this machine.
Be sure all User data is saved, and all Users on the Network are notified that the Network Server will be shut down momentarily.
When all Users have been properly notified, Right Click the ASA902 icon and Choose "Run as administrator".
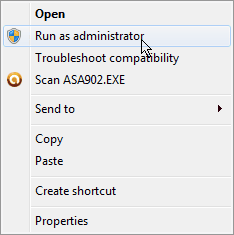
Run as administrator option
| • | If "User Account Control" is turned on, you must Confirm that this application is allowed to make changes on your computer. |
| • | Once permission is granted if it was required, or without permission being granted if it's not required, the Installing dialog will proceed to completion. |

MKMS Sybase SQL Adaptive Server Anywhere installation dialog with Reboot message displayed
| • | Once this process is completed, a reboot will be required. Click OK to initiate the Reboot. |
| □ | Complete the MKMS Program Installation - After the Windows® Network Server has restarted, the MKMS Sybase® Adaptive Server Anywhere database will have been properly installed. |
Start Menu with Computer option selected
| • | Click the Start icon, then, as done previously, Select the Computer option on the right side of the Start Menu. |
| • | This will display the available Hard Drives and Devices with Removable Storage installed on this machine. |
Computer dialog with Hard Drives and Devices displayed
| • | Right Click on the Drive containing the MKMS Application CD. |
| • | Choose Open to view the contents of this CD. |
Choose Open to view files on the MKMS Application CD
| • | A list of the contents of the MKMS Application CD will be displayed. |
Computer dialog with contents of the MKMS CD shown
| • | Right Click the WindowsD folder. |
| • | Choose Open to view the files and folders within the WindowsD folder. |
Select Open to view WindowsD files
| • | Right Click on the MKMSInst icon. |
Computer - Drives - MKMS CD - WindowsD folder's contents
| • | Then Select the Run as administrator option. |
Run as administrator option
| • | Because the installation process must check several settings on your computer first, this process may take a few minutes to start. |
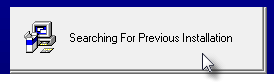
| • | Be patient - depending on the speed, hard drive size, number of programs and devices attached, etc., that are being checked - this could take several minutes. |
| • | Often, as part of this check, and sometimes because another application has made registry entries that duplicate what MKMS will make or a Demo version of the program had been previously installed, a Millennium Series Software Detected message will be displayed warning you of this situation. |
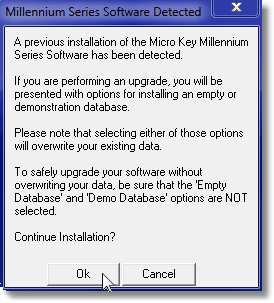
Millennium Series Software Detected
| • | Read this warning message carefully. |
| • | If this is a New installation or an Upgrade, answer Yes to proceed. |
| • | If this is an Upgrade Installation, note that option on the next screen (shown below). |
| • | If in doubt, Call for Technical Support. |
| • | Select Installation Type |
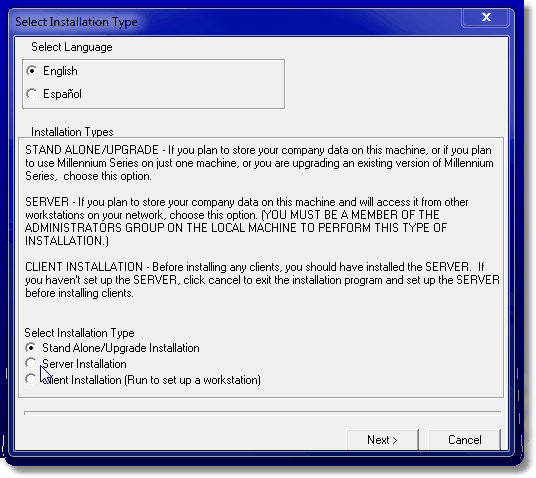
MKMS Installation - Select Installation Type dialog
| • | Select Language - By default English is selected. Click Spanish (Espanol) if appropriate. |
| • | Select Installation Type - For the purpose of this chapter - the installation of a new MKMS Program suite on the Windows® 7 (64bit) machine - Click the Server Installation option. |
| • | After you Choose the appropriate installation type (Server Installation in this case), Select Next>. |
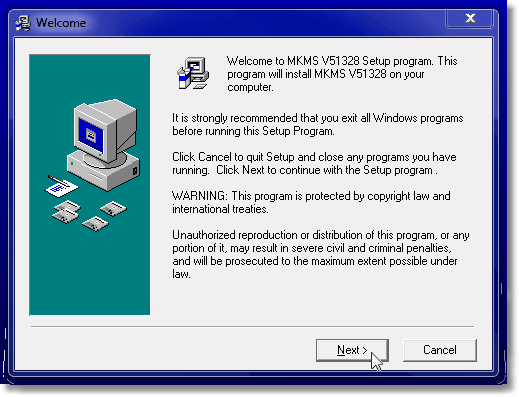
MKMS Program Installation Welcome screen
| • | The Welcome screen displayed. Select Next>. |

MKMS Installation - Read Me File License Text
| • | Read Me File with the Text for the MKMS Licensing and Warranty Agreement will be displayed. |
| • | Please read the text, and using the Slide Bar (as shown below), continue through the License Text to the end. |
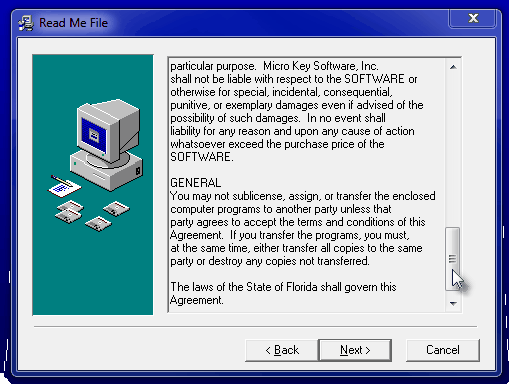
MKMS Installation - Read Me File slide bar
| • | If you agree, Select Next>, otherwise Select Cancel. |
| • | The Choose Destination Location dialog will be displayed. |
| • | Choose the Destination Location for the Program: |
| • | By default, the program will be installed on the "C:" drive under the \Program Files(x86) folder in a MKS\MKMS sub folder. |
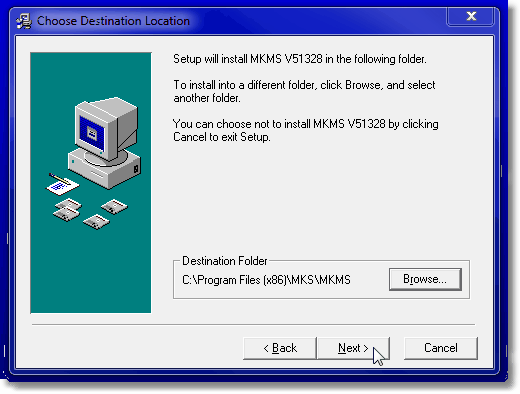
MKMS Installation - Choose Destination Directory
| • | Because this is a Server Installation, you may - optionally - want to locate the application on a different Drive. |
| ▪ | To do so, Click the Browse button. |

MKMS Installation - Choose Destination Location - Select Destination Directory
| ▪ | Using the Drop-Down Selection Box provided, Choose the desired alternate Drive. |
| ▪ | Either the revised Destination Folder information, or the default Destination Folder will be (re-)displayed on the Choose Destination Location screen. |
MKMS Installation - Choose Destination Location
| ▪ | Select Next> to proceed. |
| • | Designate a location for the Backup Files folder. |
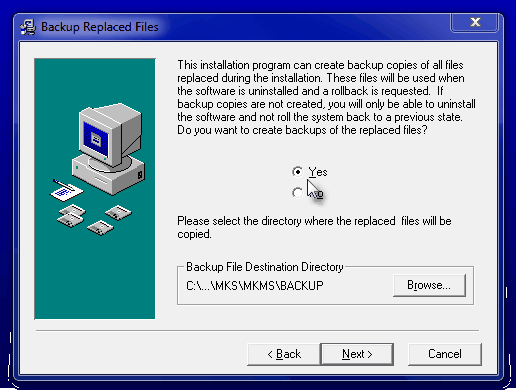
MKMS Installation - Backup Replaced Files dialog
| • | The installation program can create backup copies of all the files that were replaced during installation. |
| ▪ | These files will be used when the software is uninstalled and a roll back is requested. |
| ▪ | If backup copies are not created, you will only be able to uninstall the software but nor be able to roll back the system to a previous state. |
| • | You may also use the Browse button the select a different drive or folder location for the Backups. |
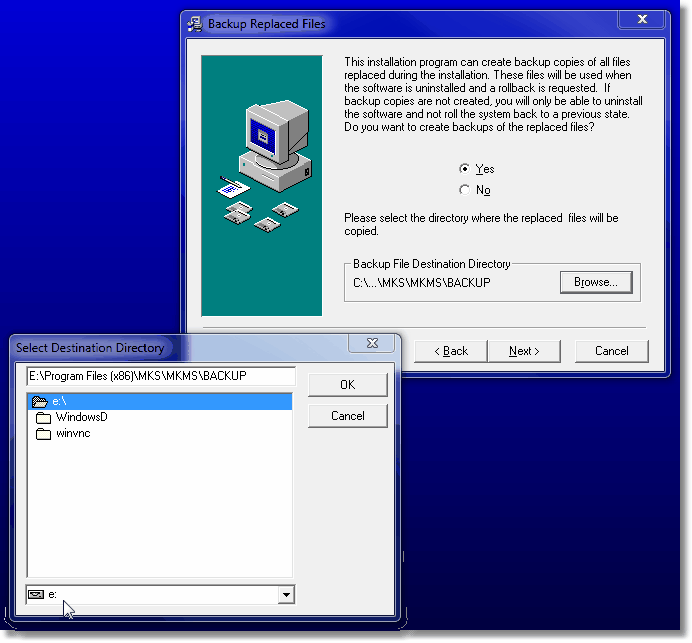
MKMS Installation - Backup Replaced Files - Select Destination Directory dialog
| • | It is strongly suggested that you answer Yes to this Backup Replaced Files question. |
| ▪ | Select Next> to proceed. |
| ► | Note: For more information relating to making Backups, see: |
| • | Selecting the Components (standard and optional modules) to be installed: |
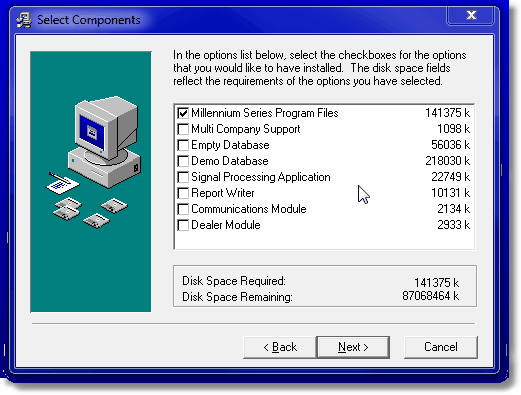
MKMS Installation - Select Components dialog
| • | Check the Program Modules and Database sets you want installed. |
| ▪ | The Empty Database and Demo Database options are only listed when installing MKMS as a Server or Standalone application. |
| ▪ | When installing as a Server (as we are in this chapter), it is recommended that you Check Empty Database and all other Module options except the Demo Database. |
| ▪ | Even if certain Program Modules are not needed now, in case these are ever needed - you almost certainly will be adding more modules later - upgrading to those additional modules will be faster and easier. |
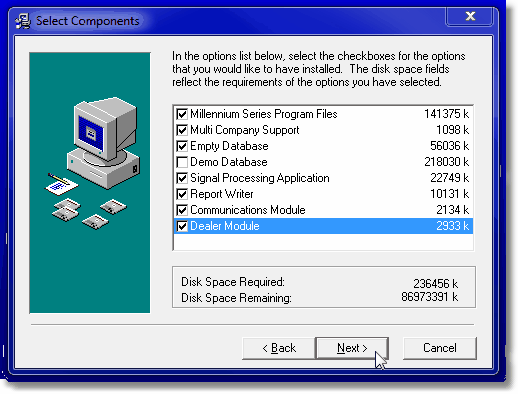
MKMS Installation - Select Components
All Modules and the Empty Database are selected
| • | Check your selections (the preferred selections are shown above). |
| ▪ | Select Next> to proceed. |
| • | At this point, all options have been chosen and you may now Start the actual Installation process: |
| • | Select Next> to proceed. |
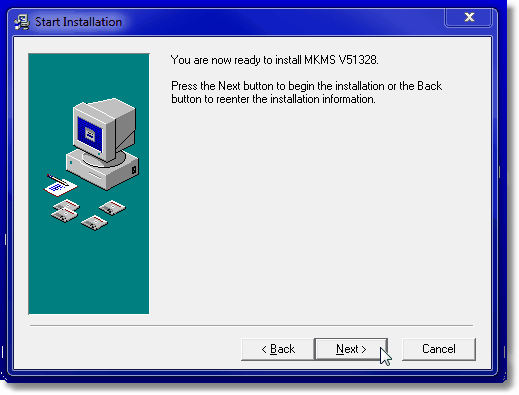
MKMS Installation - Start Installation screen
| • | The Installation will proceed automatically. |

MKMS Installation - Installing progress meter
| • | Once the installation is completed an Installation Complete screen will be displayed. |
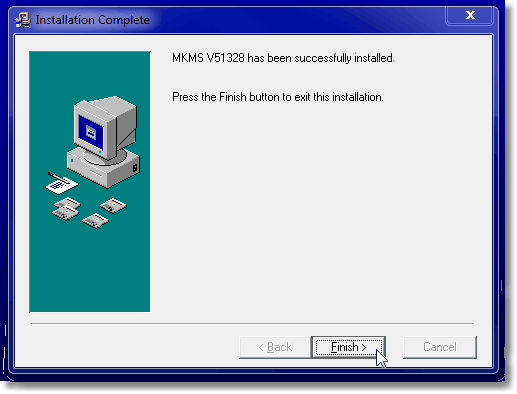
MKMS Installation - System Complete screen
| • | Click the Finish> button to Close the MKMS Installation CD dialog. |
| • | Remove the CD from the drive. |
| • | Setup the Sybase SQL Service to be started as an Automatic Service (see "Windows® Services" below), or as a Windows® Shortcut. |
| □ | Windows® Services - The Sybase® Adaptive Server Anywhere database engine may be run as a stand-alone program, or as a Windows® Service. |
| • | Why use Windows® Services? |
| • | Among the many advantage of assigning processes to a Windows® Service are: |
| ▪ | The process (Service) starts automatically when the system is turned on. |
| ▪ | The Service runs in the background using less system resources. |
| ▪ | All Workstations may access the central MKMS Sybase® Adaptive Server Anywhere Service for their data. |
| ▪ | No separate Login is required to start the Service. |
| ▪ | If a File Server must be restarted, the Service will re-start automatically. |
| • | Setting up the Sybase® Adaptive Server Anywhere database server to be an Automatic Service (or a manually started application) is explained in Starting Sybase in Windows 7 |

