| □ | The Central Station Off-Line Date dialog permits an authorized User to take an Account Off-Line, and also return them to an On-Line status, as required: |
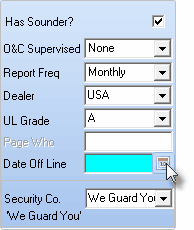
Date Off Line button next to date field
| • | Date Off Line - Click the Date Off Line button on the Central Station Data Form if the Account is to be suspended, or has actually canceled service. |
| • | The Central Station Off-Line Date dialog will be displayed. |
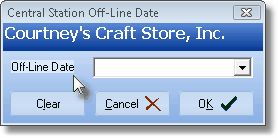
Central Station Off-Line Date dialog
| • | Off-Line Date - Use the Drop-Down Date Selection Box provided to enter the Date this Subscriber went Off-Line. |
| • | OK - Click the OK button to record the Off-Line Date. |
| ▪ | The Central Station Off-Line Date dialog will Close. |
| ▪ | The selected Off-Line Date will be inserted into the Date Off-Line field. |
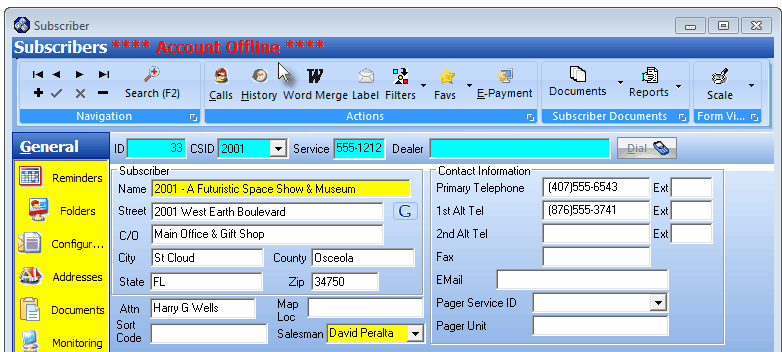
Subscribers Form with an Off-Line Date defined
| ▪ | Whenever a Subscriber record with an Off-Line Date defined, is viewed: |
| o | The Subscribers Form will display an **** Account Offline **** message at the top of the Form. |
| o | The background of that Subscriber Form's Quick Access Menus will be displayed in Yellow. |
| • | Cancel - Click the Cancel button to abort this process. |
| ▪ | The Central Station Off-Line Date dialog will Close. |
| ▪ | No change to the Date Off-Line field will occur. |
| • | Clear - If they are reinstated and so should be returned to an On-Line status, |
| ▪ | Click the Clear button on the Central Station Off-Line Date dialog to remove the Off-Line Date. |
| ▪ | OK - Click the OK button to clear the Off-Line Date field. |
| ▪ | The Central Station Off-Line Date dialog will Close. |
| ▪ | The Date Off-Line field will be empty thus reinstating the Subscriber. |

